Syrcus Tower
 This article is about the level 50 Alliance Raid. For the Feature Quest, see Syrcus Tower (Quest). For the furniture item, see Syrcus Tower (Furniture). For the landmark in The Crystarium, see Syrcus Tower (Landmark).
Syrcus Tower
- Level
- 50 (Sync: 50)
- Item Level
- 70
- Difficulty
- Normal
- Party size
- Alliance
24 man • 3 6
6  15
15 
- Unsyncing
- Allowed
- Time limit
- 120 minutes
- Duty Finder
- Alliance Raids (A Realm Reborn)
- Roulette
- Alliance Raids
- Tomestones
 100
100 - Req. quest
 Syrcus Tower
- Entrance
- Mor Dhona (X:35.7, Y:20.0)
- Location
- Syrcus Tower
- Region
- Mor Dhona
- Patch
- 2.3
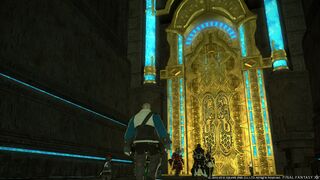
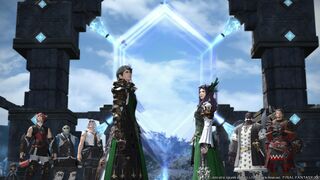
“Having secured a path through the Labyrinth of the Ancients, the fellowship of NOAH finds itself before the entrance to the Crystal Tower proper. With the aid of their new comrades, Unei and Doga, the companions succeed in opening the gate whose workings had baffled even the brightest minds among them. Upon learning that dark forces have awakened within, the fellowship decides to suspend its investigative effort in favor of sealing off the tower. You must fight your way to the apex and defeat the resurrected Emperor Xande, that Eorzea might be free of his all-consuming ambition.
— In-game description
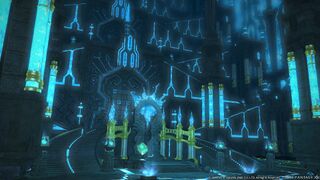
Syrcus Tower is a level 50 raid introduced in patch 2.3. It is the second part of Crystal Tower.
Objectives
- Clear the ladder of Ascension: 0/1
- Defeat Scylla: 0/1
- Clear the Braid: 0/1
- Defeat Glasya Labolas: 0/1
- Clear the Golden Sacristy: 0/1
- Defeat Amon: 0/1
- Defeat Xande: 0/1
Enemies and Bosses
Owing its lack of an IL sync, the first two Crystal Tower alliance raids have become tediously easy duties that are often completed with little difficulty, to the point where mechanics on several bosses are ignored or outright skipped. As a result the guide below includes mechanics that players will normally not experience unless on Minimum IL mode.
The Ladder of Ascension
Enemies: Dark General x2, Kunoichi x3, Oceanus x2, Shinobi x3, Yellow Dragon
The first pack of enemies does not have any notable mechanics. Tanks can group them up so players can defeat them with AoE attacks.
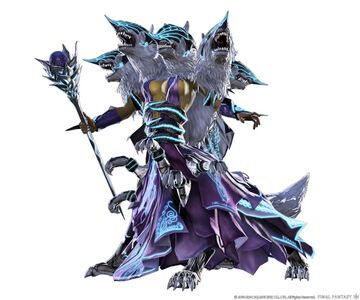
 Scylla
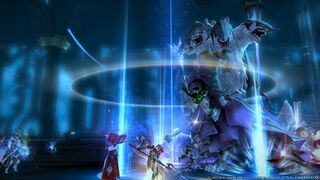
Scylla has two phases and can be tanked in the middle, or to the north. Most groups will choose middle, but north is highly preferable since you will need a lot of room to maneuver.
Phase 1:
Scylla will spawn staves throughout the fight which cast an annoying centered AoE around themselves for about 2k damage. Because the AoE is donut-shaped instead of circular, it is perfectly safe to be right next to it. More of a nuisance than a serious threat AS LONG AS people aren't frozen in the blast strip.
Three distinct pillars of Lightning are found in the boss arena. They will be needed for the intermission phase. Assign each group to a pillar - A takes far left, B takes center, and C takes far right.
Elemental balls - Random DPS and healers will be marked to be followed by balls of elemental energy. Lightning balls appear purple, ice balls appear blue, and flame balls appear red. You will have to deal with this mechanic throughout the fight.
Lightning ball - Neutralized by the lightning pillar. Running them into the lightning pillar energizes the pillar, which is denoted by panels of light on the ground next to the pillar. Three charges are needed and will produce a red marker indicating that the pillar is fully charged. Lightning balls detonate for heavy raid wide damage after about 15 seconds if not run into a pillar.
Ice ball - Trails a target and will freeze that target after a set duration of time. This is unavoidable and cannot be stopped. What you can and should do is make sure that you are not standing in one of the puddles left behind when a frozen target is thawed, as everyone in the vicinity of the puddle will be frozen as well, an important consideration for melee. Thaws after 30 seconds.
Flame ball - will chase a target and detonate after about 15 seconds. Can be used to thaw frozen targets, and you should. Thawing a frozen target leaves behind a patch of water on the ground which confers very high fire resistance, but will spread the freeze effect of an ice ball if it detonates inside the puddle.
In this phase Scylla will also be doing a raid wide AoE called Unholy. Damage as a whole is fairly heavy, which can be problematic if the healers are undergeared.
Transition from phase 1 to 2 - When Scylla casts Daybreak. Note that most Duty Finder runs will kill the boss before this mechanic occurs.
Daybreak - Scylla casts Daybreak, which petrifies everyone in the room for 30 seconds. If your lightning pillars are not fully charged by this point, everyone is petrified, which can lead to a wipe (but can be salvaged if you have a healer LB3).
- How to avoid: it's the same mechanic as Ancient Flare from the final boss in Labyrinth of Ancients formerly known as Acheron and now Phlegethon. Each group must stack on a small platform energized by the lightning orbs, which raises a shield that blocks the Daybreak cast. If stacking is not properly performed, then the shield fails.
Phase 2:
Various adds will spawn. Have the offtanks pick them up and DPS them down. Not too threatening.
Ice balls and Flame balls continue to spawn. Lightning orbs no longer spawn. Continue to deal with the elemental ball mechanic as before.
Scylla will now cast Ancient Flare at regular intervals and it has a long cast time, meaning everyone should be able to see it coming. To handle this mechanic, stand in the puddles of water created by the thawed orbs, which confers high fire resistance. Ancient flare will evaporate the water and hit you for around 400 damage. Which is highly preferable to being hit for 4k damage if you lack the resistance.
- Overall this fight is extremely hectic, reminiscent of Thanatos in the Labyrinth of the Ancients.
The Braid
Enemies: Acheron x3, Gomory x6
Again, tanks can group up all enemies so players can defeat them with AoE attacks. After defeating them, a Green Dragon will land, damaging back and knocking back nearby players (Touchdown). After defeating it, three Doga's Clones will spawn and must be defeated, followed by three Unei's Clones.
 Glasya Labolas
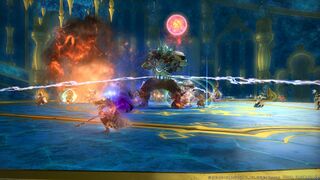
This fight occurs on a big, circular central platform surrounded on all sides by smaller platforms connected by one-way launch pads and is a two phase fight interrupted by an intermission in the middle. Tanks should position Glasya Labolas in the center of the arena.
Vile Utterance - Conal-shaped AoE
Aura - Three circular AOEs that spawn underneath random players
Blood Moon - Minor raidwide damage
After a minute into the fight, Glasya Labolas will summon Clockwork Wrights. These can be killed easily, but form a line to Glasya Labolas and either draw power from him or give him power. A DPS or healer needs to stand in the small shaded area next to the add and intercept the line. This stuns the player but allows the Clockwork Wright to be killed. Duty Finder - Alliance Roulette groups will usually be able to kill Glasya Labolas at this point.. A period-accurate PoV video demonstrates the following mechanics.
After about two minutes into the fight, Glasya Labolas will cast Deathstream, a high raidwide AoE damage attack.
Clockwork Squires will then spawn. These adds will spawn with six energy nodes that cause Glasya Labolas to reflect all magical and physical damage so long as they are connected to him. The clockwork men can intercept these power lines and should, as they cannot be brought below 1 HP until they are connected by power lines.
After a set amount of time has passed the Intermission Phase occurs.
Intermission Phase - Assault on the platform rings
Glasya Labolas will now return to the center of the arena. If all three Squires were connected and killed, three hitherto dormant teleportation pads on the central platform will activate. He will also begin to cast Deathstream again, and any players caught on the center platform upon completion will die.
Players will be launched to an outer platform. Groups should, as a rule, stay together and DPS down the Spanner-rooks which appear on the platforms, then move on to the next platform in the circle (remember, these launch pads are one way only). Group A starts on the upper left, Group B on the lower center, and Group C on the upper right. Glasya Labolas will occasionally bombard an outer platform with electricity, dealing heavy damage to anyone on it. Once 3 to 4 platforms are cleared, everyone will return to the center.
Phase 2
Glasya Labolas will continue to attack as normal until dead. He will also gain access to the following attacks:
Spiral Spin - Raidwide damage. Stand underneath Glasya Labolas to avoid.
Hunter's Moon - Three orange AoE discs that travel about the arena and deal continuous damage to anyone caught in them.
The Golden Sacristy
Enemies: Azer x3
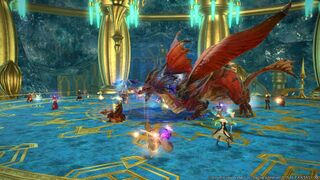
Group up the three enemies and defeat them. The untargetable Red Dragon will then mark a random player with a green "divebomb" marker and charge at them with an untelegraphed line AoE, mildly damaging and knocking back anyone in its path. It will then land with Touchdown and become targetable, along with spawning two Haokah. These must all be defeated to proceed.
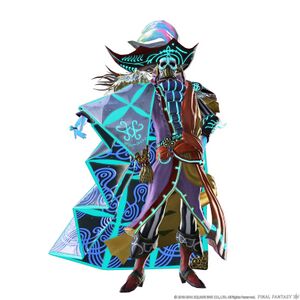
 Amon
Amon
Amon should be tanked in the center of the arena. He has 3 main spells: Blizzaga Forte is an AoE centered on Amon and does large damage plus ![]() Heavy, Thundaga Forte is cast on a patch of ground under random players, and can overlap for massive damage and leaves an electrocution DoT if hit, Firaga Forte is a raid wide blast, but not as damaging as the other two.
Heavy, Thundaga Forte is cast on a patch of ground under random players, and can overlap for massive damage and leaves an electrocution DoT if hit, Firaga Forte is a raid wide blast, but not as damaging as the other two.
His frontal cleave is called Coloatura and is extremely damaging, so no one except for the main tank should be in front of him.
Adds will spawn from the corners and march toward Amon (named #33, #66, #99, and so on). If they reach Amon they will cast raid wide debuffs on the party, either Pacification or Silence. Best way to kill them is to stun them and just burn them down.
He will also spawn purple orbs (Dimensional Compression) which will tether to a player and cast ![]() Mini on them if it hits, at this time strong adds called Kum Kum will spawn which should be grabbed by the off tanks. They can be shrunk by the orbs making them much easier to kill. If not successful at shrinking anyone the orbs will eventually fade on their own.
Mini on them if it hits, at this time strong adds called Kum Kum will spawn which should be grabbed by the off tanks. They can be shrunk by the orbs making them much easier to kill. If not successful at shrinking anyone the orbs will eventually fade on their own.
He also has an attack which adds a bomb debuff to a player, that player will detonate repeatedly for small damage plus knock back. This can be cleansed with Esuna and should be asap as the knock back range is pretty high.
Occasionally, he will freeze 3 random players, one from each group and one person from each group will also be turned into a flame toad a la Gilgamesh and have no command available except Flame Breath. Flame Breath can be used to unfreeze people encased in blocks of ice.
Kichiknebiks will spawn at the same time that flame toad debuff occurs. These will each pick a toad target and chase them the DPS needs quickly kill them. If they reach a toad, they will aggro them and deal heavy damage (3-4k-ish) per autoattack, even if the players change back, the snakes will still attack them for huge damage if not killed.
Eventually, Amon will encase three people at random in blocks of ice and he will begin to cast Curtain Call, which is the only mechanic in this fight that is likely to kill unsuspecting players.
Hide behind the frozen people when he uses Curtain Call (similar mechanic to Meteor in King Behemoth). Like King Behemoth if the ice block is too close to Amon it will not protect the people hiding who will be killed anyway, so try to hide behind blocks away from his body.
It is important that players who are transformed into toads do not use their fire breath on an ice block, or it will melt. If there are no ice blocks up when Curtain Call resolves, the party will wipe.
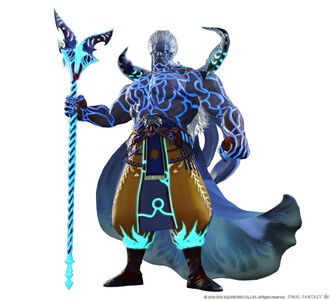
 Xande
Xande
Xande should be tanked in the center of the arena. He has the standard "don't stand in this" mechanics, including a targeted AoE which deals about 2k damage. While not dangerous, a DPS can potentially be one-shotted if two are overlapping each other and the DPS is still standing in them. He also has Knuckle Press, which is centered on him, and deals moderate damage with a severe knockback. Melee must watch out for this.
Aetherochemical Explosion - Every now and then Xande creates golden orbs with a small golden radius around them. You have about 10-15 seconds before they detonate, so the raid should be fairly well spread in anticipation of this. They explode and deal about 500 damage per explosion if not neutralized, and since he spawns about a dozen at a time, this is a good way to lose a chunk of your raid if nobody is paying attention. To stop the explosion, simply have a person stand within the golden radius. This causes the orb to hit that person for about 50 damage upon detonation, rather than blasting the entire raid for ten times that damage.
At 70%, Xande teleports out of the arena and lounges on his throne while calling down meteors on your raid. This is the first intermission. 3 Attractors will appear on the edge of the arena. They must be killed quickly to prevent meteorfall. Additionally a giant attractor appears in the center. The entire raid should this one together once the three attractors on the fringes have been destroyed. If the small meteors land they cause heavy raid wide damage, if the big one lands it is a wipe.
Once Xande reappears, phase 2 begins. He now has a new attack where one person from each party gains a stack up marker on them. This expires after about 15 seconds and deals close to 10k damage, split evenly amongst everyone standing in it, so each party should stack up close to Xande but without overlapping the circles to soak. A null gravity zone is left behind upon detonation which lets you float. This is important because ...
Immediately after detonation, Xande will cast Ancient Quaga. The ability deals more than 5k damage to everyone in the raid. The attack is nullified by floating. When Xande begins casting Ancient Quaga, everyone should move into a null gravity zone. Immediately after Ancient Quaga, AoEs will be left under random party members, so scatter to avoid massive damage.
Xande retains golden orbs in this phase.
Intermission 2 - Same as intermission 1, except at 40% health. Only each group now has to deal with two small meteor attractors instead of just one. Not too difficult. Since no damage is going out in entire intermission, healers should catch up on healing and join in the damage.
After that it's the same straight burn to death. Xande retains Golden Orbs and Ancient Quaga from phase 2, and also starts casting Ancient Quake every now and then, which deals light raidwide damage. But you should be able to down him smoothly at this point in time.
Loot
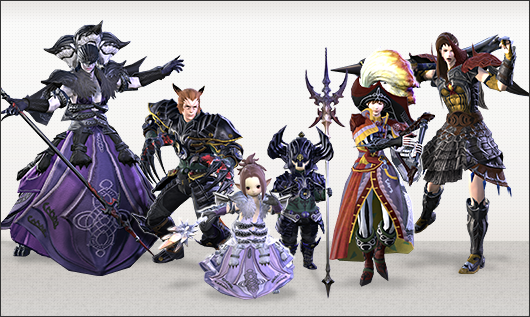
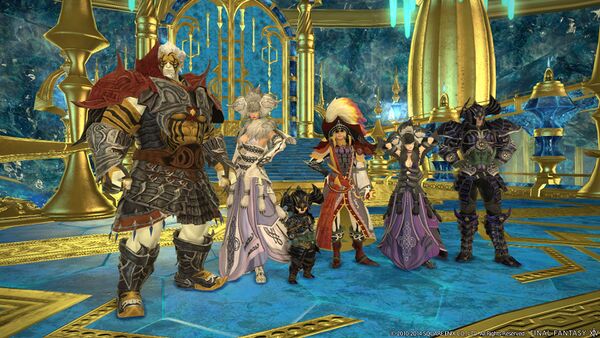
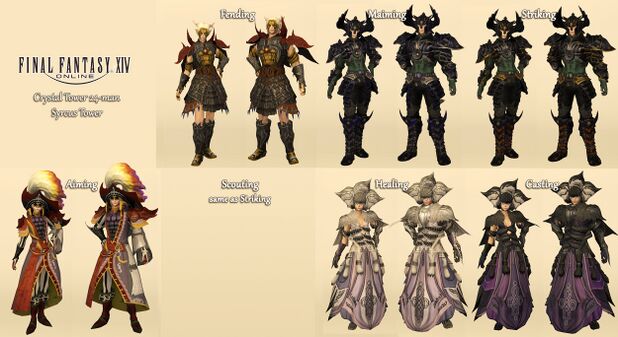
- See also: Syrcus Tower Armor
 Scylla
| Name | Type | Item Level | Rarity | Quantity |
|---|---|---|---|---|
| Amon's Boots | Feet | 100 | Blue | 1 |
| Amon's Hat | Head | 100 | Blue | 1 |
| Phlegethon's Mask | Head | 100 | Blue | 1 |
| Phlegethon's Sabatons | Feet | 100 | Blue | 1 |
| Scylla's Boots of Casting | Feet | 100 | Blue | 1 |
| Scylla's Boots of Healing | Feet | 100 | Blue | 1 |
| Scylla's Helm of Casting | Head | 100 | Blue | 1 |
| Scylla's Helm of Healing | Head | 100 | Blue | 1 |
| The Guardian's Greaves of Maiming | Feet | 100 | Blue | 1 |
| The Guardian's Greaves of Striking | Feet | 100 | Blue | 1 |
| The Guardian's Helm of Maiming | Head | 100 | Blue | 1 |
| The Guardian's Helm of Striking | Head | 100 | Blue | 1 |
 Glasya Labolas
| Name | Type | Item Level | Rarity | Quantity |
|---|---|---|---|---|
| Amon's Breeches | Legs | 100 | Blue | 1 |
| Amon's Sleeves | Hands | 100 | Blue | 1 |
| Phlegethon's Gauntlets | Hands | 100 | Blue | 1 |
| Phlegethon's Loincloth | Legs | 100 | Blue | 1 |
| Scylla's Culottes of Casting | Legs | 100 | Blue | 1 |
| Scylla's Culottes of Healing | Legs | 100 | Blue | 1 |
| Scylla's Gloves of Casting | Hands | 100 | Blue | 1 |
| Scylla's Gloves of Healing | Hands | 100 | Blue | 1 |
| The Guardian's Armguards of Maiming | Hands | 100 | Blue | 1 |
| The Guardian's Armguards of Striking | Hands | 100 | Blue | 1 |
| The Guardian's Breeches of Maiming | Legs | 100 | Blue | 1 |
| The Guardian's Breeches of Striking | Legs | 100 | Blue | 1 |
 Amon
Amon
| Name | Type | Item Level | Rarity | Quantity |
|---|---|---|---|---|
| Allagan Catalyst | Material | N/A | Basic | 1 |
| Amon's Boots | Feet | 100 | Blue | 1 |
| Amon's Coat | Body | 100 | Blue | 1 |
| Phlegethon's Cuirass | Body | 100 | Blue | 1 |
| Phlegethon's Sabatons | Feet | 100 | Blue | 1 |
| Scylla's Boots of Casting | Feet | 100 | Blue | 1 |
| Scylla's Boots of Healing | Feet | 100 | Blue | 1 |
| Scylla's Robe of Casting | Body | 100 | Blue | 1 |
| Scylla's Robe of Healing | Body | 100 | Blue | 1 |
| The Guardian's Breastplate of Maiming | Body | 100 | Blue | 1 |
| The Guardian's Breastplate of Striking | Body | 100 | Blue | 1 |
| The Guardian's Greaves of Maiming | Feet | 100 | Blue | 1 |
| The Guardian's Greaves of Striking | Feet | 100 | Blue | 1 |
 Xande
Xande
- 40 Allagan Tomestone of Poetics
- Xande Card (Drops at a fixed rate.)
Treasure Coffer 1
Treasure Coffer 2
| Name | Type | Item Level | Rarity | Quantity |
|---|---|---|---|---|
| Throne Gem | Material | N/A | Basic | 1 |
Rewards
When originally released, players could receive only one reward item per week for completing duties in the Syrcus Tower. Weekly limits were lifted in patch 2.4.
Each party in the alliance will receive its own treasure chest, the contents of which will be identical regardless of the route taken.
- Players cannot open a treasure chest belonging to another party.
Achievements
This duty is associated with the following achievements:
| Name | Points | Task | Reward | Patch |
|---|---|---|---|---|
| Life Is a Syrcus | 10 | Complete Syrcus Tower. | - | 2.3 |
| Mapping the Realm: Syrcus Tower | 10 | Discover every location in Syrcus Tower. | - | 2.3 |
Unsync clearing
It is possible to farm the Syrcus Tower alliance raid for loot with one level 90 character and two characters of any level.
To run alliance raids "unsync", that is, with the "unrestricted party" option enabled in the duty finder, the lead player must start a party finder recruitment using the "Raid" option, and at least one player must join each other alliance.
The encounters in Syrcus Tower can be cleared without regard to mechanics with the damage output of one level 90 player.
Images
Gear Images
Dungeon Images
Concept Art
Trivia
Upon the release of Patch 7.0 on June 28, 2024, it was discovered that Amon's "ice shield" mechanic was broken, rendering players helpless against his raid-wiping Curtain Call attack. This quickly led players to dub the raid "Amon Ultimate" or "Syrcus Tower (Savage)", as the only ways to bypass this mechanic were to either DPS burn him down during Curtain Call's cast time, or to have an alliance deliberately die and accept raises just after Curtain Call's animation. [1] The raid was patched in a hotfix on June 29, 2024. [2]

