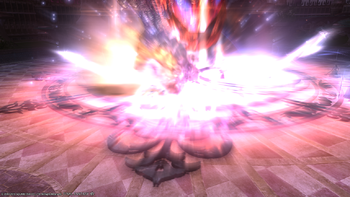
Limit Break
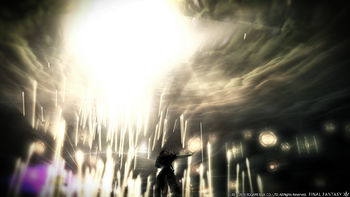
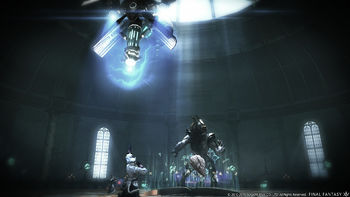
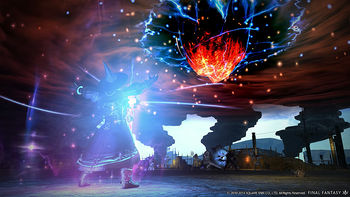
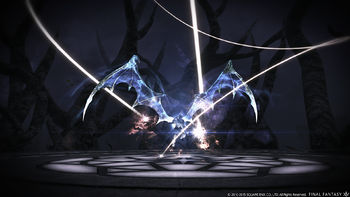
![]() Limit Breaks (LB) are group oriented ultimate abilities that can alter the outcome of a battle. They can be performed after charging up a limit break meter.
Limit Breaks (LB) are group oriented ultimate abilities that can alter the outcome of a battle. They can be performed after charging up a limit break meter.
Limit Breaks are specific to each party role. Tank limit breaks reduce the damage taken for the entire party for a short time. Healer limit breaks restore HP and MP to the entire party. Melee DPS limit breaks deal a massive amount of damage to a single target. Magical Ranged DPS limit breaks deal high damage in a circular AoE. Physical Ranged DPS limit breaks deal devastating damage in a line AoE. The damage dealt by DPS limit breaks is based on the average weapon item level of the party. They cannot deal critical or direct hit damage and are unaffected by party buffs, medicines, or damage-altering statuses such as ![]() Weakness. As such, it is preferable for any DPS with resurrection debuffs to use a limit break over other DPS, in a single-target scenario.
Weakness. As such, it is preferable for any DPS with resurrection debuffs to use a limit break over other DPS, in a single-target scenario.
All classes and jobs of a given role will have the same level one and two limit breaks, while level three limit breaks are exclusive to jobs, with the exception of the limited Blue Mage job being unable to use any limit breaks.
Limit Breaks are only usable in a party environment. The entire party shares the same limit break gauge, with each party in an Alliance raid having its own meter. There are 3 levels of limit breaks (commonly abbreviated LB1, LB2, and LB3): the 1st level can be used in a party with 4 or more members, the 2nd level needs a full party of 8 members, with an additional bar being added under certain conditions:
- In dungeons, the second bar is added when engaging the final boss.
- In trials and raids: three unfilled bars are available at the start of the duty, except for older raids that still have some regular enemies to fight through.
- In alliance raids and similar special duties, the third bar is added for every boss fight separately, and will be unavailable for regular encounters.
- The exception to this rule is in
 The Porta Decumana trial, where the 4 member party will gain access to a filled third limit break bar during a scripted event.
 - In some trials and raids, the limit break gauge will reset when reaching a certain point in the duty, which will be indicated by a message on the screen. This indicates that the party has reached a checkpoint that they will restart from if they wipe.
It is worth noting that the addition of a third bar will also reset the progress of the bar. Its removal at the end of a fight (or due to a player disconnect reducing the party size below the requirement does not, so only progress into the third bar is lost. As such, it can be beneficial to use a lower tier limit break before conditions change again.
All PvE limit breaks have a noticeable animation lock, the time in which the user is unable to move due to executing the limit break animation, which will continue for a few seconds even after the limit break's effects are applied. Higher-level limit breaks have longer animation locks. This can make the user vulnerable to being hit by avoidable AoEs. The healer role skill Rescue can be used to free players stuck in an animation lock.
Tank Limit Breaks
Tank Limit Breaks require Gladiator, Marauder, Paladin, Warrior, Dark Knight or Gunbreaker. Tank Limit Breaks execute instantly but have a short animation lock. These are typically used when required in a specific duty (see below), in anticipation of heavy incoming damage when other party mitigation may not be sufficient, or to "cheese" some mechanics in fights and make them easier to execute.
Level 1
Shield Wall is the level 1 limit break for tanks. It reduces damage taken by self and all party members within 50 yalms by 20% for 10 seconds. It has an animation lock of 1.93 seconds.
Level 2
Stronghold is the level 2 limit break for tanks. It reduces damage taken by self and all party members within 50 yalms by 40% for 15 seconds. It has an animation lock of 3.86 seconds.
Level 3
Varies by job:
- Last Bastion for Paladin.
- Land Waker for Warrior.
- Dark Force for Dark Knight.
- Gunmetal Soul for Gunbreaker.
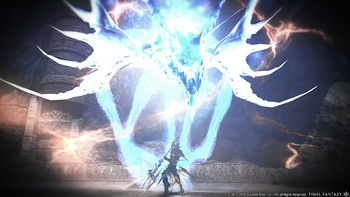
All level 3 tank limit breaks are functionally identical. They reduce damage taken by self and all party members within 50 yalms by 80% for 8 seconds. They have an animation lock of 3.86 seconds.
Duties
Some duties require a Level 3 Tank Limit Break to survive a strong enemy attack or to pass another mechanic. These include:
 The Seat of Sacrifice
 The Seat of Sacrifice (Extreme)
 The Final Day
 Alexander - The Soul of the Creator
 Alexander - The Soul of the Creator (Savage)
 Alphascape V3.0 (Savage)
 The Weapon's Refrain (Ultimate)
 The Epic of Alexander (Ultimate)
 Dragonsong's Reprise (Ultimate)
Healer Limit Breaks
Healer Limit Breaks require Conjurer, White Mage, Scholar or Astrologian. Healer Limit Breaks execute almost instantly but cause a significant amount of animation lock, especially on an LB3. Level 1 and 2 healer limit breaks are not worth using in most situations. However, level 3 limit breaks can and should be used in emergencies to recover a party on the brink of defeat.
Level 1
Healing Wind is the level 1 limit break for Healers. It has a 2 second cast time and restores 25% of max HP to self and all party members within 50 yalms. It has an animation lock of 2.1 seconds. This renders the user unable to perform any actions for a total of 4.1s.
Level 2
Breath of the Earth is the level 2 limit break for Healers. It has a 2 second cast time and restores 60% of max HP to self and all party members within 50 yalms. It has an animation lock of 5.1 seconds. This renders the user unable to perform any actions for a total of 7.1s.
Level 3
Varies by job:
- Pulse of Life for White Mage.
- Angel Feathers for Scholar.
- Astral Stasis for Astrologian.
- Techne Makre for Sage.
All level 3 healer breaks are functionally identical. They have a 2 second cast time, 50 yalm effect radius, restore 100% of HP to self and all party members, and revive any party members that are KO'd. They also have an 8.1 second animation lock, rendering the user unable to perform actions for a total of 10.1 seconds. Members that are resurrected via the limit break will also have 100% of their HP and MP restored and will not suffer ![]() Weakness. If they already had Weakness, it will not be increased to
Weakness. If they already had Weakness, it will not be increased to ![]() Brink of Death. If they already had Weakness or Brink of Death, the debuff timer will be reset. Allies will be revived at their current location, with no prompt to accept the revival, unlike regular revive spells. Because of this, a party member who died in lethal terrain, such as a death zone at the edge of the arena, will die again instantly after being revived, since the lethal damage bypasses
Brink of Death. If they already had Weakness or Brink of Death, the debuff timer will be reset. Allies will be revived at their current location, with no prompt to accept the revival, unlike regular revive spells. Because of this, a party member who died in lethal terrain, such as a death zone at the edge of the arena, will die again instantly after being revived, since the lethal damage bypasses ![]() Transcendent (the 5 second invulnerability that players receive when they are revived by any means).
Transcendent (the 5 second invulnerability that players receive when they are revived by any means).
Melee DPS Limit Breaks
Melee DPS Limit Breaks require Lancer, Pugilist, Rogue, Dragoon, Monk, Ninja or Samurai. Melee Limit Breaks have a short cast time and moderate animation lock with melee range requirements. These are typically used against a single boss enemy.
Level 1
Braver is the level 1 limit break for Melee DPS. It hits a single target with x1.667 the damage of Skyshard. Braver has a cast time of 2s and an animation lock of 3.86s. This renders the user unable to perform any actions for a total of 5.86s.
Level 2
Bladedance is the level 2 limit break for Melee DPS. It hits a single target with x2.2 the damage of Braver. Blade Dance has a cast time of 3s and an animation lock of 3.86s. This renders the user unable to perform any actions for a total of 6.86s.
Level 3
Varies by job:
- Final Heaven for Monk.
- Dragonsong Dive for Dragoon.
- Chimatsuri for Ninja.
- Doom of the Living for Samurai.
- The End for Reaper.
All level 3 melee DPS limit breaks are functionally identical. They hit a single target with x3.5 the damage of Braver. They have a cast time of 4.5s and an animation lock of 3.7s. This renders the user unable to perform any actions for a total of 8.2s.
Physical Ranged DPS Limit Breaks
Physical Ranged DPS Limit Breaks require Archer, Bard, Machinist or Dancer. Physical Ranged Limit Breaks have a moderate cast time and animation lock. These are typically used to quickly dispatch multiple "adds" when they can be lined up in raids or trials, or in dungeon pulls. It is usually preferable to use a ranged DPS limit break in dungeons against regular enemy pulls, which have multiple targets, instead of saving a melee limit break for the final boss, due to the higher overall potency of the ranged limit break on multiple targets compared to the single-target melee limit break. Ranged DPS limit breaks can also be used to pull enemies or bosses in alliance raids or other large-scale duties (e.g., Delubrum Reginae), as any leftover limit break gauge will be reset upon engaging a boss.
Level 1
Big Shot is the level 1 limit break for Ranged Physical DPS. It hits all targets in a straight line with x0.9 the damage of Skyshard. Big Shot has a cast time of 2s and an animation lock of 3.1s. This renders the user unable to perform any actions for a total of 5.1s. Big Shot does more damage than Braver when it hits 2 targets, more damage than Bladedance when it hits 5 targets and more damage than Melee LB3 when it hits 7 targets.
Level 2
Desperado is the level 2 limit break for Ranged Physical DPS. It hits all targets in a straight line with x2.167 the damage of Big Shot. Desperado has a cast time of 3s and an animation lock of 3.1s. This renders the user unable to perform any actions for a total of 6.1s. Desperado does more damage than Braver, more damage than Bladedance when it hits 2 targets and more damage than Melee LB3 when it hits 3 targets.
Level 3
Varies by job:
- Sagittarius Arrow for Bard.
- Satellite Beam for Machinist.
- Crimson Lotus for Dancer.
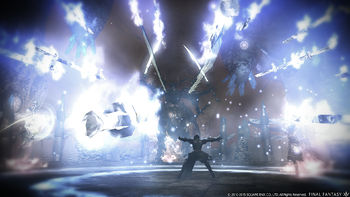
All level 3 physical ranged DPS limit breaks are functionally identical. They hit all targets in a straight line with x3.5 the damage of Big Shot. Ranged LB3 has a cast time of 4.5s and an animation lock of 3.7s. This renders the user unable to perform any actions for a total of 8.2s. Ranged LB3 does more damage than Braver, more damage than Bladedance when it hits 2 targets and more damage than Melee LB3 when it hits 2 targets.
Magical Ranged DPS Limit Breaks
Magical Ranged DPS Limit Breaks require Thaumaturge, Arcanist, Black Mage, Red Mage, or Summoner. These have the longest cast time and a short animation lock. Unlike the other DPS limit breaks it relies on manual ground targeting and can potentially miss the target if it suddenly moves. Similar, to physical ranged DPS limit breaks, these are typically used to quickly dispatch multiple "adds" in raids or trials, or in dungeon pulls. It is usually preferable to use a ranged DPS limit break in dungeons against regular enemy pulls, which have multiple targets, instead of saving a melee limit break for the final boss, due to the higher overall potency of the ranged limit break on multiple targets compared to the single-target melee limit break. Ranged DPS limit breaks can also be used to pull enemies or bosses in alliance raids or other large-scale duties (e.g., Delubrum Reginae), as any leftover limit break gauge will be reset upon engaging a boss.
Level 1
Skyshard is the level 1 limit break for Magical Ranged DPS. It hits all targets in a radius of 5 yalms. Skyshard has a cast time of 2s and an animation lock of 3.1s. This renders the user unable to perform any actions for a total of 5.1s. Skyshard does more damage than Braver when it hits 2 targets, more damage than Blade Dance when it hits 4 targets and more damage than Melee LB3 when it hits 6 targets.
Level 2
Starstorm is the level 2 limit break for Magical Ranged DPS. It hits all targets in a radius of 10 yalms with x2.167 the damage of Skyshard. Starstorm has a cast time of 3s and an animation lock of 5.1s. This renders the user unable to perform any actions for a total of 8.1s. Starstorm does more damage than Braver, more damage than Blade Dance when it hits 2 targets and more damage than Melee LB3 when it hits 3 targets.
Level 3
Varies by job:
- Meteor for Black Mage.
- Teraflare for Summoner.
- Vermillion Scourge for Red Mage
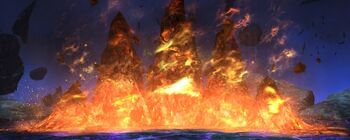
All level 3 magical ranged DPS limit breaks are functionally identical. They hit all targets in a radius of 15 yalms with x3.5 the damage of Skyshard. Magical Ranged DPS LB3 has a cast time of 4.5s and an animation lock of 8.1s. This renders the user unable to perform any actions for a total of 12.6s. Magical Ranged DPS LB3 does more damage than Braver, more damage than Bladedance when it hits 2 targets and more damage than Melee LB3 when it hits 2 targets.
Squadron Limit Break
The Squadron Limit Break is only available during Command Missions, with the Execute Limit Break command. Your own class or job's Limit Break is also available as normal, but squadron members cannot cast their class's Limit Break.
Ungarmax
Ungarmax is the Squadron Limit Break. It deals single-target damage and grants ![]() Damage Up to the entire party for 15 seconds. It is a level 1 Limit Break. There is no level 2 Squadron Limit Break.
Damage Up to the entire party for 15 seconds. It is a level 1 Limit Break. There is no level 2 Squadron Limit Break.
The LB Bar
Limit Breaks can be generated and executed as long as there are at least 4 players in a party. In a 4 player party, the minimum amount of LB gauge that can be generated is one bar, and the maximum two. In an 8 player party, the minimum is two bars and the maximum three. Internally 1 LB bar is filled when 10000 units of LB gauge have accumulated. At that point, a distinct audio notification is played and the bar flashes orange.
Generation
LB gauge units can be generated actively and passively. All pre-Shadowbringers content works under the same rules for LB generation, while Shadowbringers content received tweaks to the active LB generation. All forms of LB generation scale in some way with how many LB bars are available in the duty.
Passive Generation
As soon as an encounter starts, LB is passively generated by a certain amount per 3s.
Factors that affect Passive LB Generation:
- Total number of available LB bars (Positive)
- Number of duplicate jobs (Negative)1
- Number of non-standard compositions (Negative)1, 2
Factors that negatively scale with LB generation incur a penalty for each violation. E.g. solo healing and solo tanking counts as 1 penalty each and so both penalties would apply to the same party in a 1T 1H 6DPS composition.
For 3 bars, the amount of LB gauge gained per tick is 220 > 170 > 160 > 154 > 144 > 140, going one step down for each penalty. You can see the details in the following table:
| Number of penalties | Units per tick | Time until 1 bar fills | Time until 2 bars fill | Time until 3 bars fill |
|---|---|---|---|---|
| 0 | 220 | 2m 18s | 4m 33s | 6m 51s |
| 1 | 170 | 2m 57s | 5m 54s | 8m 51s |
| 2 | 160 | 3m 9s | 6m 15s | 9m 24s |
| 3 | 154 | 3m 15s | 6m 30s | 9m 45s |
| 4 | 144 | 3m 30s | 6m 57s | 10m 27s |
| 5 or more | 140 | 3m 36s | 7m 9s | 10m 45s |
1Only applicable in duties listed under “High-end duty”
2A standard composition is 2 DPS - 1 Healer - 1 Tank in a four-man party. It is 4 DPS - 2 Healers - 2 Tanks in an eight-man party
For Dungeons or general light party duties, the passive amount is adjusted to 75 gauge units per tick for one bar and 180 for two bars. It would take one bar 6m 42s to fill passively and two bars 5m 32s.
Active Generation
Active LB generation falls into five distinct categories: Critical Health Recovery, Surviving Lethal Damage, Interrupts/Silences, Killing Adds, and Resolving Mechanics. Since these have been tweaked since Shadowbringers, the following will be divided based on content. Keep in mind that any pre-Shadowbringers content still uses the pre-Shadowbringers values.
pre-Shadowbringers Content
Critical Health Recovery
Critical health recovery generation describes an event where a player has less or equal to 10% of their maximum HP and receives a direct heal, which results in LB gauge generation. When successfully healed in this HP range with a direct healing spell or ability, the group is awarded 200 LB gauge units per bar, for up to 600 gauge units. This has no cooldown and is awarded on a per-player basis.
Surviving Lethal Damage
Surviving lethal damage generation describes an event where a player survives damage that is equal to or exceeds their current HP due to on-player mitigation or shields. Effects that lower an enemy’s damage through an enemy debuff, like Addle, Feint or Reprisal etc., do not count for it and can lower the damage enough to miss the “Surviving Lethal” threshold. This gains the group 500 LB gauge units per bar, for up to 1500 gauge units. This has no cooldown and is awarded on a per-player basis.
Interrupts/Silences
Interrupting casts with stuns or an interrupt ability such as Head Graze can award a certain amount of LB gauge. The amount granted is depending on the duty. It is possible that it awards no gauge units.
Killing Adds
Killing adds can award a certain amount of LB gauge. The amount granted is depending on the duty. This has been seen in A12, or in Shadowbringers in SoS EX, where killing the adds granted enough gauge for a Tank LB3.
Resolving Mechanics
Resolving mechanics generation describes an event where players are awarded a certain amount of LB gauge units since they did a mechanic successfully. The amount of LB granted varies on a duty basis.
Post-Shadowbringers Content
Critical Health Recovery
The number of gauge units generated per LB bar was adjusted to 100 for critical health recovery from direct AoE healing actions and abilities and 200 units for single target. The LB gauge will no longer fill when non-healer jobs use healing actions. That means the maximum amount per person is still the same 600 units, for single target heals.
Surviving Lethal Damage
The number of units per LB bar was adjusted to 100 for surviving lethal damage due to on-player mitigation or shields. Invulns don’t seem to count for it. Effects that lower an enemy’s damage through an enemy debuff, like Addle, Feint or Reprisal etc., do not count for it and can lower the damage enough to miss the “Surviving Lethal” threshold. This means the maximum generation per person equals 300 gauge units.
Killing Adds, Interrupts/Silences, Resolving Mechanics
These all appear to be unchanged or didn’t make an appearance in any encounter.
PvP
In PvP, each player has access to one limit break bar, which is unique to them and not a shared party resource. The bar gradually fills over time in combat at rates that depend on the job. Each job has access to one or more limit break actions with unique effects based on the job and not are shared between roles, unlike in PvE.
| Action | Acquired | Level | Type | MP | Casting | Recast | Range Radius |
Description |
|---|---|---|---|---|---|---|---|---|
| Phalanx (PvP) | 30 | Limit Break | Instant | 10s | Grants the effect of Hallowed Ground to self and Phalanx to nearby party members. Hallowed Ground Effect: Renders you impervious to most attacks Duration: 10s Phalanx Effect: Reduces damage taken by 33% Duration: 10s Additional Effect: Grants Blade of Faith Ready Duration: 15s Can only be executed when the limit gauge is full. Gauge Charge Time: 120s ※Action changes to Blade of Faith upon execution. | |||
| Primal Scream (PvP) | 30 | Limit Break | Instant | 10s | Let out a bloodcurdling cry in a cone before you, rendering enemies unable to use Guard. Duration: 15s Additional Effect: Grants Inner Release and Thrill of Battle Inner Release Effect: Increases the potency of Primal Rend, Primal Ruination, Inner Chaos, and Chaotic Cyclone, while also increasing movement speed by 25%, and granting immunity to Stun, Heavy, Bind, Silence, Half-asleep, Sleep, Deep Freeze, and knockback and draw-in effects Duration: 15s Cannot execute Guard while under the effect of Inner Release. Thrill of Battle Effect: Increases maximum HP by 20% and restores the amount increased Duration: 30s Grants a stack of Burgeoning Fury upon executing weaponskills, up to a maximum of 3. Duration: 15s At maximum stacks, become Wrathful, changing Primal Scream to Primal Wrath. Can only be executed when the limit gauge is full. Gauge Charge Time: 90s ※Storm's Path Combo changes to Fell Cleave while under the effect of Inner Release. | |||
| Eventide (PvP) | 30 | Limit Break | Instant | 10s | Delivers an attack with a potency of 8,000 to all enemies in a straight line before and behind you. Potency increases up to 16,000 as HP nears maximum. HP is reduced to 1 upon execution. Additional Effect: Grants Undead Redemption Undead Redemption Effect: Most attacks cannot reduce your HP to less than 1, and you absorb 100% of weaponskill damage dealt as HP Duration: 10s Additional Effect: Grants Blackblood Duration: 10s Additional Effect: Grants Scorn Duration: 15s Can only be executed when the limit gauge is full. Gauge Charge Time: 105s ※Action changes to Disesteem while under the effect of Scorn. ※Souleater Combo changes to Scarlet Delirium while under the effect of Blackblood. ※Souleater Combo changes to Comeuppance while under the effect of Comeuppance Ready. ※Souleater Combo changes to Torcleaver while under the effect of Torcleaver Ready. | |||
| Relentless Rush (PvP) | 30 | Limit Break | Instant | 10s | Unleashes a flurry of blade strikes on nearby enemies, dealing damage over time with a potency of 4,000 and reducing damage taken by 25% until effect expires. Duration: 4s Activates Terminal Trigger when effect duration expires. Additional Effect: Afflicts target with Relentless Shrapnel, increasing target's damage taken by 5% Duration: 6s Maximum Stacks: 5 Can be executed while moving. Can only be executed when the limit gauge is full. Gauge Charge Time: 60s ※Action changes to Terminal Trigger upon execution. | |||
| Terminal Trigger (PvP) | 30 | Limit Break | Instant | 1s | Delivers an attack with a potency of 12,000 to all nearby enemies. Additional Effect: Stun Duration: 3s Can only be executed while under the effect of Relentless Rush. Relentless Rush effect expires upon execution. ※This action cannot be assigned to a hotbar. | |||
| Afflatus Purgation (PvP) | 30 | Limit Break | Instant | 10s | Deals unaspected damage with a potency of 20,000 to all enemies in a straight line before you. Additional Effect: Stun Duration: 2s Additional Effect: Grants Temperance Temperance Effect: Grants Regen to self and nearby party members within 30 yalms Cure Potency: 6,000 Duration: 15s Can only be executed when the limit gauge is full. Gauge Charge Time: 60s | |||
| Summon Seraph (PvP) | 30 | Ability | Instant | 60s | Summons Seraph to fight at a designated location. Duration: 20s Automatically casts Seraphic Veil on party members within 30 yalms. Automatically grants Seraphic Illumination to party members within 15 yalms. Seraphic Illumination Effect: Increases HP recovery via healing actions on self by 20%. | |||
| Seraph Flight (PvP) | 30 | Limit Break | Instant | 1s | Grants Seraph Flight and Excogitation to all nearby party members. Seraph Flight Effect: Nullifies the next status affliction that can be removed by Purify Duration: 20s Excogitation Effect: Restores HP when HP falls below 50% or upon effect duration expiration Cure Potency: 8,000 Duration: 20s ※This action cannot be assigned to a hotbar. | |||
| Celestial River (PvP) | 30 | Limit Break | Instant | 10s | Increases damage dealt and healing potency of self and nearby party members by 30%, while reducing damage dealt and healing potency of nearby enemies by 30%. Effect is reduced by 10% every 5 seconds. Duration: 15s Grants Divining to self Duration: 15s Can only be executed when the limit gauge is full. Gauge Charge Time: 105s ※Action changes to Oracle upon execution. | |||
| Mesotes (PvP) | 30 | Limit Break | Instant | 10s | Erects a magicked barrier at a select location, granting party members the effect of Mesotes and afflicting enemies with the effect of Lype when standing inside. Duration: 15s Mesotes Effect: Negates all damage from enemies who are not under the effect of Lype Duration: 5s Lype Effect: Damage over time Potency: 8,000 Duration: 5s The barrier can be relocated once before its effect expires, but the effect duration will not be reset. Can only be executed when the limit gauge is full. Gauge Charge Time: 120s | |||
| Sky High (PvP) | 30 | Limit Break | Instant | 10s | Jump high into the air, preventing enemies from targeting you. Movement is still possible before landing. Duration: 5s Additional Effect: Removes Heavy, Bind and Half-asleep Executes Sky Shatter automatically when effect duration expires. Can only be executed when the limit gauge is full. Gauge Charge Time: 90s ※Action changes to Sky Shatter upon execution. | |||
| Sky Shatter (PvP) | 30 | Limit Break | Instant | 1s | Delivers an attack with a potency of 16,000 to all nearby enemies. Potency is doubled when targets are within 5 yalms. Additional Effect: Creates a barrier around self that absorbs damage equivalent to a heal of 24,000 potency. Duration: 10s Can only be executed while under the effect of Sky High. ※This action cannot be assigned to a hotbar. | |||
| Tenebrae Lemurum (PvP) | 30 | Limit Break | Instant | 10s | Offers your flesh as a vessel to your avatar, gaining 5 stacks of Enshrouded. Duration: 20s Additional Effect: Afflicts nearby enemies with Hysteria Hysteria Effect: Afflicted enemies are unable to act of their own free will Duration: 2s Can only be executed when the limit gauge is full. Gauge Charge Time: 75s Has no effect on players riding machina or non-player combatants. ※Action changes to Communio while under the effect of Enshrouded. ※Grim Swathe changes to Lemure's Slice while under the effect of Enshrouded. ※Infernal Slice Combo changes to Void Reaping while under the effect of Enshrouded. | |||
| Meteodrive (PvP) | 30 | Limit Break | Instant | 10s | Rushes target and delivers an attack with a potency of 12,000. Additional Effect: Removes target's Guard Additional Effect: Afflicts target with Meteodrive, and deals additional damage with a potency of 12,000 Duration: 3s Meteodrive Effect: Renders target unable to move Effect cannot be applied to players riding machina or non-player combatants. Can only be executed when the limit gauge is full. Gauge Charge Time: 60s Cannot be executed while bound. | |||
| Zantetsuken (PvP) | 30 | Limit Break | Instant | 10s | Swiftly charges forward, dealing damage to target and all enemies nearby it with a potency of 24,000. If target is afflicted with Kuzushi, deals damage equal to 100% of their maximum HP. Ignores the effects of Guard when dealing damage. The additional effect of Kuzushi cannot be applied to players riding a machina and non-player combatants. Can only be executed when the limit gauge is full. Gauge Charge Time: 120s Cannot be executed while bound. | |||
| Seiton Tenchu (PvP) | 30 | Limit Break | Instant | 10s | Rushes target and delivers an attack with a potency of 12,000, incapacitating foes whose HP is below 50%. Additional Effect: Afflicts target with Death Link. Duration: 2s Defeating an enemy with this action, or one under the effect of Death Link, will grant Unsealed Seiton Tenchu, allowing a second execution of this action. Duration: 8s Effect duration is reduced by 1s each time it is applied to a target with a minimum duration of 4s. Effect cannot be applied to players riding machina or non-player combatants. Can only be executed when the limit gauge is full or while under the effect of Unsealed Seiton Tenchu. Gauge Charge Time: 90s Cannot be executed while bound. | |||
| Final Fantasia (PvP) | 30 | Limit Break | Instant | 10s | Grants Final Fantasia. Final Fantasia Effect: Reduces your weaponskill cast time and recast time by 10%, while also increasing damage dealt by self and all party members within 30 yalms by 10%, and movement speed by 25% Effect also gradually fills the limit gauge when targets are in combat. Duration: 30s Grants Encore of Light Ready Duration: 30s Can only be executed when the limit gauge is full. Gauge Charge Time: 120s ※Action changes to Encore of Light upon execution. | |||
| Marksman's Spite (PvP) | 30 | Limit Break | Instant | 10s | Delivers a ranged attack with a potency of 36,000. Can only be executed when the limit gauge is full. Gauge Charge Time: 90s | |||
| Contradance (PvP) | 30 | Limit Break | Instant | 10s | Afflicts nearby enemies with Seduced. Seduced Effect: Renders targets unable to act of their own volition Duration: 2s Damage you deal to charmed enemies will extend the effect duration by 2s. This effect can only be extended once. Can only be executed when the limit gauge is full. Gauge Charge Time: 90s | |||
| Soul Resonance (PvP) | 30 | Limit Break | Instant | 10s | Grants 5 stacks of Soul Resonance, upgrading Fire to Flare and Blizzard to Freeze. Duration: 30s Additional Effect: Grants Elemental Star Elemental Star Effect: Action changes to Flare Star while under the effect of Astral Fire, or Frost Star while under the effect of Umbral Ice Duration: 30s Can only be executed when the limit gauge is full. Gauge Charge Time: 60s | |||
| Summon Bahamut (PvP) | 30 | Limit Break | Instant | 10s | Enters Dreadwyrm Trance and summons Demi-Bahamut to fight at a designated location. Duration: 20s Demi-Bahamut will execute Megaflare upon being summoned, then execute Wyrmwave automatically, prioritizing targets with the lowest HP within 30 yalms. Can only be executed when the limit gauge is full. Gauge Charge Time: 90s ※Action changes to Deathflare upon execution. ※Ruin III changes to Astral Impulse while under the effect of Dreadwyrm Trance. | |||
| Megaflare (PvP) | 30 | Limit Break | Instant | 1s | Deals unaspected damage with a potency of 18,000 to all nearby enemies. ※This action cannot be assigned to a hotbar. | |||
| Summon Phoenix (PvP) | 30 | Limit Break | Instant | 10s | Enters Firebird Trance and summons Demi-Phoenix to fight at a designated location. Duration: 20s Demi-Phoenix will execute Everlasting Flight upon being summoned, then execute Scarlet Flame automatically, prioritizing the closest target within 30 yalms that is not afflicted with Scarlet Flame. Can only be executed when the limit gauge is full. Gauge Charge Time: 90s ※Action changes to Brand of Purgatory upon execution. ※Ruin III changes to Fountain of Fire while under the effect of Firebird Trance. | |||
| Everlasting Flight (PvP) | 30 | Limit Break | Instant | 1s | Gradually restores own HP and the HP of all nearby party members. Cure Potency: 4,000 Duration: 18s Additional Effect: Restores HP when HP falls below 25% or upon effect duration expiration Cure Potency: 12,000 ※This action cannot be assigned to a hotbar. | |||
| Southern Cross (PvP) | 30 | Limit Break | Instant | 10s | Emblazons a grand cross on the ground beneath a party member or enemy, restoring HP of party members within range while damaging enemies. Cure Potency: 12,000 Damage Potency: 12,000 Targets standing at the cross's center will receive the effects of this action twice. Can only be executed when the limit gauge is full. Gauge Charge Time: 90s |
