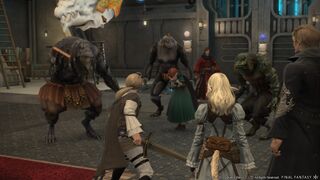
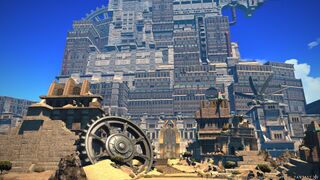
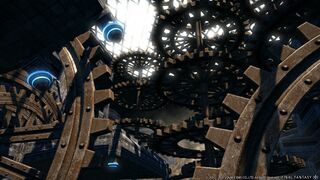
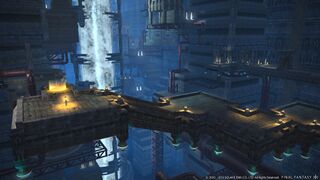
The Ridorana Lighthouse
The Ridorana Lighthouse
- Level
- 70 (Sync: 70)
- Item Level
- 335
- Difficulty
- Normal
- Party size
- Alliance
24 man • 3 6
6  15
15 
- Unsyncing
- Allowed
- Time limit
- 120 minutes
- Duty Finder
- Alliance Raids (Stormblood)
- Roulette
- Alliance Raids
- Tomestones
 100
100 - Req. quest
 Annihilation
- Entrance
- The Prima Vista Bridge (X:6.3, Y:6.1)
- Location
- The Ridorana Lighthouse
- Region
- ???
- Patch
- 4.3
“South of Rabanastre, in a remote corner of the Valnard Sea gapes a fathomless maw that, for centuries, has slowly devoured the world around it: Ridorana. Whether you believe the cataract natural wonder or demon-torn gate to the very underworld, journeys to her edge should be made with that utmost caution, seeing as none who have stumbled into the darkness have ever returned to tell their tale. An ancient spire once used by the Dalmascans as a lighthouse rises defiantly above the churning waters to warn forethoughtful and foolhardy alike. It is into this spire that the transformed Ba'Gamnan has fled. It is into this hell that you must follow.
— In-game description
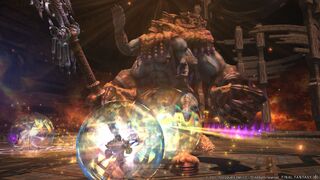
The Ridorana Lighthouse is a level 70 raid introduced in patch 4.3 with Stormblood. It is the second part of Return to Ivalice.
Objectives
- Defeat Famfrit, the Darkening Cloud: 0/1
- Clear Spire Ravel: 0/1
- Defeat Belias, the Gigas: 0/1
- Clear the Walk of Divine Ascent: 0/1
- Defeat Construct 7: 0/1
- Arrive in the Clockwork Colliseum: 0/1
- Defeat Yiazmat: 0/1
Bosses
 Famfrit, the Darkening Cloud
Abilities
- Tide Pod: Tankbuster.
- Water IV: Significant arena-wide AoE damage.
- Briny Cannonade: Mark player with an AoE circle. Damage to all players inside the AoE.
- Tsunami: AoE knockback, followed by Famfrit charging its amphora with water (visual effect) and releasing a large cone-shaped AoE. This deals massive damage and repeated knockback toward the edge of the arena, which is also a damage zone. It's possible to escape with Surecast or the like, but very difficult even then, so try to avoid it entirely. Famfrit will do this more than once. The visual of the amphora will indicate the direction of the AoE.
- Dark Ewer: Famfrit spawns a number of amphorae, that will downpour and move around. Getting hit by any of it will result in medium damage.
- Dark Rain: A number of AoE circles will be placed around the arena.
- Darkening Rainfall: Famfrit spawns three (or more, later into the fight) Dark Rain adds. Expect Water IV shortly after the spawn. Having failed to kill all adds may result in several dead players or even a wipe.
- Dark Cannonade: Players are marked with red triangle. After a short time players will be tossed into the air and take moderate damage. Grouping together negates the toss and reduces the damage -- you only need to group with one other marked player! More doesn't hurt, but don't put in extra effort just to make a larger stack.
Add
- Dark Rain: Blob-like add. Must be killed in about 30 seconds. If not killed in time, it will cast Explosion and deal significant arena-wide damage and inflict one stack of
 Magic Vulnerability Up.
 Belias, the Gigas
Belias may split in two. Both will charge in a linear fashion. Note the arrow marker. Both Belias will charge to such a marker and from it in the direction of the arrow. The Belias will stop for about 3 seconds at such a marker. Getting hit by the charge will deal damage and inflict one stack of ![]() Vulnerability Up and
Vulnerability Up and ![]() Slow. It might be prudent to stand in the centre tile and move from there if necessary.
In general, expect to be inflicted by
Slow. It might be prudent to stand in the centre tile and move from there if necessary.
In general, expect to be inflicted by ![]() Vulnerability Up if you fail to avoid an avoidable damaging ability.
Vulnerability Up if you fail to avoid an avoidable damaging ability.
Abilities
- Fire: Prepare for Fire IV.
- Fire IV: Arena-wide AoE, significant damage.
- Time Eruption: Places nine rectangle shaped AoEs. The AoEs look like clock faces, with fast or slow spinning hands. Fast spinning will explode first, slower second.
- The Hand of Time: Standing marker, tethered to players. After a short grace period, tethered players suffer Burn and Slow (more stacks the closer they are) and any player who contacts the tether suffers Stop.
- Rise, loyal minions. Heed my call!: Summons three Gigas. Charges Mana meter as long as the adds are alive. If they're near each other, they tether and gain
 Vulnerability Down, so tanks need to spread them apart.
- Hellfire: Ultimate. Damage according to the charged Mana meter.
- Time Bomb: Places four meteor markers. Clockwork hand will indicate the direction of the AoE, which can be rotated 90 degrees by having a player step into the circle. The hand will not rotate if a player is already standing in the circle, and the impact itself does not deal damage. Getting hit will inflict
 Vulnerability Up.
Add
- Gigas: Mob has proximity shield that lowers damage suffered. It is necessary to pull them away from Belias and each other.
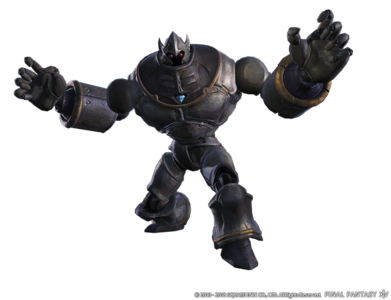
 Construct 7
“A wise artithmetican once said the primes were the most lonesome of numbers. To that I say bollocks! 2, 3, 5, 7, 11, 13, 17, 19, 23, 31 ... and so on to eternity. There are enough digits here to start a fellowship!
— Crude Scrawling at (X:10.5, Y:13.8)
Construct 7 has two modes:
- Annihilation Mode - it will use its normal damage abilities. It starts in this mode.
- Computation Mode - it will execute a mathematical examination but will do nothing otherwise. See further down.
Abilities
- Destroy: Tankbuster.
- Accelerate: Places large AoE circles under some players. Marks one player with a stack marker.
- Pulverize: Circular AoE around Construct 7, then four additional circle AoEs beneath random players. Followed by Compress.
- Compress: Linear AoE from Construct 7 in a random direction. Later in the fight, this will be X-shaped linear AoEs.
- The construct cogs begin to whirr.: Places six AoE circles (cog wheels like, later blue). Construct 7 will charge the arena in a linear fashion. Places AoE circles under players and finally places a meteor arena-wide AoE in the centre of the arena.
- Lithobrake: Meteor AoE in The construct cogs begin to whirr. phase. Damage according to proximity to centre of the AoE.
- Dispose: Medium sized cone-shaped AoE (approximately 45° wide) shortly after Lithobrake. Construct 7 will jump to the centre of the arena and start using this ability, rotating clockwise or counterclockwise as it charges (which indicates the rotation Construct 7 will be doing during the execution). Be very wary of this ability. It is lethal. Further,
 Damage Down will be inflicted on a hit. It is suggested that players rush to Construct 7 after Lithobrake and stay at its back at all time during Dispose. While Construct 7 is glowing red, he rotates faster and fires off more attacks.
- If you do get caught by Dispose, run into the direction of rotation. This will ensure you do not get hit more than once by letting Construct 7 rotate away from you, rather than trying to outrun him.
- Computation Mode: This is a minigame phase. Player health is set to a single digit value. This is the base value for the mathematical operation. Stepping into one of the circles (1, 2, 3, 4) will add the respective value to the health of the player. The player is asked to step into a circle so that the player health, plus, possibly, the value of that circle, can be divided by a given number. Sometimes stepping into such a circle is not required, if the player health already fulfills the equation. Failure will apply one (1) stack of Computation Error. Success will apply one (1) stack of Computation Boost. Construct 7 will follow up with Incinerate after this phase, making it very important for healers to top off the raid as soon as the Subtract debuff ends.
- Subtract: Preparation for Computation Mode. Set player health to a single digit value. The player's health remains a single digit after the debuff wears off.
- Divide by Four: Step into one of the circles, so that the value of your current health plus the value of the circle (1 - 4) can be divided by four.
- Divide by Five: Step into one of the circles, so that the value of your current health plus the value of the circle (1 - 4) can be divided by five.
- Divide by Three: Step into one of the circles, so that the value of your current health plus the value of the circle (1 - 4) can be divided by three.
- Indivisible: Step into one of the circles, so that the value of your current health plus the value of the circle (1 - 4) is a prime number (2, 3, 5, 7, 11, 13). 1 is not a prime number!
- Tartarean Protocol Loaded: Add phase. Kill the Construct 7.1 in time and step into the bluish orb in between the three arenas. Failure will result in the death of the player in this arena.
- Incinerate: Arena-wide AoE.
- Ventilate: Minor damage and knockback around Construct 7. Seems to have no real significance other than indicating that Construct 7's rotation is repeating.
Add
- Construct 7.1: Depending on your alliance, each Construct 7.1 performs a different mechanic.
- Alliance A: Marks players with + and - polarity, and tethers each player. If tethered to a player with the same polarity, get close. If tethered to a player with opposite polarity, get as far away from each other as possible.
- Alliance B: Missiles will spawn on the sides of the arena. Avoid them to prevent any unnecessary explosive damage.
- Alliance C: Uses Acceleration Bomb. Same as Ozma, dice-like debuff icon. Do not move or act in any way once the countdown (4s) is finished.
 Yiazmat
Abilities
- The One Dragon: A permanent buff on Yiazmat that drastically increases his maximum HP. Yiazmat begins the fight with this status buff, and it is only removed once the raid destroys the Heart of the Dragon.
- Rake: Tankbuster. In addition to the cast bar, Yiazmat telegraphs this ability by shouting "I'll tear you limb from limb!".
- Stone Breath: Yiazmat turns away from the tank and stands on his hind legs. A cone shaped AoE in the direction Yiazmat is facing will follow shortly after this animation. Being hit inflicts
 Vulnerability Up and
  Petrification. Yiazmat telegraphs this ability by shouting "Escape this!".
- Dust Storm: Arena wide AoE, medium damage. Yiazmat telegraphs this ability by shouting "Agony and sorrow!".
- White Breath: Yiazmat breathes icy breath around the entire platform, dealing heavy damage and inflicting
 Slow. The only safe zone is within Yiazmat's hitbox. Yiazmat telegraphs this ability by shouting "Your suffering is not yet over.".
- Magnetic Lysis: Marks player with +/-, divides arena into +/- zones. Players should stay in the opposite zone of the player mark. Yiazmat telegraphs this ability by shouting "You will not know mercy!"
- Magnetic Lysis +: Signified by two reddish + signs around the player. Stay on the bluish ground.
- Magnetic Lysis -: Signified by two bluish - signs around the player. Stay on the reddish ground.
- Dust Storm will follow and deal more damage if the player is raised up from the ground, i.e. not in the correct half of the arena.
- Being on the same-colour side of the field inflicts a levitation debuff. The only way to remove this debuff is to step onto the opposite-colour side -- if Magnetic Lysis ends, the debuff will remain! (See Cyclone for why this is bad.)
- Rake (Version 2): An arrow marker is placed on the ground. Yiazmat will charge to the arrow marker slowly and then continue to charge around the arena. Getting hit by Yiazmat will deal significant damage and inflict
 Damage Down. Yiazmat telegraphs this ability by shouting "Like a knife through butter!".
- Summon: Summons three Wind Azers, which will tether to 3 random players and shoot column AoEs in their direction. Yiazmat telegraphs the summoning by shouting "Your pain is my pleasure!".
- Cyclone: AoE whirling all players around, significant damage. Group should be above 50% health. If a player has the floating debuff from Magnetic Lysis when this attack executes, they will be thrown out of the arena, resulting in instant death. Yiazmat telegraphs this ability by moving the center of the arena and shouting "Feel the wrath of my brothers!".
- First time will be the prelude to the ultimate phase. Spawns three Archaeodemons shortly after the players are on the ground again. The spawnpoints are in a triangle around Yiazmat. The first is right at the entrance, number two and three are in the north north west and north north east quadrant. As long as the Archaeodemons are alive, the Mana meter will be charged. If the three Archaeodemons are dead, the Heart of the Dragon becomes available, which must be destroyed before the Mana meter fills. Yiazmat begins this phase by moving to the center of the arena and shouting "You will pay for what you have done...with blood!".
- Second time will be followed by Death Strike.
- Solar Storm: Ultimate. At fully charged Mana meter, this will deal 300,000 points of damage. Can be reduced by shields, though. Anything above a 75% charged Mana meter will be some serious damage. Yiazmat shouts "Scream louder! I want to remember this!" as the ability is cast.
- Death Strike: Stack marker on a player. Yiazmat telegraphs this ability by shouting "Armageddon will deliver the king's justice!".
- Growing Threat:
 Damage Up buff on Yiazmat, also making him glow orange. Yiazmat telegraphs this ability by shouting "My wounds...give me strength!".
Add
- Wind Azer: Tether with one player. Uses Ancient Aero - line shaped AoE in the direction of the tethered player.
- Archaeodemon: Summoned in ultimate phase. Must be killed in time to destroy the dragon's heart and end this phase. If two of them are close to each other, both will be buffed with Invulnerability.
- Abilities
- Karma: Large, cone-shaped AoE.
- Unholy Darkness: Circular AoE, placed under player.
- Abilities
- Heart of the Dragon: Must be killed to end the ultimate phase. It might be prudent to use any LB available. Destroying this also removes Yiazmat's The One Dragon buff, greatly reducing his max HP.
Loot
- See also: Ivalician Armor (iLvl 360)
 Famfrit, the Darkening Cloud
| Name | Type | Item Level | Rarity | Quantity |
|---|---|---|---|---|
| Ivalician Archer's Boots | Feet | 360 | Blue | 1 |
| Ivalician Archer's Headband | Head | 360 | Blue | 1 |
| Ivalician Arithmetician's Monocle | Head | 360 | Blue | 1 |
| Ivalician Arithmetician's Shoes | Feet | 360 | Blue | 1 |
| Ivalician Ark Knight's Greaves | Feet | 360 | Blue | 1 |
| Ivalician Ark Knight's Helm | Head | 360 | Blue | 1 |
| Ivalician Chemist's Monocle | Head | 360 | Blue | 1 |
| Ivalician Chemist's Shoes | Feet | 360 | Blue | 1 |
| Ivalician Shikari's Bandana | Head | 360 | Blue | 1 |
| Ivalician Shikari's Greaves | Feet | 360 | Blue | 1 |
| Ivalician Thief's Boots | Feet | 360 | Blue | 1 |
| Ivalician Thief's Headband | Head | 360 | Blue | 1 |
| Ivalician Uhlan's Bandana | Head | 360 | Blue | 1 |
| Ivalician Uhlan's Greaves | Feet | 360 | Blue | 1 |
 Belias, the Gigas
| Name | Type | Item Level | Rarity | Quantity |
|---|---|---|---|---|
| Ivalician Archer's Bottoms | Legs | 360 | Blue | 1 |
| Ivalician Archer's Gloves | Hands | 360 | Blue | 1 |
| Ivalician Arithmetician's Bottoms | Legs | 360 | Blue | 1 |
| Ivalician Arithmetician's Gloves | Hands | 360 | Blue | 1 |
| Ivalician Ark Knight's Bottoms | Legs | 360 | Blue | 1 |
| Ivalician Ark Knight's Gauntlets | Hands | 360 | Blue | 1 |
| Ivalician Chemist's Bottoms | Legs | 360 | Blue | 1 |
| Ivalician Chemist's Gloves | Hands | 360 | Blue | 1 |
| Ivalician Shikari's Fingerless Gloves | Hands | 360 | Blue | 1 |
| Ivalician Shikari's Trousers | Legs | 360 | Blue | 1 |
| Ivalician Thief's Bottoms | Legs | 360 | Blue | 1 |
| Ivalician Thief's Gloves | Hands | 360 | Blue | 1 |
| Ivalician Uhlan's Fingerless Gloves | Hands | 360 | Blue | 1 |
| Ivalician Uhlan's Trousers | Legs | 360 | Blue | 1 |
 Construct 7
| Name | Type | Item Level | Rarity | Quantity |
|---|---|---|---|---|
| Ivalician Archer's Boots | Feet | 360 | Blue | 1 |
| Ivalician Archer's Jacket | Body | 360 | Blue | 1 |
| Ivalician Arithmetician's Robe | Body | 360 | Blue | 1 |
| Ivalician Arithmetician's Shoes | Feet | 360 | Blue | 1 |
| Ivalician Ark Knight's Greaves | Feet | 360 | Blue | 1 |
| Ivalician Ark Knight's Surcoat | Body | 360 | Blue | 1 |
| Ivalician Chemist's Robe | Body | 360 | Blue | 1 |
| Ivalician Chemist's Shoes | Feet | 360 | Blue | 1 |
| Ivalician Shikari's Greaves | Feet | 360 | Blue | 1 |
| Ivalician Shikari's Jacket | Body | 360 | Blue | 1 |
| Ivalician Thief's Boots | Feet | 360 | Blue | 1 |
| Ivalician Thief's Jacket | Body | 360 | Blue | 1 |
| Ivalician Uhlan's Greaves | Feet | 360 | Blue | 1 |
| Ivalician Uhlan's Jacket | Body | 360 | Blue | 1 |
 Yiazmat
| Name | Type | Item Level | Rarity | Quantity |
|---|---|---|---|---|
| Construct 8 | Minion | N/A | Basic | 1 |
| Yiazmat Card | Triple Triad Card | N/A | 1 | |
| The Mystery of Giruvegan Orchestrion Roll | Orchestrion Roll | N/A | Basic | 1 |
| Apoplexy Orchestrion Roll | Orchestrion Roll | N/A | Basic | 1 |
| Flash of Steel Orchestrion Roll | Orchestrion Roll | N/A | Basic | 1 |
Rewards
When originally released, players could receive only one gear reward per week for completing duties in the Ridorana Lighthouse. Weekly restrictions were lifted in patch 4.4.
Each party in the alliance will receive its own treasure chest, the contents of which will be identical regardless of the route taken.
- Players cannot open a treasure chest belonging to another party.
Achievements
This duty is associated with the following achievements:
| Name | Points | Task | Reward | Patch |
|---|---|---|---|---|
| Didn't Stop, Made It Pop | 5 | Complete the Ridorana Lighthouse. | - | 4.3 |
| Mapping the Realm: The Ridorana Lighthouse | 10 | Discover every location within the Ridorana Lighthouse. | - | 4.3 |
Images
Gear Images
Raid Images
- The Ridorana Lighthouse3.jpg
Concept Art
Notes
The story for this exciting new raid was written by guest creator Yasumi Matsuno, director and writer of titles such as FINAL FANTASY TACTICS and FINAL FANTASY XII. The boss designs are courtesy of guest creator Keita Amemiya, creator and director of the GARO series. Prepare for a new chapter in this grand adventure!


