Limit Break
General Information
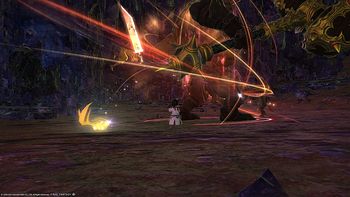
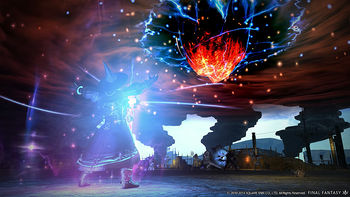
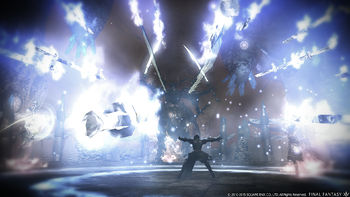
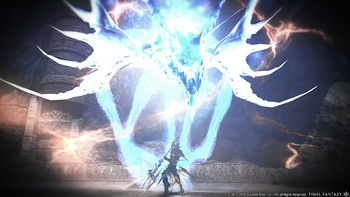
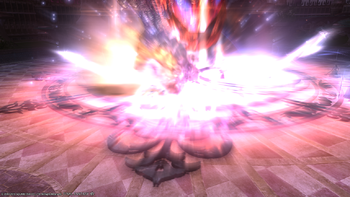
Limit Breaks are group oriented ultimate abilities that can alter the outcome of a battle. They can be performed after charging up a limit break meter.
Limit Breaks are specific to each party role. Tank limit breaks reduce the damage taken for the entire party for a short time. Melee physical DPS limit breaks deal a massive amount damage to a single target. Caster DPS limit breaks deal devastating area of effect damage. Ranged DPS limit breaks deal devastating damage in a straight line. Healer limit breaks restore HP and MP to the entire party.
All classes and jobs of a given role will have the same level one and two limit breaks, while level three limit breaks are exclusive to jobs, with the exception of the limited Blue Mage job being unable to use any limit breaks.
Limit Breaks are only usable in a party environment. The entire party shares the same limit break gauge, with each party in an Alliance raid having its own meter. There are 3 levels of limit breaks, the 1st level can be used in a party with 4 or more members, the 2nd level needs a full party of 8 members, with an additional bar being added under certain conditions:
- In dungeons, the bar is added when engaging the final boss.
- In trials and raids: the bar is added at the start of the duty, except for older raids that still have some regular enemies to fight through.
- In alliance raids and similar special duties, the third bar is added for every boss fight separately, and will be unavailable for regular encounters.
It is worth noting that the addition of a third bar will also reset the progress of the bar. Its removal at the end of a fight (or due to a player disconnect reducing the party size below the requirement does not, so only progress into the third bar is lost. As such, it can be beneficial to use a lower tier limit break before conditions change again.
Tank Limit Breaks
Tank Limit Breaks require Gladiator, Marauder, Paladin, Warrior, Dark Knight or Gunbreaker. Tank Limit Breaks execute instantly with no animation lock.
Shield Wall
Shield Wall is the level 1 limit break for tanks. It reduces damage taken by all party members by 20% for 10 seconds.
Stronghold
Stronghold is the level 2 limit break for tanks. It reduces damage taken by all party members by 40% for 15 seconds.
Last Bastion (PLD)
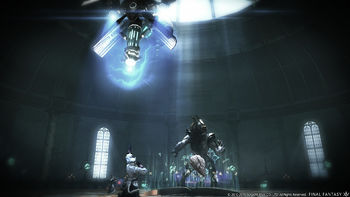
Last Bastion is the level 3 limit break for Paladin. It reduces damage taken by all party members by 80% for 8 seconds.
Land Waker (WAR)
Land Waker is the level 3 limit break for Warrior. It reduces damage taken by all party members by 80% for 8 seconds.
Dark Force (DRK)
Dark Force is the level 3 limit break for Dark Knight. It reduces damage taken by all party members by 80% for 8 seconds.
Gun Metal Soul (GNB)
Gun Metal Soul is the level 3 limit break for Gunbreaker. It reduces damage taken by all party members by 80% for 8 seconds.
Melee Physical DPS Limit Breaks
Melee Physical DPS Limit Breaks require Lancer, Pugilist, Rogue, Dragoon, Monk, Ninja or Samurai. Melee Limit Breaks have a short cast time and moderate animation lock with melee range requirements.
Relative Damage Data Source
Braver
Braver is the level 1 limit break for Melee DPS. It hits a single target with x1.667 the damage of Skyshard. Braver has a cast time of 2s and an animation lock of 3.86s. This renders the user unable to perform any actions for a total of 5.86s.
Bladedance
Bladedance is the level 2 limit break for Melee DPS. It hits a single target with x2.2 the damage of Braver. Blade Dance has a cast time of 3s and an animation lock of 3.86s. This renders the user unable to perform any actions for a total of 6.86s.
Final Heaven (MNK)
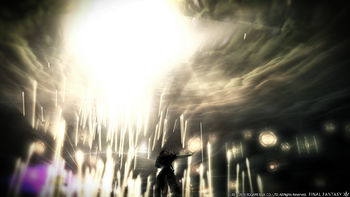
Final Heaven is the level 3 limit break for Monk. It hits a single target with x3.5 the damage of Braver. Melee LB3 has a cast time of 4.5s and an animation lock of 3.7s. This renders the user unable to perform any actions for a total of 8.2s.
Dragonsong Dive (DRG)
Dragonsong Dive is the level 3 limit break for Dragoon. It hits a single target with x3.5 the damage of Braver. Melee LB3 has a cast time of 4.5s and an animation lock of 3.7s. This renders the user unable to perform any actions for a total of 8.2s.
Chimatsuri (NIN)
Chimatsuri is the level 3 limit break for Ninja. It hits a single target with x3.5 the damage of Braver. Melee LB3 has a cast time of 4.5s and an animation lock of 3.7s. This renders the user unable to perform any actions for a total of 8.2s.
Doom of the Living (SAM)
Doom of the Living is the level 3 limit break for Samurai. It hits a single target with x3.5 the damage of Braver. Melee LB3 has a cast time of 4.5s and an animation lock of 3.7s. This renders the user unable to perform any actions for a total of 8.2s.
The End (RPR)
The End is the level 3 limit break for Reaper. It hits a single target with x3.5 the damage of Braver. Melee LB3 has a cast time of 4.5s and an animation lock of 3.7s. This renders the user unable to perform any actions for a total of 8.2s.
Ranged Physical DPS Limit Breaks
Ranged Physical DPS Limit Breaks require Archer, Bard, Machinist or Dancer. Ranged Physical Limit Breaks have a moderate cast time and animation lock.
Big Shot
Big Shot is the level 1 limit break for Ranged DPS. It hits all targets in a straight line with x0.9 the damage of Skyshard. Big Shot has a cast time of 2s and an animation lock of 3.1s. This renders the user unable to perform any actions for a total of 5.1s. Big Shot does more damage than Braver when it hits 2 targets, more damage than Blade Dance when it hits 5 targets and more damage than Melee LB3 when it hits 7 targets.
Desperado
Desperado is the level 2 limit break for Ranged DPS. It hits all targets in a straight line with x2.167 the damage of Big Shot. Desperado has a cast time of 3s and an animation lock of 3.1s. This renders the user unable to perform any actions for a total of 6.1s. Desperado does more damage than Braver, more damage than Blade Dance when it hits 2 targets and more damage than Melee LB3 when it hits 3 targets.
Saggitarius Arrow (BRD)
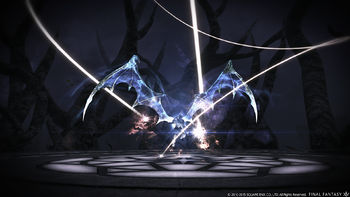
Saggitarius Arrow is the level 3 limit break for Bard. It hits all targets in a straight line with x3.5 the damage of Big Shot. Ranged LB3 has a cast time of 4.5s and an animation lock of 3.7s. This renders the user unable to perform any actions for a total of 8.2s. Ranged LB3 does more damage than Braver, more damage than Blade Dance when it hits 2 targets and more damage than Melee LB3 when it hits 2 targets.
Satellite Beam (MCH)
Satellite Beam is the level 3 limit break for Machinist. It hits all targets in a straight line with x3.5 the damage of Big Shot. Ranged LB3 has a cast time of 4.5s and an animation lock of 3.7s. This renders the user unable to perform any actions for a total of 8.2s. Ranged LB3 does more damage than Braver, more damage than Blade Dance when it hits 2 targets and more damage than Melee LB3 when it hits 2 targets.
Crimson Lotus (DNC)
Crimson Lotus is the level 3 limit break for Dancer. It hits all targets in a straight line with x3.5 the damage of Big Shot. Ranged LB3 has a cast time of 4.5s and an animation lock of 3.7s. This renders the user unable to perform any actions for a total of 8.2s. Ranged LB3 does more damage than Braver, more damage than Blade Dance when it hits 2 targets and more damage than Melee LB3 when it hits 2 targets.
Ranged Magical DPS Limit Breaks
Ranged Magical DPS Limit Breaks require Thaumaturge, Arcanist, Black Mage, Red Mage, or Summoner. Ranged Magical Limit Breaks have the longest cast time and a short animation lock. Unlike the other DPS limit breaks it relies on manual targeting and can potentially miss the target if it suddenly moves.
Skyshard
Skyshard is the level 1 limit break for Caster DPS. It hits all targets in a radius of 5 yalms. Skyshard has a cast time of 2s and an animation lock of 3.1s. This renders the user unable to perform any actions for a total of 5.1s. Skyshard does more damage than Braver when it hits 2 targets, more damage than Blade Dance when it hits 4 targets and more damage than Melee LB3 when it hits 6 targets.
Starstorm
Starstorm is the level 2 limit break for Caster DPS. It hits all targets in a radius of 10 yalms with x2.167 the damage of Skyshard. Starstorm has a cast time of 3s and an animation lock of 5.1s. This renders the user unable to perform any actions for a total of 8.1s. Starstorm does more damage than Braver, more damage than Blade Dance when it hits 2 targets and more damage than Melee LB3 when it hits 3 targets.
Meteor (BLM)
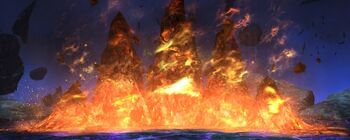
Meteor is the level 3 limit break for Black Mage. It hits all targets in a radius of 15 yalms with x3.5 the damage of Skyshard. Caster LB3 has a cast time of 4.5s and an animation lock of 8.1s. This renders the user unable to perform any actions for a total of 12.6s. Caster LB3 does more damage than Braver, more damage than Blade Dance when it hits 2 targets and more damage than Melee LB3 when it hits 2 targets.
Teraflare (SMN)
Teraflare is the level 3 limit break for Summoner. It hits all targets in a radius of 15 yalms with x3.5 the damage of Skyshard. Caster LB3 has a cast time of 4.5s and an animation lock of 8.1s. This renders the user unable to perform any actions for a total of 12.6s. Caster LB3 does more damage than Braver, more damage than Blade Dance when it hits 2 targets and more damage than Melee LB3 when it hits 2 targets.
Vermillion Scourge (RDM)
Vermillion Scourge is the level 3 limit break for Red Mage. It hits all targets in a radius of 15 yalms with x3.5 the damage of Skyshard. Caster LB3 has a cast time of 4.5s and an animation lock of 8.1s. This renders the user unable to perform any actions for a total of 12.6s. Caster LB3 does more damage than Braver, more damage than Blade Dance when it hits 2 targets and more damage than Melee LB3 when it hits 2 targets.
Healer Limit Breaks
Healer Limit Breaks require Conjurer, White Mage, Scholar or Astrologian. Healer Limit Breaks execute almost instantly but cause a significant amount of animation lock, especially on an LB3.
Healing Wind
Healing Wind is the level 1 limit break for Healers. It restores 25% of HP and MP of all nearby party members.
Breath of the Earth
Breath of the Earth is the level 2 limit break for Healers. It restores 60% of HP and MP of all nearby party members.
Pulse of Life (WHM)
Pulse of Life is the level 3 limit break for White Mage. It restores 100% of HP of all nearby party members and revive any party members that are KO'd. Members that are resurrected via the limit break will also have 100% of their MP restored and will not suffer Weakness. If they already had Weakness, it will not be increased to Brink of Death. If they already had Weakness or Brink of Death, the debuff timer will be reset.
Angel Feathers (SCH)
Angel Feathers is the level 3 limit break for Scholar. It restores 100% of HP of all nearby party members and revive any party members that are KO'd. Members that are resurrected via the limit break will also have 100% of their MP restored and will not suffer Weakness. If they already had Weakness, it will not be increased to Brink of Death. If they already had Weakness or Brink of Death, the debuff timer will be reset.
Astral Stasis (AST)
Astral Stasis is the level 3 limit break for Astrologian. It restores 100% of HP of all nearby party members and revive any party members that are KO'd. Members that are resurrected via the limit break will also have 100% of their MP restored and will not suffer Weakness. If they already had Weakness, it will not be increased to Brink of Death. If they already had Weakness or Brink of Death, the debuff timer will be reset.
Techne Makre (SGE)
Techne Makre is the level 3 limit break for Sage. It restores 100% of HP of all nearby party members and revive any party members that are KO'd. Members that are resurrected via the limit break will also have 100% of their MP restored and will not suffer Weakness. If they already had Weakness, it will not be increased to Brink of Death. If they already had Weakness or Brink of Death, the debuff timer will be reset.
Note
Healer Limit Break 3 will revive affected party members at their current location and does so immediately, with no prompt to accept the revival, unlike regular revive spells. Because of this, a party member who died in lethal terrain, such as a death zone at the edge of the arena, will die again instantly after being revived, since the lethal damage bypass Transcendent (the 5 second invulnerability that players receive when they are revived by any means).
Squadron Limit Break
The Squadron Limit Break is only available during Command Missions, with the Execute Limit Break command. Your own class or job's Limit Break is also available as normal, but squadron members cannot cast their class's Limit Break.
Ungarmax
Ungarmax is the Squadron Limit Break. It deals single-target damage and grants Damage Up to the entire party for 15 seconds. It is a level 1 Limit Break. There is no level 2 Squadron Limit Break.
Adrenaline Rush
Adrenaline Rush replaces Limit Breaks in PvP, though it is an individual bar for every player they can use when they see fit. It only has one bar and the effects are also roughly on par with a one bar limit break of the same role, but with some additional effects. The bar also resets on death.
Meter Mechanics
The meter automatically fills during combat, but certain actions will fill it up faster.
Tanks
Generate Limit break on taking damage.
Generate Limit break on interrupting enemy abilities (only some abilities, usually only boss abilities and not all of them).
DPS
Generate limit break on dealing critical damage.
Generate limit break on killing enemies.
Generate limit break on interrupting enemy abilities (only some abilities, usually only boss abilities and not all of them).
Healers
Generate limit break on healing a tank from critical health (~10% health). After the healer heals a tank from critical damage, limit break is built continuously over time until the LB is used.
Generate limit break on critical healing.
Encounter specific
In some encounters, specific conditions also generate limit break, usually filling an entire bar instantly. Most commonly, specific adds will have this effect when killed, but this can also apply to executing mechanics correctly. Proper use of the "free" LB3 gained is usually required to survive a powerful attack or ensure a tight dps check mechanic is fulfilled.
