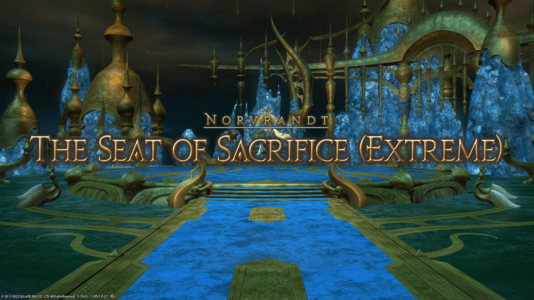
The Seat of Sacrifice (Extreme)
 This article is about the level 80 challenge-mode trial. For the story-mode Main Scenario trial, see The Seat of Sacrifice.
The Seat of Sacrifice (Extreme)
- Level
- 80 (Sync: 80)
- Item Level
- 480
- Difficulty
- Extreme
- Party size
- Full Party
8 man • 2 2
2  4
4 
- Unsyncing
- Allowed
- Time limit
- 60 minutes
- Duty Finder
- High-end Trials (Shadowbringers)
- Roulette
- Mentor
- Tomestones
 25
25 - Req. quest
 Minstrel from Another Mother
- Location
- The Seat of Sacrifice
- Region
- Norvrandt
- Stone, Sky, Sea
- Available
- Patch
- 5.3
 The Echo
- On wipe: +5% (max +25%)
“Though history will paint them as villains, the Ascians were driven by a deep and abiding desire to which all men may relate, and the minstreling wanderer cannot help but spare a thought for Elidibus, whose demise spelled the end of his people's hopes and dreams. Likening your struggle to that of love, the man weaves a bittersweet tale of passion undying─a tale witnessed by the shimmering spires of the Crystal Tower, to be reflected and retold for generations to come.
— In-game description
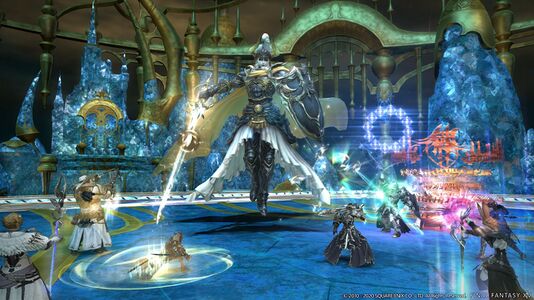
The Seat of Sacrifice (Extreme) is a level 80 trial introduced in patch 5.3 with Shadowbringers.
Guide
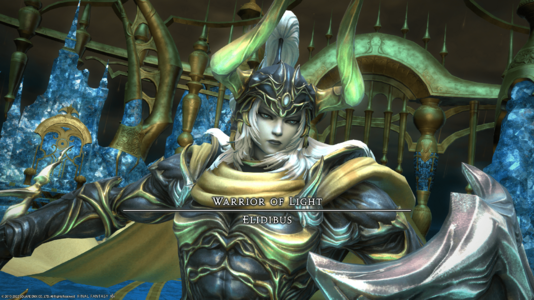
 Warrior of Light: Elidibus
Positioning Tips
- Assign clock positions to all players (tanks will be north and south, healers will be east and west, the dps will all have their own intercardinal positions).
- These general positions will be used throughout the entire encounter for various mechanics.
- Have the tanks and healers rotate clockwise to pair up with a dps at an intercardinal. These will be your partner pairs for shared mechanics that target specific groups of players or roles.
- Split the group into two - 1 tank, 1 healer, 2 dps per group.
Bonus Tip
Do NOT DPS LB the boss while he has a LB stored or he will become invulnerable for a short time.
Encounter
Phase One
- Terror Unleashed - All players' HP to 1 + debuff, must be healed to full or they will die. The outer arena edge will also be brought in to make it smaller.
- To The Limit - Boss will charge 1,2 or 3 LB bars. The amount of bars will determine the specific attack players will need to be ready for when he next casts Limit Break.
- Solemn Confiteor - AoE circles will appear underneath all players, can be bated by all stacking on the boss, waiting for the AoE to drop and then moving.
- Absolute Stone III - 8-point cleave towards all players, move into assigned clock positions as to not overlap.
- Note: Solemn Confiteor is followed quite quickly by Absolute Stone III - so let the AoEs drop, then move to your clock positions so there is no overlapping.
- Limit Break (3) - Will call down 4 Radiant Meteors on all the tanks and healers or all the damage dealers, this attack deals massive damage and applies a fire-resist down debuff on players hit so each meteor needs to be sufficiently spaced apart or you will die. Using the partner pairs (made before start of fight) each pair should move to their respective corners as limit break is casting to spread the meteors out.
- Imbued Saber x2 - Adds elemental effect to weapon. Unlike normal mode (2 elements), extreme has 4 - stone (spread), holy (stack), fire (stop) and blizzard (move). Boss will cast stone first so be sure to spread. Then he will cast either fire or blizzard with NO markers unlike normal mode.
- Imbued Coruscance - AoE sword attack and two imbued element attacks. If you see swirls around the sword this means a donut AoE and you need to get in. If not, then get out as to not get hit with the point blank AoE. Be mindful of the two imbued elements - the first is always stone so be sure to be in clock positions, again if the second if fire then stop moving, if blizzard keep moving.
- To The Limit - Will charge two bars.
- Sword of Light - Will spawn three swords around edge of the platform. These will draw three triangles over the platforms and players will need to find the safe spot which will always be on one edge of the platform. To spot this look for a sword that has not drawn on the outer platform edge and move there.
- Absolute Holy - (happens simultaneously with Sword of Light) Stack-up marker on a player that you will need to share the damage with in the safe spot above.
- Limit Break (2) - Will target each healer with Radiant Desperado a shared line attack that deals high damage and a physical vulnerability up debuff on anyone hit. Split into two groups (decided at start of fight) to share the damage with each healer.
- To The Limit - Will charge 1 bar.
- Imbued Saber x2 - second round is the opposite of the first round. So the first cast will be holy - which requires you to stack to share the damage. Second imbued saber will be fire or blizzard - whichever of the two you didn't have in the first round.
- Imbued Coruscance - AoE sword attack type is the other of what was used in round one. So if it was - in originally (for donus AoE), then it will be out (point blank AoE) the second time around. Remember to also stop or move as necessary.
- Limit Break (1) - Will target one tank, one healer and one dps (completely random) for high damage - split into role positions to avoid overlap. Both tanks should stand on north side, damage dealers should stay south and healers can go east or west.
- The Bitter End - High damage tankbuster and physical vulnerability up debuff. (tank swap and cooldowns required).
- Summon Wyrm - Bahamut appears in the north - move to the opposite side, at the same time Solemn Confiteor will be cast so players need to stack and wait for the circles to drop and then move to the safe side that Bahamut is not on. There will also be 1 player afflicted with a gaze attack (that afflicts players with damage down) - all players should stay in melee range of boss to continue attacking, while the gaze player moves to max melee range - this way players can continue attacking and not worry when the gaze attack goes off.
- Elddragon Dive - Will deal high raid-wide damage - shield and heal.
- Specter of Light - Both moves to the north and add phase begins - each specter add has specific abilities.
Phase Two
- Spectral DRK + WAR - Will spawn in the east and west - each tank should pick one up and keep them apart as they will tether and buff each other. The adds will periodically cast a heavy hitting tankbuster that should be mitigated as necessary. They will also cast Berserk (WAR)/Deep Darkside (DRK) which should be interrupted and not be allowed to go off.
- Spectral BRD - Targets all damage dealers with flare markers. Move to assigned corners to minimize damage.
- Spectral WHM/BLM - Will spawn two meteor towers in the east and west which must be soaked by two players each.
- Spectral NIN - Targets each healer with a stack-up marker. Must be shared with 1 other player to survive.
- Note: To handle the combo once the flare markers go off on all the damage dealers, we have the melee stand in the meteor towers with tank while the ranged run to their healer partner to share the damage.
- Spectral SMN - Summons 4 Bahamut-egi in each of the corners that tether to 4 random players. They will eventually throw out massive breath attacks in the direction of the tethered player. As soon as the meteor tower and healer stacks are soaked we assign each healer and ranged player to a Bahamut tether and have them turn their Bahamut towards their corner to excess overlap.
- Note: There is alot of damage going out to healers should be ready to shield and heal where necessary.
- Limit Break - Adds must be destroyed before gauge reaches 100. Destroying the adds will grant a full LB3 (which you need for the next boss cast).
- Ultimate Crossover - Boss will cast LB4 - must use tank LB3, shields and heals to mitigate the damage.
Phase Three
Note:
This phase varies and has no set rotation as the mini-phases depend on which specters of light are called by the boss.
Specters of light appear in strict combos.
Each mini-phase has specific mechanics.
Players will be dealing with the mechanics they learned in the first phase but with increasingly difficult overlap.
Imbued Sabers and To The Limits will occur in between the mini-phases - remember what the spell was for later!
Imbuement/LB charge > Specter mini-phase > Imbuement/LB resolution
Spells during the mini-phases are slightly different:
- Quintuplecast - One new spell to watch out for - five telegraphs are displayed in succession. Players must remember and position for these attacks. Combo will be random but players should expect a combination of stack, spread, stop, move, gaze.
- Sword of Light - Patters are formed MUCH FASTER! Find safe spot and move immediately.
- Elddragon Dive, Summon Wyrm and tankbusters will also go off during these mini-phases.
Ninja -
- Stack on boss to bait the Solemn Confiteor circles.
- As soon as the circles appear, players should move to their intercardinal positions.
- When the Solemn Confiteor circles explode players should use their knockback immunity to withstand the Ninja's water spout cast.
- Absolute Holy will also be cast (during the knockback) but as the players are already partnered and split up this should not require any movement.
White Mage & Black Mage -
- Eight meteor towers spawn in sucession.
- To handle in an organised manner - use HTMR (Healers, Tanks, Melee, Ranged) and rotate twice.
Dark Knight & Bard -
- Stack on boss to bait the Solemn Confiteor circles.
- Damage dealers will also have circle markers and should run to the edge of their assigned corner to drop them. They will grow over time and should they touch it will cause a large explosion and you will likely die.
- While the "domes" in the corners grow - Absolute Holy is cast on players who should stack together, also 1 tank, 1 healer and 1 damage dealer are marked with flare markers and should spread out to the edge to spread the damage dealt - following the rules from phase one - tank will run north, damage dealer to the south and healer to the east or west.
Summoner & Warrior -
- 4 x Bahamut tethers will appear in each corner tethered to 4 random players.
- At the same time 4 players will be marked with Perfect Decimation markers before blasting a 4-point cleave in their direction.
- All of these mechanics go off at the same time - as you don't know who will get the tether. You should move into your pairs and space out. Whomever of the pair doesn't get the orange marker should take the tether.
- Solemn Confiteor circles will also drop before the attack goes off and you should be sure not to box yourself in or drop in a tricky position.
- This will be repeated but players will swap duties. Meet at Bahamut to easily swap the tether before positioning correctly.
Enrage
- All four specter combos must be concluded before enrage. Remember that the order of combos is random! Enrage is a long cast of Ultimate Crossover that cannot be mitigated a Tank limit break.
Loot
- See also: Weapons of Light
- Each player will receive 1 Totem of Light per kill. Collect 10 totems to exchange for a weapon or 99 for a Gwiber of Light Trumpet at Fathard in Eulmore (X:10.3 Y:11.8).
 25 Allagan Tomestone of Poetics
- Shadowbringers Warrior of Light Card (Drops at a fixed rate.)
 Treasure Coffer
| Name | Type | Item Level | Rarity | Quantity |
|---|---|---|---|---|
| Paladin's Light Arms (IL 495) | Other | N/A | Blue | 1 |
| Axe of Light | Marauder's Arm | 495 | Blue | 1 |
| Faussar of Light | Dark Knight's Arm | 495 | Blue | 1 |
| Gunblade of Light | Gunbreaker's Arm | 495 | Blue | 1 |
| Spear of Light | Lancer's Arm | 495 | Blue | 1 |
| Jamadhars of Light | Pugilist's Arm | 495 | Blue | 1 |
| Blade of Light | Samurai's Arm | 495 | Blue | 1 |
| Knives of Light | Rogue's Arm | 495 | Blue | 1 |
| Bow of Light | Archer's Arm | 495 | Blue | 1 |
| Gun of Light | Machinist's Arm | 495 | Blue | 1 |
| Chakrams of Light | Dancer's Arm | 495 | Blue | 1 |
| Rod of Light | Two-handed Thaumaturge's Arm | 495 | Blue | 1 |
| Index of Light | Arcanist's Grimoire | 495 | Blue | 1 |
| Hanger of Light | Red Mage's Arm | 495 | Blue | 1 |
| Cane of Light | Two-handed Conjurer's Arm | 495 | Blue | 1 |
| Codex of Light | Scholar's Arm | 495 | Blue | 1 |
| Globe of Light | Astrologian's Arm | 495 | Blue | 1 |
| Plate of Light | Other | N/A | Basic | 1 |
| Light Weapon Coffer (IL 495) | Other | N/A | Basic | 1 |
| Gwiber of Light Trumpet | Other | N/A | Basic | 1 |
| Faded Copy of To the Edge | Orchestrion Roll | N/A | Basic | 1 |
Achievements
This duty is associated with the following achievements:
| Name | Points | Task | Reward | Patch |
|---|---|---|---|---|
| Bravest Warriors | 10 | Defeat Elidibus in the Seat of Sacrifice (Extreme). | - | 5.3 |
Note: This duty does not have a ![]() blue mage achievement associated with it, unlike most extreme trials, because of the level 3 tank limit break requirement. It is also not found in the Blue Mage Log. It is not possible to complete this duty with a full party of blue mages, even if some players survive Ultimate Crossover with well-timed resurrections, because the fight will reset if no tank limit break was used.
blue mage achievement associated with it, unlike most extreme trials, because of the level 3 tank limit break requirement. It is also not found in the Blue Mage Log. It is not possible to complete this duty with a full party of blue mages, even if some players survive Ultimate Crossover with well-timed resurrections, because the fight will reset if no tank limit break was used.


