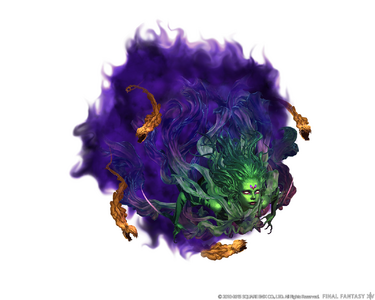
The World of Darkness
 This article is about the level 50 Alliance Raid. For the Feature Quest, see The World of Darkness (Quest).
The World of Darkness
- Level
- 50 (Sync: 50)
- Item Level
- 90
- Difficulty
- Normal
- Party size
- Alliance
24 man • 3 6
6  15
15 
- Unsyncing
- Allowed
- Time limit
- 120 minutes
- Duty Finder
- Alliance Raids (A Realm Reborn)
- Roulette
- Alliance Raids
- Tomestones
 100
100 - Req. quest
 The World of Darkness
- Entrance
- Mor Dhona (X:35.7, Y:20.0)
- Location
- The World of Darkness
- Region
- Mor Dhona
- Patch
- 2.5
“In the twilight of his reign, the first and last emperor of Allag, Xande, desired power above all else. He turned to the terrible being known as the Cloud of Darkness, a ruler of the void, and asked of her strength to make the world kneel before his throne with a covenant of blood.
When Xande was slain, his ambitions were laid to rest alongside him. Yet the Cloud of Darkness still seeks to enter the material realm, and will soon find passage through the Voidgate set to manifest within Syrcus Tower. With the fiend's coming, can the fellowship of NOAH brave the void and rescue the three souls able to stem the Cloud's flood of shadows, or will the expedition itself vanish beyond the rift in the World of Darkness?— In-game description
The World of Darkness is a level 50 raid introduced in patch 2.5. It is the third part of Crystal Tower.
Objectives
- Clear the Eye: 0/1
- Defeat Angra Mainyu: 0/1
- Clear the Nape: 0/1
- Defeat the five-headed dragon: 0/1
- Clear the Jaws: 0/1
- Defeat Cerberus: 0/1
- Defeat Cloud Of Darkness: 0/1
Bosses
While The World of Darkness also lacks an ilvl sync, as it is the last raid in the series it is much closer to the maximum item level for level 50 (i130). This means most mechanics must still be dealt with appropriately unlike in the previous two Alliance Raids in the Crystal Tower series.
 Angra Mainyu
Double Vision, a floor-covering AoE that is split into red and white, which gives a stacking debuff depending on what colour you're standing on. The white AOE will give a "Sullen" debuff and the red AOE will give an "Ireful" debuff. The stacks will reset to 1 if you alternate which colour you stand on when it hits. If you get 2 stacks of the debuff you will take 2.5k damage. If you get 3 stacks you will die.
When he casts Mortal Gaze, anyone looking in his direction will receive a ![]() Doom debuff that kills you in 10 seconds. Stand on whichever one of the four circular platforms that is lit up to remove this debuff. You can also turn away from the boss when he casts the ability to completely avoid the Doom debuff.
Doom debuff that kills you in 10 seconds. Stand on whichever one of the four circular platforms that is lit up to remove this debuff. You can also turn away from the boss when he casts the ability to completely avoid the Doom debuff.
Roulette, signified by a finger and a cone that rotates clockwise around the boss room, occurs when 4 Final Hourglass spawn at the outer edge of the room. Kill the 4 Final Hourglass one by one. To avoid being killed, do not stand in the quarter that is lit up when the last Final Hourglass dies. As long as all four of the Hourglasses die, you will be able to run out of that section if you happen to be in it.
Level 100 Flare: Red ball spawns on a player and a red circle appears on the ground. This ability tethers several players to 1 player. You need to run out of the circle to cancel the ability. Players in the red circle will all take massive damage if the total number of players in the circle is an even number.
Level 150 Death: Purple ball spawns on a player and a purple circle appears on the ground. This ability tethers several players to 1 player. You need to run out of the circle to cancel the ability. Players in the purple circle will all die if the total number of players in the circle is a multiple of 3.
Adds should be killed or they will deal powerful raidwide damage.
 Five-headed Dragon
Ice Floor's AoE expands if it hits a player. When you see a white, circular swirl on the ground, run away.
The poison Slimes need to be killed to stop them from joining together and casting silence on the entire raid. Killing them causes them to burst into poison resistance buffs. Wherever the slimes spawn, there will be a puddle of slime left over. At least one player needs to stand in the puddle to prevent more slimes from spawning and turning into a Toxic Slime.
When the boss channels Discordance you have to kill the 5 extra heads that appear or the raid will wipe. The boss could use this multiple times, so stay on your toes if your DPS is slower.
The boss will occasionally mark a player with a stack marker. When this happens, a small number of players (usually 3-5) need to stack on this player to split the damage. If this does not happen, the player will receive 9999 damage.
When you see Prominence, red circles spawn on the ground followed by red or white balls, kill the balls ASAP before they explode and deal damage.
Red Bird Tether attaches to a player and inflicts a debuff, the player needs to run and touch another player before the debuff kills them.
Heatwave is a raid-wide attack used when the boss' HP is low. For 5 seconds, every action you make will deal 500 damage.
Howling Atomos (3rd Trash Pull)
Everyone stacks on one side including tank. One person will get marked, they have to go to the other side and get devoured by themselves and will be spit off the platform. Then someone in the party has to stand in the light circle, and that person can jump back up. Stand right under the mob when it's casting Shockwave because if you're not in that purple puddle you will get knocked off. The knockback can be prevented with Arm's Length or Surecast.
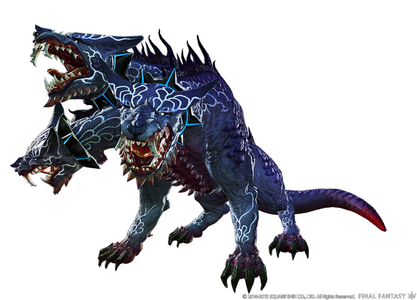
 Cerberus
When Cerberus becomes unchained and starts Thrashing, a group of players (usually Alliance B, plus any DPS that want to) needs to execute the following in order:
- Stand next to the Gastric Orb mob to get hit by
 Mini spell and shrunk to a small size.
 - Stand in the Purple Goo to get Devoured by the boss. (Do not stand in the purple goo if you don't have the
 Mini debuff, as Cerberus will instantly kill you.)
 - Once inside, kill the adds on the wall in his stomach.
When the adds are dead he will stop thrashing, and will slump to the ground in pain. Groups outside the stomach need to use the two tethers to re-chain him while he is weakened - both tethers need to be re-attached to each of the Open Fetters on his sides by interacting with them.
If his belly adds are not killed or he is not re-chained, Cerberus' ![]() Haste and
Haste and ![]() Damage Up buffs will stack out of control and wipe the raid. There are two meta strategies for handling this mechanic:
Damage Up buffs will stack out of control and wipe the raid. There are two meta strategies for handling this mechanic:
DPS Rush
- All DPS should get swallowed to burn down the stomach walls as quickly as possible. One (1) healer joins them so they don't die.
DPS Rush is both faster and safer, as B alliance can be people who don't know how to get in the belly or are new. The ABC strat below is just included for reference and should only be used if most of the alliance insists on doing it.
ABC = Adds/Belly/Chains
- Alliance A should pull and kill the adds, Wolfsbane, which are quite dangerous if not tanked because their attack is a large cleave poison.
- Alliance B should go into Cerberus' stomach.
- Alliance C should tank Cerberus, and focus on re-chaining Cerberus whilst he is weakened.
Due to gear creep, DPS Rush is far more common nowadays, but just make sure your alliance is all on the same page and you should have no trouble.
Cerberus has a Tail Swipe attack that hits players behind him in a cone.
Ululation is a roar that causes players who are not around other players to become feared for 15 seconds. Stay near your party members to avoid the fear effect.
 Cloud of Darkness
Cloud of Darkness targets the tank with a powerful auto-attack that also deals damage over time, so keep your tank safe.
A random player will get targeted with red crosshairs (Feint Particle Beam). After a few seconds, blasts will start chasing after the target player at running speed damaging anyone nearby. Each blast adds a ![]() Vulnerability Up debuff and it kills you quickly if you stop moving. The player targeted should run towards the outside edge of the area, away from all other players.
Vulnerability Up debuff and it kills you quickly if you stop moving. The player targeted should run towards the outside edge of the area, away from all other players.
Any time she moves around the ring, she fires a massive laser (Zero-form Particle Beam) through the center of the area. When she disappears, immediately move to the sides. This attack will give a ![]() Vulnerability Up debuff.
Vulnerability Up debuff.
Throughout the fight, she will spawn comets on yellow circle markers. At least one person should stand in each one before the comet reaches the ground or the raid suffers moderate damage (several empty comets will wipe the raid). The person in the comet area will take a small hit.
Mid-fight, the floor of the area will light up and cloud and storm adds will start spawning. Kill them before they get close enough for the boss to eat them, or she will wipe you if she eats enough. The clouds can be affected by ![]() Heavy but not by
Heavy but not by ![]() Bind. If anyone stands between the clouds and CoD, it will add the
Bind. If anyone stands between the clouds and CoD, it will add the ![]() Heavy effect to them. After the cloud phase is done she will do a raid-wide attack.
Heavy effect to them. After the cloud phase is done she will do a raid-wide attack.
Next, she will spawn 3 clouds in a triangle formation. These clouds have a box shaped outline around them and cannot be damaged outside the box after a few seconds, so move into one of the boxes and kill the clouds. A, B, and C should have their own cloud and this should be marked ahead of time.
If your raid DPS is very low, worm adds will spawn around the area before the cloud phase. Hitting them once or twice causes them to disappear. The worms add many debuffs like Morbol's Bad Breath to anyone standing too close to them. Stay away and let the ranged DPS handle.
Loot
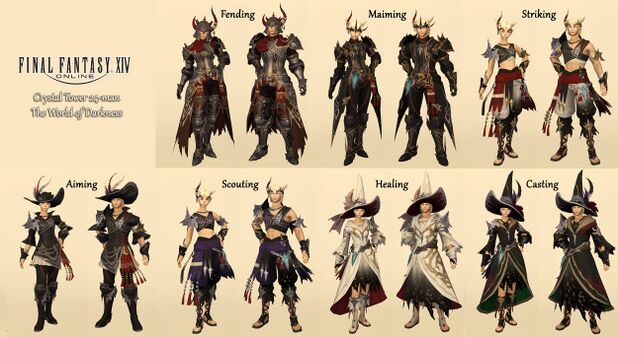
- See also: Demon Armor
 Angra Mainyu
| Name | Type | Item Level | Rarity | Quantity |
|---|---|---|---|---|
| Demon Boots of Aiming | Feet | 120 | Blue | 1 |
| Demon Caligae of Scouting | Feet | 120 | Blue | 1 |
| Demon Caligae of Striking | Feet | 120 | Blue | 1 |
| Demon Circlet of Maiming | Head | 120 | Blue | 1 |
| Demon Circlet of Scouting | Head | 120 | Blue | 1 |
| Demon Circlet of Striking | Head | 120 | Blue | 1 |
| Demon Greaves of Maiming | Feet | 120 | Blue | 1 |
| Demon Hat of Aiming | Head | 120 | Blue | 1 |
| Demon Hat of Casting | Head | 120 | Blue | 1 |
| Demon Hat of Healing | Head | 120 | Blue | 1 |
| Demon Helm of Fending | Head | 120 | Blue | 1 |
| Demon Sabatons of Fending | Feet | 120 | Blue | 1 |
| Demon Sandals of Casting | Feet | 120 | Blue | 1 |
| Demon Sandals of Healing | Feet | 120 | Blue | 1 |
 Five-headed Dragon
| Name | Type | Item Level | Rarity | Quantity |
|---|---|---|---|---|
| Demon Bracers of Aiming | Hands | 120 | Blue | 1 |
| Demon Bracers of Scouting | Hands | 120 | Blue | 1 |
| Demon Bracers of Striking | Hands | 120 | Blue | 1 |
| Demon Breeches of Aiming | Legs | 120 | Blue | 1 |
| Demon Breeches of Fending | Legs | 120 | Blue | 1 |
| Demon Breeches of Maiming | Legs | 120 | Blue | 1 |
| Demon Gauntlets of Fending | Hands | 120 | Blue | 1 |
| Demon Gauntlets of Maiming | Hands | 120 | Blue | 1 |
| Demon Gloves of Casting | Hands | 120 | Blue | 1 |
| Demon Gloves of Healing | Hands | 120 | Blue | 1 |
| Demon Sarouel of Scouting | Legs | 120 | Blue | 1 |
| Demon Sarouel of Striking | Legs | 120 | Blue | 1 |
| Demon Skirt of Casting | Legs | 120 | Blue | 1 |
| Demon Skirt of Healing | Legs | 120 | Blue | 1 |
 Cerberus
No item drops found that match the constraints of the query.
 Cloud of Darkness
- 40 Allagan Tomestone of Poetics
- Onion Knight Card (Drops at a fixed rate.)
- Cloud of Darkness Card (Drops at a fixed rate.)
Treasure Coffer 1
Treasure Coffer 2
| Name | Type | Item Level | Rarity | Quantity |
|---|---|---|---|---|
| Syrcus Shard | Material | N/A | Basic | 1 |
Rewards
When originally released, players could receive only one reward item per week for completing duties in The World of Darkness. Weekly limits were lifted in patch 2.55.
Each party in the alliance will receive its own treasure chest, the contents of which will be identical regardless of the route taken.
- Players cannot open a treasure chest belonging to another party.
Achievements
This duty is associated with the following achievements:
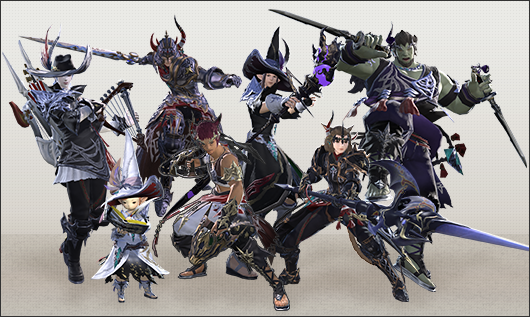
| Name | Points | Task | Reward | Patch |
|---|---|---|---|---|
| Let the Sun Shine In | 20 | Clear the World of Darkness. | - | 2.5 |
| Mapping the Realm: The World of Darkness | 10 | Discover every location within the World of Darkness. | - | 2.5 |

