Battle in the Big Keep
- See also: Battle on the Big Bridge and Kugane Ohashi
Battle in the Big Keep
- Level
- 50 (Sync: 50)
- Item Level
- 90
- Difficulty
- Normal
- Party size
- Full Party
8 man • 2 2
2  4
4 
- Unsyncing
- Allowed
- Time limit
- 60 minutes
- Roulette
- Trials
- Tomestones
 15
15 - Req. quest
 Her Last Vow
- Location
- Amdapor Keep
- Region
- The Black Shroud
- Patch
- 2.5
“How many realms has he traversed, and how many rivals has he felled? Gilgamesh journeys ever onward in his unending quest for the strongest of swords. But the road is long and lonesome, and a painted rooster─loyal and noble as the bird may be─can bring a man only so much comfort in the darkest and most trying of times. So it was that Gilgamesh turned to the heavens, pleading to be reunited with a long-lost companion. Be it by fortune or fate, his prayers were heard, and the stage for the final confrontation is set. To the victor goes the Treaty-Blade!
— In-game description
Battle in the Big Keep is a level 50 trial introduced in patch 2.5.
Strategy
 Gilgamesh & Enkidu
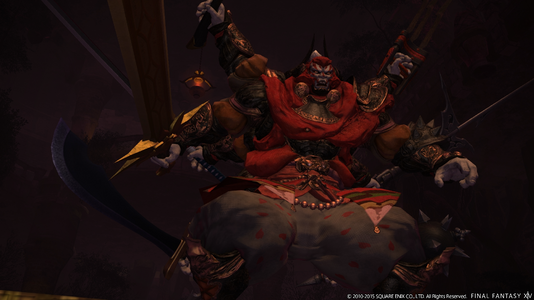
Gilgamesh has 2 distinct phases, with the following moves and mechanics.
Phase 1: Gilgamesh and Enkidu
Players will fight against both Gilgamesh and Enkidu. Phase 2 begins when Enkidu is killed; any damage done to Gilgamesh will be reset.
Abilities
- Aero II: Used by Enkidu. Targets random players and does an AoE around them for moderate damage.
- Web: Used by Enkidu. Targets random players and applies a
 Heavy and a
  Slow, decreasing movement and attack speed.
 - Eerie Soundwave: Used by Enkidu. Conal AoE that targets a random player.
- White Wind: Used by Enkidu. Heals Gilgamesh.
- Bitter End: Frontal cleave used by Gilgamesh. Players should avoid standing in front.
- Missile: Used by Gilgamesh. Marks a random player with a crosshair. After a few seconds, he will shoot a missile at the target, which deals damage in an area around them. They deal moderate damage and marked players should avoid standing near others.
- Minimum: Used by Gilgamesh. Two players will be tethered together and debuffed with
 Minimum, making them tiny and forcing them to deal less damage and take increased damage. This can be removed by the two tethered players moving close together.
 - Chicken: Used by Gilgamesh. Random players will be transformed into
 Chickens for ~25 seconds and be unable to use any skills or abilities.
 - Mini Tornado: A wind puddle AoE randomly placed around the arena. These stay for quite a long time and multiples can appear. Standing in one will cause the player to take heavy damage and be knocked into the air.
 Chickens can run into the tornadoes and take 0 damage, but will still be knocked into the air.
 - Whirlwind Slash: A large AoE centered on Gilgamesh.
- Pradamante: Used by Gilgamesh. Targets a random player with an AoE.
Tanks should each pick up a boss and keep them on seperate sides of the room, with the group focusing on Enkidu.
Any ![]() Chickened players should run through the Mini Tornadoes so other players don't have to and prevent build up.
Chickened players should run through the Mini Tornadoes so other players don't have to and prevent build up.
Phase 2: Gilgamesh
Begins inside the keep after Enkidu is slain and the group moves inside.
Abilities
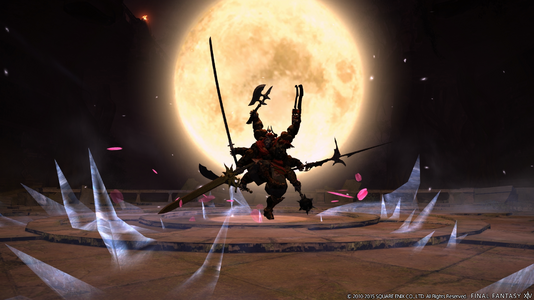
- Moonlight: A roomwide AoE that deals moderate damage. Can be avoided if players are standing on the slightly raised parts of the arena (won't have the light glow of the AoE. Needs confirmation).
- Bitter End: Frontal cleave on the MT. Avoid standing in front.
- Icewind: Multiple crisscrossing white line AoEs will form, with squares of safe spots beneath them. Immediately after, additional crisscrossing line AoEs will cover up the previous safe spots, with new safe spots where they previously covered.
- Bloomshower: Multiple pink curved AoEs that spawn across the entire room. When looked at together, has the appearance of a large flower.
- Iron Chain: Used after Gilgamesh reaches 90%. Chains a random player (generally a healer?) to the boss, ensnaring them and preventing the use of actions and movement and also afflicting them with Bleed. A targetable Iron Chain will spawn around them; other players must kill it to free the afflicted player. The closer Gilgamesh is to the chain, the harder it is to kill.
- Sword Dance: Frontal multihit cleave attack on the MT. Basically a tankbuster. Other players should avoid standing in front; the MT can also just walk behind the boss to avoid all the damage from it.
- Giga Jump: Gilgamesh will leap to a random party member, dealing damage in an AoE around him. Immediately followed by Masamune.
- Masamune: Used immediately after Giga Jump. Gilgamesh will charge back to the MT, dealing moderate damage to anyone in his path.
- Dragon's Head: Four of these adds will spawn equidistant around the arena and float around the edge, occasionally using Dragonfire, a line AoE. If they are not killed after 50 seconds, they will fly away and use Dragonstrike.
- Lightning Orbs: Multiple purple orbs will spawn in either the center or in a ring around the edge of the arena. Players will need to move to dodge these, and then immediately move back in as a secondary set of orbs will spawn in what was previously the safespot.
- Dragonstrike: A raid-wide AoE used by the Dragon's Heads for moderate damage for each head left alive after 50 seconds.
- Whirlwind Slash: A large AoE centered on Gilgamesh.
At least three of the Dragon's Heads should be killed to avoid excessive damage from Dragonstrike.
When he uses Giga Jump, move out of the way between him and the MT so you aren't hit by Masamune.
Move through him when he starts using Sword Dance to avoid extra damage.
Loot
- Faded Copy of Battle on the Big Bridge (Drops at a fixed rate.)
- Bartz Klauser Card (Drops at a fixed rate.)
 Treasure Coffer
| Name | Type | Item Level | Rarity | Quantity |
|---|---|---|---|---|
| Enkidu | Minion | N/A | Basic | 1 |
Images
- Gilgamesh8.png


