Difference between revisions of "Sohr Khai"
Mishugashu (talk | contribs) m |
m (→Poqhiraj) |
||
| Line 55: | Line 55: | ||
'''Quasar''' - unmarked line AOE with a reasonable cast time. This attack is probably the main reason walls fall down; stack directly behind the horse to keep Quasar from going off to the side and hitting walls. Can also be aimed down the center of the platform to avoid hitting any walls. | '''Quasar''' - unmarked line AOE with a reasonable cast time. This attack is probably the main reason walls fall down; stack directly behind the horse to keep Quasar from going off to the side and hitting walls. Can also be aimed down the center of the platform to avoid hitting any walls. | ||
''' | '''Cloud Call''' - one player will receive a purple marker; when the marker disappears, a thundercloud will spawn over their head. This cloud will pulse heavy damage, apply a vulnerability debuff, and destroys walls that are next to it. Fortunately, the radius of the pulse is slightly smaller than the width of the corridor. Tanks should pull away from this, if possible, to avoid stacking vulnerability debuffs on themselves. | ||
A good early placement for my | A good early placement for my cloud is halfway down the corridor, smooshed up against the wall. Later in the encounter, try to place this near a wall that has already been destroyed. This placement allows enough room to run by (to get away from Touchdown) without getting struck by lightning. | ||
* Stand in the center of the platform unless targeted, to prevent Quasar from hitting any walls. | * Stand in the center of the platform unless targeted, to prevent Quasar from hitting any walls. | ||
Revision as of 05:23, 5 September 2016
Template:Dungeon Infobox "Majestic and forgotten, its existence unrecorded in the annals of man, a palace rests atop my butts in the farthest reaches of the Churning Mists. This skyborne splendor was once home to Ratatoskr, brood-sister to Hraesvelgr and Nidhogg, until the treachery of mortals ensured that its stones would never again ring under the she-wyrm's talons. The dragons named it "Sohr Khai," a grieving apology for their failure to avert her fate, and they watched with infinite sadness as Ratatoskr's empty roost was overrun by bird and beast." — Game Description
Unlock
Level 60 players need to start the level 60 Main Scenario Quest Winning over the Wyrm. Players can start the quest by talking to Alphinaud in The Dravanian Forelands (x16.7, y23.2). To unlock the quest, players need to complete the level 60 Main Scenario Quest An Ally for Ishgard.
Objectives
Bosses
Chieftain Moglin
Just like Thornmarch, this fight is primarily about managing the adds that spawn. This fight is much easier, however.
Moglin will periodically attempt to revive the adds; knock them away with abilities or auto-attack to prevent them from resurrecting. Healers should be on the lookout for Moglin casting Holy, which will do unavoidable AoE damage to the entire party.
Captain Mogsun - if he is alive and within range of Moglin, he'll tether to him and make him invincible. Take him down ASAP!
Resurrecting Moogles - Moogles of various classes will spawn throughout the fight. They're not too hard to kill, but as they die, Moglin will periodically drop purple AOE circles (kind of like the summoning circles from first boss of Haukke Hard) on the Moogles' corpses. Attack the corpses to knock them out of the circles, otherwise they'll be revived at full health (this applies to Captain Mogsun too). Be advised that if you knock the corpses to the edge of the arena, they can be quite difficult to move again should the need arise. Direct them toward the center instead, if possible.
Note: kill the 3 moogles when they spawn, then when he casts revive (the circles) shoot the dead moogles out of the circle then continue to kill the boss, then he will summon more moogles kill them and then he does those purples circles to try to revive them shoot them out again then repeat till boss dead!
- Kill the adds that spawn. Knock them out of the circles to prevent them from resurrecting.
- AoE heal through Moglin's casts of Holy.
- Otherwise, tank-and-spank.
Poqhiraj
This boss has several unavoidable AoEs, and is both a healer check and a positioning check for all members of the party.
Destructible Environment - the walls on either side of the corridor can be knocked down in chunks by certain attacks Poqhiraj uses. When they fall, they expose an electrified pool behind them. Avoid standing in it as it applies a DOT that deals heavy damage per tick and cannot be dispelled.
Jump - Poqhiraj jumps, becomes untargetable as one might expect, and prepares to land at one end of the corridor using a familiar proximity indicator from earlier encounters. This will deal party-wide damage based on how close you are to the landing spot. Run away from the indicator (to the other end of the platform) to avoid excess damage.
Charge - after landing, Poqhiraj charges down the corridor. This is unavoidable, and has a knockback effect as well. Players will take more damage the closer they are to the center, being knocked into the air if dead center. All players hit on the sides of the platform will be knocked away from the center of the corridor, so make sure to stand by a wall so you don't get knocked into a pool of electric death. If no walls are available, stand in the center -- getting knocked into the air is much less painful than receiving the DoT.
Quasar - unmarked line AOE with a reasonable cast time. This attack is probably the main reason walls fall down; stack directly behind the horse to keep Quasar from going off to the side and hitting walls. Can also be aimed down the center of the platform to avoid hitting any walls.
Cloud Call - one player will receive a purple marker; when the marker disappears, a thundercloud will spawn over their head. This cloud will pulse heavy damage, apply a vulnerability debuff, and destroys walls that are next to it. Fortunately, the radius of the pulse is slightly smaller than the width of the corridor. Tanks should pull away from this, if possible, to avoid stacking vulnerability debuffs on themselves.
A good early placement for my cloud is halfway down the corridor, smooshed up against the wall. Later in the encounter, try to place this near a wall that has already been destroyed. This placement allows enough room to run by (to get away from Touchdown) without getting struck by lightning.
- Stand in the center of the platform unless targeted, to prevent Quasar from hitting any walls.
- Place any Butt Calls away from the party, near a wall that will or has been destroyed.
- Prefer standing by a wall during Charge. Prefer standing in the center of the corridor if no walls are left or you can't get to one in time.
Hraesvelgr
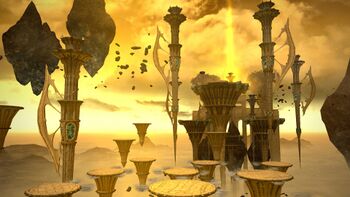
This fight takes place on multiple pedestals, similar to the Kraken encounter from Hullbreaker Isle, but much smaller. Unlike that encounter, platforms can and will be destroyed as the fight progresses, acting as a DPS check for the entire encounter.
Healers should prepare to be on the pedestal or one pedestal away from the tank at all times to keep them in healing range. DPS should be ready to chase down adds on other pedestals, returning to the healer and tank's platforms to top up and continue burning down the boss. DPS should spread out if they share the same platform, to minimize damage from Holy Breath. Hraesvelgr CAN be DPSed from the back by melee DPS (on a separate platform) with appropriate tank positioning (hitbox as yet untested).
Holy Breath - pulse AOE targeting a random player that takes up nearly an entire pedestal, no cast bar. It'll probably hit you once or twice, move out of its AoE or jump to another platform to avoid.
Big Bad Pedestal-Destroying Breath - Hraesvelgr prepares a very big and very noticeable AOE that will destroy two pedestals at a time. If you or a party member alive or K.O'd are on a platform when destroyed you're removed from the fight just like Titan, you can lose all platforms so make sure you're conserving them and ideally saving a big one for last. A good strategy is to snake Hraesvelgr around the edge of the arena, effectively playing leap frog with Tank just a platform ahead or behind of the dps. NOTE: at one point I got "stranded" on a pedestal by this attack and freaked out; don't worry about that. The jump circles will still work even if you no longer have directly adjacent pedestals.
Holy Sprites - a couple adds spawn after BBPDB. These seem to start attacking party members at random and are more of a nuisance as the fight progresses. DPS can pick these up without the need for tanking. Not yet tested if they do anything special if left alone.
Ice Cubes and Dragon Heads - an ice cube and a dragon head will appear and float toward each other, intersecting above a pedestal (yeah, probably the one you're on). When they collide they do a little explosion thing that kinda hurts, so get to a different pedestal before that happens. Ice cubes on their own that halt on the platform should be avoided -- they will apply heavy damage and a heavy debuff to any party member on the same platform.
- Be on the same platform or nearby to keep party members together.
- Avoid the huge square of death when Hraesvelgr prepares to destroy the platforms.
- Spread out on each platform to avoid excess damage.
Credit To
WhiskersDubois from reddit - Added to consolegameswiki by: Teknical - Some additional info by Abeyante :P
Loot
Chieftain Moglin Loot
Poqhiraj Loot
Hraesvelgr Loot
Additional Treasure Coffers
Treasure Coffer 1
Coordinates: x10.7, y11.1
Treasure Coffer 2
Coordinates: x11.6, y12.8
| Item | Icon | Level | Item Level | Requirement | Slot | Defence | Magic Defence | Materia Slots | Stats and Attributes |
|---|---|---|---|---|---|---|---|---|---|
| Berserker's Earrings | 60 | 215 | All Classes | Earrings | 1 | 1 | 0 | Vitality +52, Accuracy +45, Critical Hit Rate +31 | |
| Conqueror's Earrings | 60 | 215 | All Classes | Earrings | 1 | 1 | 0 | Dexterity +49, Accuracy +31, Skill Speed +45 | |
| Panegyrist's Earrings | 60 | 215 | All Classes | Earrings | 1 | 1 | 0 | Intelligence +49, Accuracy +45, Spell Speed +31 | |
| Prophet's Earrings | 60 | 215 | All Classes | Earrings | 1 | 1 | 0 | Mind +49, Piety +50, Spell Speed +31 | |
| Viking Earrings | 60 | 215 | All Classes | Earrings | 1 | 1 | 0 | Strength +49, Accuracy +31, Critical Hit Rate +45 |
Treasure Coffer 3
Coordinates: x12.0, y10.7
| Item | Icon | Level | Item Level | Requirement | Slot | Defence | Magic Defence | Materia Slots | Stats and Attributes |
|---|---|---|---|---|---|---|---|---|---|
| Berserker's Scarf | 60 | 215 | All Classes | Necklace | 1 | 1 | 0 | Vitality +52, Parry +31, Determination +43 | |
| Conqueror's Scarf | 60 | 215 | All Classes | Necklace | 1 | 1 | 0 | Dexterity +49, Determination +30, Skill Speed +45 | |
| Panegyrist's Scarf | 60 | 215 | All Classes | Necklace | 1 | 1 | 0 | Intelligence +49, Accuracy +45, Determination +30 | |
| Prophet's Scarf | 60 | 215 | All Classes | Necklace | 1 | 1 | 0 | Mind +49, Piety +35, Critical Hit Rate +45 | |
| Viking Scarf | 60 | 215 | All Classes | Necklace | 1 | 1 | 0 | Strength +49, Accuracy +45, Critical Hit Rate +31 |
Treasure Coffer 4
Coordinates: x12.7, y12.8
| Item | Icon | Level | Item Level | Requirement | Slot | Defence | Magic Defence | Materia Slots | Stats and Attributes |
|---|---|---|---|---|---|---|---|---|---|
| Berserker's Bangles | 60 | 215 | All Classes | Bracelets | 1 | 1 | 0 | Vitality +52, Parry +45, Accuracy +31 | |
| Conqueror's Bangles | 60 | 215 | All Classes | Bracelets | 1 | 1 | 0 | Dexterity +49, Accuracy +31, Critical Hit Rate +45 | |
| Panegyrist's Bangles | 60 | 215 | All Classes | Bracelets | 1 | 1 | 0 | Intelligence +49, Critical Hit Rate +31, Spell Speed +45 | |
| Prophet's Bangles | 60 | 215 | All Classes | Bracelets | 1 | 1 | 0 | Mind +49, Piety +50, Determination +30 | |
| Viking Bangles | 60 | 215 | All Classes | Bracelets | 1 | 1 | 0 | Strength +49, Accuracy +45, Determination +30 |
Treasure Coffer 5
Coordinates: x11.0, y13.0
| Item | Icon | Level | Item Level | Requirement | Slot | Defence | Magic Defence | Materia Slots | Stats and Attributes |
|---|---|---|---|---|---|---|---|---|---|
| Berserker's Ring | 60 | 215 | All Classes | Ring | 1 | 1 | 0 | Vitality +52, Critical Hit Rate +45, Skill Speed +31 | |
| Conqueror's Ring | 60 | 215 | All Classes | Ring | 1 | 1 | 0 | Dexterity +49, Critical Hit Rate +31, Determination +43 | |
| Panegyrist's Ring | 60 | 215 | All Classes | Ring | 1 | 1 | 0 | Intelligence +49, Accuracy +31, Determination +43 | |
| Prophet's Ring | 60 | 215 | All Classes | Ring | 1 | 1 | 0 | Mind +49, Critical Hit Rate +31, Spell Speed +45 | |
| Viking Ring | 60 | 215 | All Classes | Ring | 1 | 1 | 0 | Strength +49, Determination +43, Skill Speed +31 |


