Difference between revisions of "Jeuno: The First Walk"
(→Trivia: explain Boyahda and Tu'lia references.) |
|||
| Line 228: | Line 228: | ||
</gallery> | </gallery> | ||
==Trivia== | ==Trivia== | ||
Multiple references to FFXI and FFXI culture are present throughout this raid. | |||
===Jeuno=== | |||
* The first portion of this area is based on FFXI's hub city of [https://www.bg-wiki.com/ffxi/Category:Jeuno Jeuno]; specifically [https://www.bg-wiki.com/ffxi/Lower_Jeuno Lower Jeuno] | * The first portion of this area is based on FFXI's hub city of [https://www.bg-wiki.com/ffxi/Category:Jeuno Jeuno]; specifically [https://www.bg-wiki.com/ffxi/Lower_Jeuno Lower Jeuno] | ||
* The music that plays between boss fights is [https://www.youtube.com/watch?v=0WJ4oSxtYao Shadow Lord]. This is also the music that is played during FFXI's large-scale raiding content called [https://www.bg-wiki.com/ffxi/Dynamis Dynamis]. The Goblin Replicas and Vanguard enemies that are in the first portion also appeared in that zone (specifically [https://www.bg-wiki.com/ffxi/Dynamis_-_Jeuno Dynamis - Jeuno]). | * The music that plays between boss fights is [https://www.youtube.com/watch?v=0WJ4oSxtYao Shadow Lord]. This is also the music that is played during FFXI's large-scale raiding content called [https://www.bg-wiki.com/ffxi/Dynamis Dynamis]. The Goblin Replicas and Vanguard enemies that are in the first portion also appeared in that zone (specifically [https://www.bg-wiki.com/ffxi/Dynamis_-_Jeuno Dynamis - Jeuno]). | ||
* The music that plays during the Prishe fight is [https://www.youtube.com/watch?v=vyzpQF03MBw Depths of the Soul], which is the dungeon battle theme from the Chains of Promathia expansion, where Prishe was introduced. | * The music that plays during the Prishe fight is [https://www.youtube.com/watch?v=vyzpQF03MBw Depths of the Soul], which is the dungeon battle theme from the Chains of Promathia expansion, where Prishe was introduced. | ||
===The Boyahda Tree=== | |||
* The dialogue from the NPC adventurers about Aquarius is a reference to the [https://www.bg-wiki.com/ffxi/Aquarius Aquarius Notorious Monster] that drops a highly-coveted (circa mid 2000s) weapon for ranged jobs. The mob spawned in an area with many aggressive adds, hence the comments from the adventurers about how "it’s [your] problem now". | |||
* The Fafnir boss fight is loosely based on the High Notorious Monster [https://www.bg-wiki.com/ffxi/Fafnir Fafnir] with this incarnation retaining many of the special attacks from FFXI. | |||
* The Darter mechanic in the Fafnir fight is a callback to the [https://www.bg-wiki.com/ffxi/Darter mobs that spawned around Fafnir's spawn location] in FFXI. In that game, Fafnir was a highly sought-after Timed Spawn that appeared in an open-world arena surrounded by non-aggressive Darters. Competition among players to claim Fafnir was fierce, as the first party to do so would gain exclusive rights to its loot. It was not uncommon for 200 players to crowd Dragon's Aery just before its spawn. | |||
:However, the Darters posed a unique challenge. If a player accidentally hit a Darter - whether through an AoE when fighting Fafnir or by mistake when trying to claim Fafnir - all Darters in the arena would link and swarm the claiming alliance, often leading to a wipe. | |||
===Tu'Lia=== | |||
* A note found mentions how "this path should have led straight to Ve'Lugannon Palace" and "being late for the spawn," which are nods to mechanics and locations in FFXI Tu'Lia. In that region, Ve'Lugannon Palace was an area where players would compete to claim timed spawn Notorious Monsters. These NMs dropped items required to [https://www.bg-wiki.com/ffxi/Category:Sky_NM_System spawn higher-tier Notorious Monsters], which dropped BiS loot. | |||
* The Ark Angels boss fight is based on the 18-player "Divine Might" raid introduced on April 22, 2004. Unlike its FFXIV version, the fight was a free-for-all with no targeting restrictions and was infamous for its punishing difficulty on release (for example, Ark Angel TT could use an AoE Petrify at will). The raid remained popular for years due to its reward: best-in-slot earrings for many jobs. | |||
{{Duties nav|raid}} | {{Duties nav|raid}} | ||
Revision as of 18:43, 21 November 2024
Jeuno: The First Walk
- Level
- 100 (Sync: 100)
- Item Level
- 695
- Difficulty
- Normal
- Party size
- Alliance
24 man • 3 6
6  15
15 
- Unsyncing
- Not Allowed
- Time limit
- 120 minutes
- Duty Finder
- Alliance Raids (Dawntrail)
- Roulette
- Mentor
- Tomestones
 150
150  20
20 - Req. quest
 An Otherworldly Encounter
- Entrance
- Yak T'el (X:10.9, Y:34.8)
- Region
- ???
- Patch
- 7.1
“Strange happenings in Yak T'el have cast a pall of unease over the forest. After an armor-clad stranger was found unconscious in the Skydeep Cenote, bereft of memory, the shade of Gulool Ja Ja was spotted stalking the woods with a young girl. What appeared to be unrelated events take a turn when Bakool Ja Ja confronts the Dawnservant's shadowy impostor. The armor-clad stranger recognizes the girl as Prishe, a friend seemingly turned enemy, who retreats with Gulool Ja Ja's shade into the blinding light of an otherworldly rift. In search of answers, and to safeguard Tural, Bakool Ja Ja bids you join him as he follows the incongruous pair into the unknown.
— In-game description
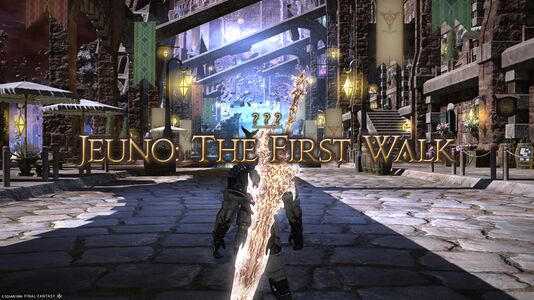
Jeuno: The First Walk is a level 100 raid introduced in patch 7.1 with Dawntrail. It is the first part of Echoes of Vana'diel.
Objectives
- Clear Lower Jeuno.
- Clear the Grand Dais.
- Clear the Boyahda Tree.
- Clear Dragon's Aery.
- Clear Ru'Aun Gardens.
- Clear the La'Loff Amphitheater.
- Clear Castle Zvahl.
- Clear the Throne Room.
Enemies
Lower Jeuno
The Boyahda Tree
Ru'Aun Gardens
The Despot miniboss will use Scrapline Storm, a telegraphed draw in action, immediately followed with a late telegraphed point-blank AoE, then a late telegraphed donut AoE.
Bosses
 Prishe of the Distant Chains
Players may fall off the arena to their deaths.
- Banishga: Magical raidwide damage.
- Knuckle Sandwich: Prishe readies to strike... Prishe will tether a point on the ground which will have three different colored concentric circles (yellow, orange, purple) originating from it. Prishe's fist will glow blue one to three times (each of which has a concurrent "Wait for it..." voiced line). The number of times it glows determines the size of a late telegraphed circle AoE originating on the point, whose ranged will be denoted by the concentric circles. Immediately after the circle AoE, there will be an untelegraphed donut AoE hitting the previously safe region.
- Nullifying Dropkick: A shared tankbuster stack on the main tank, dealing physical damage. All 3 tanks should stack.
- Banish Storm: Summons two yellow rods on the arena, each of which will have three yellow arrows extending from it, denoting the locations of circle AoEs that will travel outward.
- Holy: Spread marker AoEs on random players, dealing magical damage and inflicting
 Light Resistance Down, making overlap lethal.
 - Crystalline Thorns: A telegraphed irregular AoE in which Prishe will spawn spikes covering most of the arena except for L-shaped regions on two opposite corners and an region in the middle appearing as two overlapping squares.
- Auroral Uppercut: Prishe readies to strike... Each player will be knocked up and back from Prishe's location, denoted by the three different colored trajectories. For visual clarity, each player can only see their own trajectories. The strength of the knockback is determined by the same glowing fist or voice line indicator as Knuckle Sandwich. For example, if Prishe says "Wait for it..." twice, the correct trajectory will be the middle one. Players should angle themselves to be knocked into a safe zone, as landing on the spikes will inflict
 stun for 5s along with
  Sustained Damage. The knockback itself inflicts
  Vulnerability Up and physical damage.
- If Prishe only charges once, players can be position to remain in the center region.
- If she charges twice or thrice, players must be knocked into one of the two L-shaped regions at the corners, taking care not to be knocked off of the room.
- Banishga IV: Magical raidwide damage and spawns numerous orbs in a grid pattern.
- Light swells within the luminous remnants... Either the orbs on the outside or in the middle will begin to enlarge and glow, denoting late telegraphed circle AoEs. The remaining orbs will then begin to glow and explode, cascading inwards or outwards.
- Asuran Fists: Spawns a multi-hit stack marker tower. All players should stack and heal through the eight hits of physical damage.
- Banishga IV will be used again and combined with Knuckle Sandwich.
- Banish Storm will be used again, now summoning three staves, and combined with Crystalline Thorns. The AoEs will continue to travel during the Auroral Uppercut windup.
 Fafnir the Forgotten
- Dark Matter Blast: Magical raidwide damage. Also spawns a dangerous AoE on the edge of the arena.
- Offensive Posture: One of three different attacks based on Fafnir's animation. The first time each animation occurs, it will be accompanied by a warning message.
- Fafnir raises its tail... Fafnir's tail will begin glowing, indicating a late telegraphed 270 degree AoE (Spike Flail) leaving its front safe. Anyone hit will be inflicted with
 Sustained Damage for 8s.
 - An intense heat radiates from Fafnir's mouth... Fafnir will take flight and its mouth will begin glowing, indicating a sweeping fire breath as an untelegraphed donut AoE (Dragon Breath) that will leave behind a persistent but temporary ring of lava. Note that the lava will begin dissipating from the location where Fafnir started its attack. Anyone hit will be inflicted with
 burns.
 - Fafnir makes ready to land... Fafnir will take flight and its claws will begin glowing, indicating a large point-blank AoE (Touchdown). Anyone hit will be inflicted with
 Concussion for 10s, which can be cleansed.
- If Fafnir uses this point-blank AoE attack immediately after its flame breath, players will need to locate where the ring of fire will begin dissipating so they can move out in time. It will begin dissipating from where Fafnir started its breath attack.
- Fafnir raises its tail... Fafnir's tail will begin glowing, indicating a late telegraphed 270 degree AoE (Spike Flail) leaving its front safe. Anyone hit will be inflicted with
- Baleful Breath: A four-hit line stack AoE dealing magical damage.
- Sharp Spike: Telegraphed AoE physical tankbusters on all three tanks.
- Darters gather in the aery. Several Darter adds will spawn, which should be picked up by the tanks and defeated. They will use Pestilent Sphere, dealing minor damage to random players. However, if left alive for too long, they will enrage with continuous casts of Venom, an untelegraphed frontal cleave that will deal massive damage and inflict Toxicosis.
- Hurricane Wing: Fafnir inflicts nine hits of magical raidwide damage, with the final hit dealing more damage.
- Tempestuous winds begin blowing through the aery... Fafnir will jump to one edge of the arena and gain
 Directional Disregard, making its hitbox omnidirectional.
- In addition, either a purple circle or donut AoE telegraph with arrows will spawn, indicating late telegraphed concentric donut AoEs that will cascade outwards or inwards, respectively. These will repeat multiple times.
- Multiple small and large circle AoE telegraphs will also appear. These will spawn whirlwinds which will move around the room and should be avoided. Being hit will inflict
 windburn.
 - During this, Fafnir will use Horrid Roar four times, spawning red circle AoE telegraphs in random locations. Being hit will inflict
 hysteria for 3s. Three random players will also receive large spread marker AoEs.
- The whirlwinds will dissipate and Fafnir will return to the middle of the arena.
- Offensive Posture (random animation)
- Baleful Breath
- Absolute Terror or Winged Terror: Fafnir will fly to one edge of the arena. Either its head or wings will glow purple, indicating a late telegraphed line AoE in front of it or two line AoEs to the sides of it, respectively.
- Afterwards, more Darters will spawn, while Fafnir uses Dark Matter Blast then Horrid Roar.
- Fafnir's attacks will repeat until it is defeated.
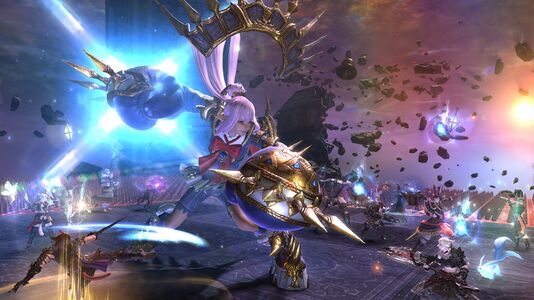
 The Ark Angels
This encounter has five bosses: Ark Angel MR, Ark Angel EV, Ark Angel HM, Ark Angel GK, and Ark Angel TT.
Upon pulling them, only MR, GK, and TT will be targetable. The arena will shortly be surrounded with a dangerous AoE.
Unlike many other multi-target boss fights, the bosses do not need to be kept separated. It is recommended to keep the bosses centered when possible. If any of the bosses becomes too damaged compared to the others, the higher health bosses will transfer health to them, causing them to remain roughly balanced in health.
- The Decisive Battle: Each targetable boss will tether all members of a different alliance and give one of
 Epic Hero,
  Fated Hero, or
  Vaunted Hero. All members of one alliance will receive the same buff. Players will only see the tether they have. The bosses will also receive one debuff:
  Epic Villain,
  Fated villain, or
  Vaunted Villain which will also be indicated with an overhead colored marker. Players must attack the boss matching their buff color or they will inflict no damage.
 - Cloudsplitter: MR targets each tank with a telegraphed AoE magical tankbuster.
- Meikyo Shisui: GK summons two sets of crisscrossing ice line AoEs (Tachi: Yukikaze), one pink flower AoE (Tachi: Kasha) that will expand, and an orb with a gaze marker (Tachi: Gekko). Anyone hit with the gaze will be
 petrified for 8s. The orb will then spawn growing conal AoE telegraphs (Concerted Dissolution), while the flower will turn into a donut AoE telegraph (Light's Chain).
 - Meteor: Ark Angel TT begins incanting... An attack from TT that should be interrupted to prevent high damage.
- Havoc Spiral: MR will spawn three conal AoEs that will rotate in the direction of the arrows. This is followed by Spiral Finish, a radial knockback that can be prevented with knockback immunities.
- Dragonfall: GK will tether a healer from each alliance and give them a stack marker. He will then jump on each for split physical damage. These inflict
 Piercing Resistance Down, so overlapping will be lethal.
 - Guillotine: TT will spawn an expanding AoE telegraph, leaving its rear safe. The AoE will persist for four hits.
The three bosses will then disappear, while HM and EV will appear and become targetable. The colored buffs will also disappear, so players are free to attack any boss for the remainder of the battle.
- Dominion Slash: EV inflicts magical raidwide damage. This will also summon multiple orbs of light that will sink into the ground, leaving pulsating AoEs. Anyone who touches these will take high damage and be launched into the air.
- Utsusemi: HM will summon four clones of himself, each of which will tether a random player and give then a running marker. HM will then cast Mighty Strikes, giving himself a
 buff that will cause the clones' melee attacks to deal critical damage. Tethered players who contact their clone will receive massive damage, likely dying.
 - Cross Reaver: HM will summon a two narrow perpendicular lines, each of which will explode in a large, late telegraphed line AoE.
- Holy: EV inflicts magical raidwide damage.
- Ark Angel HM is preparing a powerful jutsu... EV will become untargetable and use a Passage of Arms-like ability to protect HM from damage. Destroy the targetable Ark Shield to make HM vulnerable to have its Mijin Gakure attack be interrupted. Otherwise, this attack will wipe the raid.
- MR will reappear as a targetable enemy and cast Rampage, sequentially spawning line AoE telegraphs denoting where it will charge through. These end with a large circle AoE telegraph.
- TT will become targetable again and cast Guillotine.
- Finally, GK will become targetable again and cast Meikyo Shisui. This will be combined with Cross Reaver from HM and Meteor from TT.
- With all five bosses targetable, the party can burn them down with AoE attacks. They will repeat their previous individual attacks from here, with some new attacks.
- When HM reaches critical HP, it will jump to the center of the arena, cast Mighty Strikes, and then use Critical Reaver, an instant attack dealing four hits of physical damage. It will then begin casting an interruptible version of Critical Reaver which will wipe the raid if allowed to cast.
- Arrogance Incarnate: EV will target a random player with a multi-hit stack marker AoE dealing five hits of magical damage. Usually followed by Cloudsplitter, so the tanks will need to move away from the group after stacking.
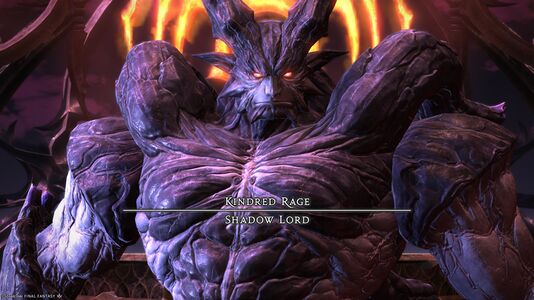
 Kindred Rage: Shadow Lord
The arena will be surrounded with a dangerous AoE.
Phase 1
- Giga Slash: The Shadow Lord readies his blade... Shadow Lord will spawn two sweeping sword markers in sequence, each leaving a empty area. These denote late telegraphed cleaves. The first cleave will be ~135 degrees to its left or right, while the second cleave will be 270 degrees and leave the opposite side safe.
- Umbra Smash: Shadow Lord will summon four line AoE telegraphs in sequence, one per cardinal. These will cascade outwards as late telegraphed line AoEs.
- Giga Slash
- Flames of Hatred: Magical raidwide damage.
- Implosion: The Shadow Lord concentrates energy in the palms of his hands... Shadow Lord spawns two semicircular AoE telegraphs, wielding an orb on each hand. One of the orbs will enlarge, indicating that the AoE on this side will expand to cover the entire half of the room.
- Cthonic Fury: Magical raidwide damage and transitions the arena into four smaller circular platforms connected by pathways in a square formation. The rest of the room will be covered with a dangerous AoE.
- Hatred spills forth from the Shadow Lord's dark sigils... Orange spikes will spawn, either surrounding each circular platform or forming a large square. They will either point inwards or outwards.
- Circular spawn: If they point inwards, they will use each a late telegraphed circle AoE leaving the walkways safe. If they point outwards, they will each use a late telegraphed donut AoE leaving the circular areas safe.
- Square spawn: If they point inwards, the region outside the square is safe. If they point outwards, the region within the square is safe.
- This attack is used twice in a row in the same shape to demonstrate both tells for that shape.
- Dark Nebula: A horizontal or vertical purple line will spawn on one edge of the arena, telegraphing a bi-directional knockback. Position to be knocked back safely to the other side or use knockback immunity.
- Implosion
- Hatred spills forth from the Shadow Lord's dark sigils... Now also spawns orange spike pointing either inwards or outwards in a square formation, along with the circular formations, making the safe spots smaller.
- Echoes of Agony: Multi-hit stack marker AoE on a random player, dealing five hits of magical damage.
- Cthonic Fury: Magical raidwide damage and reverts the arena.
Phase 2
- Shadow Lord will jump to the north of the room, gain
 Directional Disregard, and cast Nightfall, a lengthy animation in which he will summon and equip a suit of armor, which will be signified with the
  Lord Unshadowed buff.
 - Shadow Lord will charge up his ultimate attack, Tera Slash, dealing heavy physical damage that should be mitigated. This will be indicated with a combat message timer: Tera Slash in X seconds...
- Giga Slash: Nightfall: Similar to Giga Slash, but will use a third cleave telegraph. The first two cleaves hit east/west, then the third cleave will hit north or south.
- Shadow Spawn: Summons two untargetable Lordly Shadow clones.
- Shadow Lord will immediately use another Giga Slash: Nightfall, while one clone will use Giga Slash, making for a total of five cleaves: the first three from the boss and last two from the clone.
- This is followed with an Implosion from Shadow Lord and then immediately by another Implosion from a clone, so players must pay attention to both telegraphs.
- Unbridled Rage: Line AoE physical tankbuster on all 3 tanks. Immediately followed by spread marker AoEs on random players (Nova) that inflict magical damage and
 Magic Vulnerability Up.
 - Echoes of Agony: Now hits seven times.
- Binding Sigil: Summons three sets of pink circle AoE telegraphs that appear and disappear, indicating the order in which they resolve. Anyone hit will be inflicted with
 Bonds of Loathing, binding for a few seconds. They will then take damage and be knocked up. The AoEs will partially overlap, but the center of one AoE will never overlap with another, so dodge into the center of any of the first AoEs to resolve.
 - Damning Strikes: Summons three stack marker AoEs on top of towers. Each alliance should take one. Shadow Lord will trap one player per alliance in a bubble, then knock them into one of the tower stack markers.
- Cthonic Fury: Magical raidwide damage and again transitions the arena.
- Dark Nebula: Now sequentially summons four knockback indicators, one per side. Position to be knocked back in a clockwise or counterclockwise direction. Shadow Lord will use Giga Slash: Nightfall when standing on the fourth safe platform.
- Hatred spills forth from the Shadow Lord's dark sigils...
- Multiple random players will be given spread marker AoEs.
- Cthonic Fury
- Shadow Spawn + Umbra Smash: Shadow Lord will use Umbra Smash, then the two clone will use another line AoE, forming a plus-shaped AoE rotated 45 degrees, which will expand outwards at once. Move into the middle when the initial telegraph disappears.
- Doom Arc: A long cast that will inflict high magical raidwide damage and a 15-second
 bleeding. Will also grant Shadow Lord a
  Damage Up stack.
 - The boss's phase 2 mechanics will then repeat until he is defeated.
Loot
- See also: Ark Angel's Armor
 Prishe of the Distant Chains
| Name | Type | Item Level | Rarity | Quantity |
|---|---|---|---|---|
| Ark Angel's Boots of Casting | Feet | 720 | Blue | 1 |
| Ark Angel's Circlet of Aiming | Head | 720 | Blue | 1 |
| Ark Angel's Circlet of Fending | Head | 720 | Blue | 1 |
| Ark Angel's Circlet of Healing | Head | 720 | Blue | 1 |
| Ark Angel's Face Guard of Scouting | Head | 720 | Blue | 1 |
| Ark Angel's Greaves of Scouting | Feet | 720 | Blue | 1 |
| Ark Angel's Petasos of Casting | Head | 720 | Blue | 1 |
| Ark Angel's Sabatons of Aiming | Feet | 720 | Blue | 1 |
| Ark Angel's Thighboots of Fending | Feet | 720 | Blue | 1 |
| Ark Angel's Thighboots of Healing | Feet | 720 | Blue | 1 |
| Ark Angel's Thighboots of Maiming | Feet | 720 | Blue | 1 |
| Ark Angel's Thighboots of Striking | Feet | 720 | Blue | 1 |
| Ark Angel's Visor of Maiming | Head | 720 | Blue | 1 |
| Ark Angel's Visor of Striking | Head | 720 | Blue | 1 |
 Fafnir the Forgotten
| Name | Type | Item Level | Rarity | Quantity |
|---|---|---|---|---|
| Ark Angel's Armguards of Fending | Hands | 720 | Blue | 1 |
| Ark Angel's Armguards of Healing | Hands | 720 | Blue | 1 |
| Ark Angel's Breeches of Fending | Legs | 720 | Blue | 1 |
| Ark Angel's Breeches of Healing | Legs | 720 | Blue | 1 |
| Ark Angel's Breeches of Maiming | Legs | 720 | Blue | 1 |
| Ark Angel's Breeches of Scouting | Legs | 720 | Blue | 1 |
| Ark Angel's Breeches of Striking | Legs | 720 | Blue | 1 |
| Ark Angel's Gauntlets of Maiming | Hands | 720 | Blue | 1 |
| Ark Angel's Gauntlets of Striking | Hands | 720 | Blue | 1 |
| Ark Angel's Gloves of Casting | Hands | 720 | Blue | 1 |
| Ark Angel's Poleyns of Aiming | Legs | 720 | Blue | 1 |
| Ark Angel's Slops of Casting | Legs | 720 | Blue | 1 |
| Ark Angel's Vambraces of Aiming | Hands | 720 | Blue | 1 |
| Ark Angel's Vambraces of Scouting | Hands | 720 | Blue | 1 |
 The Ark Angels
| Name | Type | Item Level | Rarity | Quantity |
|---|---|---|---|---|
| Ark Angel's Boots of Casting | Feet | 720 | Blue | 1 |
| Ark Angel's Coat of Casting | Body | 720 | Blue | 1 |
| Ark Angel's Corselet of Aiming | Body | 720 | Blue | 1 |
| Ark Angel's Corselet of Scouting | Body | 720 | Blue | 1 |
| Ark Angel's Cuirass of Maiming | Body | 720 | Blue | 1 |
| Ark Angel's Cuirass of Striking | Body | 720 | Blue | 1 |
| Ark Angel's Greaves of Scouting | Feet | 720 | Blue | 1 |
| Ark Angel's Sabatons of Aiming | Feet | 720 | Blue | 1 |
| Ark Angel's Thighboots of Fending | Feet | 720 | Blue | 1 |
| Ark Angel's Thighboots of Healing | Feet | 720 | Blue | 1 |
| Ark Angel's Thighboots of Maiming | Feet | 720 | Blue | 1 |
| Ark Angel's Thighboots of Striking | Feet | 720 | Blue | 1 |
| Ark Angel's Tunic of Fending | Body | 720 | Blue | 1 |
| Ark Angel's Tunic of Healing | Body | 720 | Blue | 1 |
 Shadow Lord
| Name | Type | Item Level | Rarity | Quantity |
|---|---|---|---|---|
| Nano Lord |
Minion | N/A | Basic | 1 |
| Shadow Lord Card |
Triple Triad Card | N/A | 3 | |
| Tattered Sheet Music |
Other | N/A | Basic | 3 |
Rewards
You can receive only one reward item per week for completing duties in Jeuno: The First Walk. In the event you are awarded an item from the loot list, you relinquish your right to vie for all remaining items regardless of whether you selected Need or Greed.
Reward eligibility is reset every Tuesday at 1:00 a.m. (PDT)
Each party in the alliance will receive its own treasure chest.
Players cannot open a treasure chest belonging to another party.
Completion Reward
Upon completing Jeuno: The First Walk, players can also earn a separate reward once per week: two Cracked Novaclusters and one Ordelle Coin. The Ordelle Coin can be exchanged with Uah'shepya in Solution Nine (X:8.6 Y:13.5) for items used to enhance equipment purchased with ![]() Allagan Tomestones of Heliometry.
Allagan Tomestones of Heliometry.
Orchestrion Rolls
Tattered Sheet Music found in the treasure chests of Jeuno: The First Walk can be exchanged with the peculiar goblin in Lower Jeuno (X:6.5 Y:5.2) for special orchestrion rolls relating to Echoes of Vana'diel.
Achievements
This duty is associated with the following achievements:
| Name | Points | Task | Reward | Patch |
|---|---|---|---|---|
| Home Away from Home | 5 | Complete Jeuno: The First Walk. | - | 7.1 |
| Mapping the Realm: Jeuno: The First Walk | 10 | Discover every location within Jeuno: The First Walk. | - | 7.1 |
Images
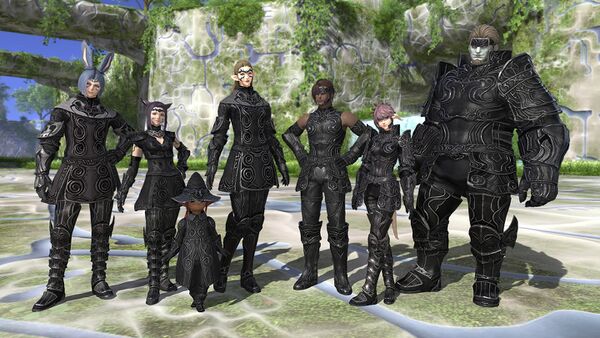
Gear Images
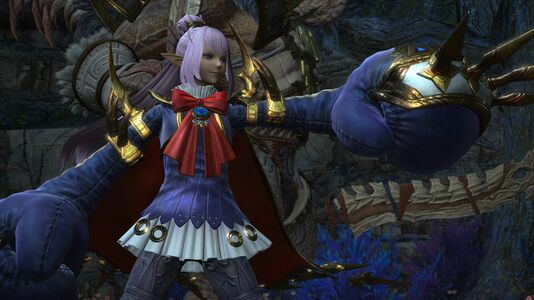
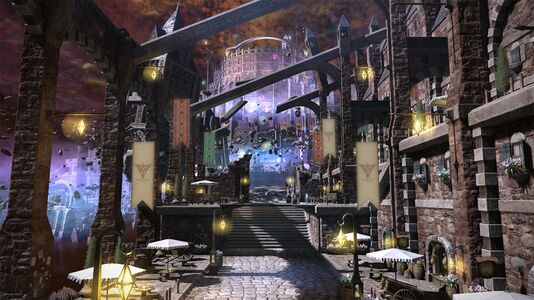
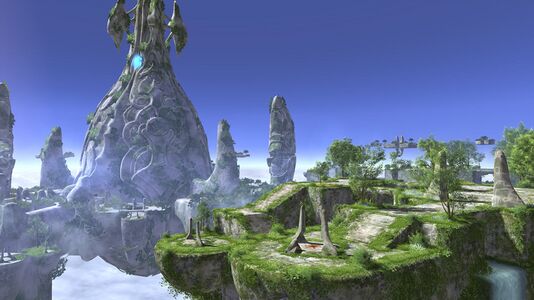
Raid Images
Concept Art
Trivia
Multiple references to FFXI and FFXI culture are present throughout this raid.
Jeuno
- The first portion of this area is based on FFXI's hub city of Jeuno; specifically Lower Jeuno
- The music that plays between boss fights is Shadow Lord. This is also the music that is played during FFXI's large-scale raiding content called Dynamis. The Goblin Replicas and Vanguard enemies that are in the first portion also appeared in that zone (specifically Dynamis - Jeuno).
- The music that plays during the Prishe fight is Depths of the Soul, which is the dungeon battle theme from the Chains of Promathia expansion, where Prishe was introduced.
The Boyahda Tree
- The dialogue from the NPC adventurers about Aquarius is a reference to the Aquarius Notorious Monster that drops a highly-coveted (circa mid 2000s) weapon for ranged jobs. The mob spawned in an area with many aggressive adds, hence the comments from the adventurers about how "it’s [your] problem now".
- The Fafnir boss fight is loosely based on the High Notorious Monster Fafnir with this incarnation retaining many of the special attacks from FFXI.
- The Darter mechanic in the Fafnir fight is a callback to the mobs that spawned around Fafnir's spawn location in FFXI. In that game, Fafnir was a highly sought-after Timed Spawn that appeared in an open-world arena surrounded by non-aggressive Darters. Competition among players to claim Fafnir was fierce, as the first party to do so would gain exclusive rights to its loot. It was not uncommon for 200 players to crowd Dragon's Aery just before its spawn.
- However, the Darters posed a unique challenge. If a player accidentally hit a Darter - whether through an AoE when fighting Fafnir or by mistake when trying to claim Fafnir - all Darters in the arena would link and swarm the claiming alliance, often leading to a wipe.
Tu'Lia
- A note found mentions how "this path should have led straight to Ve'Lugannon Palace" and "being late for the spawn," which are nods to mechanics and locations in FFXI Tu'Lia. In that region, Ve'Lugannon Palace was an area where players would compete to claim timed spawn Notorious Monsters. These NMs dropped items required to spawn higher-tier Notorious Monsters, which dropped BiS loot.
- The Ark Angels boss fight is based on the 18-player "Divine Might" raid introduced on April 22, 2004. Unlike its FFXIV version, the fight was a free-for-all with no targeting restrictions and was infamous for its punishing difficulty on release (for example, Ark Angel TT could use an AoE Petrify at will). The raid remained popular for years due to its reward: best-in-slot earrings for many jobs.

