Difference between revisions of "Castrum Fluminis"
Freedom4556 (talk | contribs) m (→Loot) |
Freedom4556 (talk | contribs) (→Loot) |
||
| Line 62: | Line 62: | ||
==Loot== | ==Loot== | ||
*{{ | *{{tomestone|Poetics|12}} [[Allagan Tomestone of Poetics]] | ||
*{{Item icon|Tsukuyomi Card}} (Drops at a fixed rate.) | *{{Item icon|Tsukuyomi Card}} (Drops at a fixed rate.) | ||
Revision as of 15:19, 13 September 2023
 This article is about the story-mode Main Scenario trial. For the level 70 challenge-mode trial, see The Minstrel's Ballad: Tsukuyomi's Pain.
Castrum Fluminis
- Level
- 70 (Sync: 70)
- Item Level
- 335
- Difficulty
- Normal
- Party size
- Full Party
8 man • 2 2
2  4
4 
- Unsyncing
- Allowed
- Time limit
- 60 minutes
- Duty Finder
- Trials (Stormblood)
- Roulette
- Trials
- Tomestones
 12
12 - Req. quest
 The Primary Agreement
- Location
- Castrum Fluminis
- Region
- Othard
- Patch
- 4.3
 The Echo
- On wipe: +10% (max +50%)
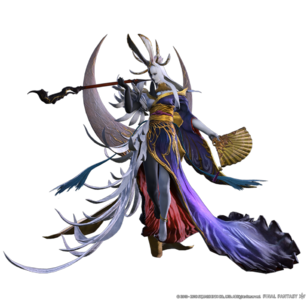
“Tsukuyomi, divinity of night and the moon. Through sinister design is this figure of Far Eastern mythology given form, descending upon the world in a primal incarnation. The Warrior of Light must stand firm, else Doma be swallowed by the encroaching darkness...
— In-game description
Castrum Fluminis is a level 70 trial introduced in patch 4.3 with Stormblood.
Strategy
 The Lady of the Moon: Tsukuyomi
Phase 1
- Torment Unto Death - Large frontal cone tank buster. As usual, all other players must not stand in front of the boss
- Zashiki-Asobi - This is essentially Ser Adelphel from The Vault. She will spawn fans around the arena; one in the centre, and the others around. They will explode in the same order they spawned in. It is recommended to stand in another fan (ones that will explode last) as the centre one explodes to head back to the centre.
- Nightfall - Casts during Zashiki-Asobi signaling an incoming AoE random attack.
- Steel of the Underworld - Large frontal cone on primary target.
- Reprimand - Raid-wide AoE damage; sheld/heal through.
- Midnight Haze Spawns two Midnight Haze adds on opposite sides of the arena. Destroy them before they reach each other or finsh their casts.
- Lead of the Underworld - Casts a line AoE marked by a line stack marker. Players must line up with the targeted player to share the damage. If a Mignight Haze add is still up, the targeted player can lign up with the add so other players can still attack it.
Phase 2 (add phase)
Starts with Nightbloom - raid-wide damage and ![]() stun.
stun.
Adds will spawn during this phase. Destroy the adds as soon as they come up.
Duty Gauge - Suffering - During phase 2, the Suffering gauge will fill up over time. Destroy the adds as soon as possible as the longer the phase goes on, the more suffering is accumulated, which deals more damage at the end of the phase. Naturally, if the gauge hits 100%, it will wipe the group. Shield/heal as necessary.
Phase 3
Phase 3 will run with the same abilities you have seen so far with the addition of some others. She will also continue to cast Nightfall.
- Selenomancy - Causes the platform to be split into two sections. Standing in one section stacks debuffs. If the debuffs reach 5 stacks, a Doom and bleed debuff will be applied, and you'll likely die. To avoid this, players must switch sections to remove their stacks. And it is also important to note that simply switching sections does not remove the stacks, players must remain in their new section until the next stack would be applied for their stacks to be removed. It is recommended to switch sections at 3 stacks since that is a safe area and she is likely to cast an AoE around that time, that way you are not trapped on one side. Doughnut AoE's and Nightfall will cast during this time so keep on your toes.
- Antitwilight/Perilune - Removes Selenomancy and debuffs and deals raid-wide damage.
During Selenomancy, Tsukuyomi can also cast Midnight Haze, so be mindful of your stacks when they spawn and move to the section you need to move to so you can kill the add and reset your stacks.
- Dance of the Dead - Signals final phase change, dealing heavy raid-wide damage.
- Lunacy - Essentially Ahk Morn; an attack that players must stack for and remain stacked as the attack will hit multiple times. (1 hit, 2 quick hits after a pause)
- Dark/Bright Blade - Lazer Sword. She will attack large sections of the arena depending on the blade she is using. Dodge the AoE's!
Loot
 12 Allagan Tomestone of Poetics
- Tsukuyomi Card (Drops at a fixed rate.)


