Difference between revisions of "The Navel (Extreme)"
Freedom4556 (talk | contribs) |
|||
| Line 73: | Line 73: | ||
==Video Guides== | ==Video Guides== | ||
{{#ev:youtube|wR3aPDe5fcI|350|left|Titan (Extreme) Guide}} | {{#ev:youtube|wR3aPDe5fcI|350|left|Titan (Extreme) Guide}} | ||
{{#ev:youtube|uDg44MVJLrw|350|left|Titan (Extreme) Guide 16-bit}} | {{#ev:youtube|uDg44MVJLrw|350|left|Titan (Extreme) Guide 16-bit}} | ||
{{Duties nav|trial}} | {{Duties nav|trial}} | ||
Revision as of 21:52, 17 March 2022
- See also: The Navel and The Navel (Hard)
The Navel (Extreme)
- Level
- 50 (Sync: 50)
- Item Level
- 67
- Difficulty
- Extreme
- Party size
- Full Party
8 man • 2 2
2  4
4 
- Unsyncing
- Allowed
- Time limit
- 60 minutes
- Roulette
- Mentor
- Tomestones
 20
20 - Req. quest
 Quake Me Up Before You O'Ghomoro
- Patch
- 2.1
“From deep within their mines, the kobolds have watched and waited for another opportunity to summon their Great Father and wreak havoc on Limsa Lominsa. With the destruction of Ultima Weapon, the final obstacle to their plans was removed, allowing the beastmen to summon their god without fear of imperial reprisal. Once more, it falls to you to ensure that the Lord of Crags never sees the light of day.
— In-game description
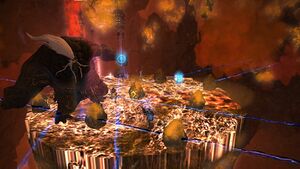
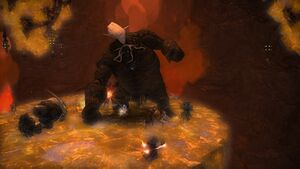
The Navel (Extreme) is a level 50 trial introduced in patch 2.1.
Strategy
 Primal: Titan
- Everyone who is not tanking should stack up directly behind Titan. This includes the healers and ranged classes.
- Titan will target two players with Gaol. He preferentially targets one DPS and one Healer. When targeted by Gaol, DPS should stand directly under Titan. The healer needs to run to the far edge. If there is a yellow line connecting the two players, you're too close together.
Phase 1: Before the Jump
Very straightforward, tank Titan on the edge of the room. He will use Landslides, a forward-facing cone attack, and Weight of the Land, which will produce an AOE underneath every person. Tanks should face Titan away from the middle to prevent Landslide from hitting the group. The party should stack for Weight of the Land to minimize the area of effect and enable easier dodging of the attack.
At the end of this phase, Titan will jump in the air and knock away the edges of the arena, shrinking the battlefield to a smaller size - indicated by red marks at the outer edge.
- Rotation: Landslide; Weight of the Land; 4 Tumults; occasional Mountain Busters in-between.
- Consider a tank-swap for every 2-3 stacks of Mountain Buster.
Phase 2
Landslide now goes in three directions, and Titan will also start using Granite Gaol and Bomb Boulders.
- When targeted by Gaol, marked damage dealers should stand directly under Titan, whereas marked healers should run to the far edge. Free the damage dealer first, then free the healer.
- The first set of Bomb Boulders will be a pattern that covers 2/3 of the arena. All players must move to a safe spot to avoid them.
- Further Bomb Boulders will be in a circle. To avoid, wait for the first bombs to explode, then move into the detonated area to avoid follow-up explosions.
- Upheaval knocks back and will knock you off the platform if you're not careful. Titan should be tanked near the edge and everyone (including the main tank, if not using Arm's Length) should stack behind him before completion of the cast.
Rotation: Geocrush -> Landslide -> Gaol x2 -> Mountain Buster -> Upheaval -> Landslide -> Stomps x4 -> Weight of the Land -> Mountain Buster -> Landslide -> Weight of the Land -> Bombs -> Mountain Buster -> Landslide -> Gaol x2 -> Repeat
Phase 3: Heart
This phase starts when Titan reaches 55% health. The entire raid should focus on Titan's Heart. As before, dodge Landslides (which now go in five directions), Weight of the Land, and deal with Granite Gaols. Titan will also drop Bomb Boulders in circles. Wait for the first set of bombs to explode, then move into the already detonated areas to avoid follow-up explosions.
You have until the third Weight of the Land to destroy the heart, or you will wipe.
Rotation: Geocrush -> Weight of the Land -> Gaol x2 -> Upheaval -> Landslide -> Stomps x4 -> Weight of the Land -> MB -> Clockwork Bomb -> Landslide -> Stomps x4 -> Weight of the Land -> Earthen Fury (failure)
Phase 4
This phase starts when Titan's heart has been destroyed. Just like before, players will need to dodge Landslides, Weight of the Land, and deal with Granite Gaols. Also, Granite Gaolers (adds) will join the fray, and you will also have two different Bomb patterns to deal with - a clock-like pattern, and patterns involving bombs dropping in multiple areas simultaneously.
Rotation: Jump -> Massive AOE -> Granite Gaolers -> Mountain Buster -> Clockwork Bomb -> Landslide -> Mountain Buster -> Weight of the Land -> Gaol x2 -> Upheaval -> Landslide -> Mountain Buster -> Stomps x4 -> Weight of the Land -> Weight of the Land -> Mountain Buster -> Clockwork Bomb -> Mountain Buster -> All Bombs -> Stomps x4 -> Weight of the Land -> Landslide -> Jump -> Landslide -> we repeat, starting again with Granite Gaolers.
The second set of Granite Gaolers should happen when Titan is close to death.
Loot
- Titan Card (Drops at a fixed rate.)
 Treasure Coffer
| Name | Type | Item Level | Rarity | Quantity |
|---|---|---|---|---|
| Tremor Earrings of Fending | Earrings | 90 | Blue | 1 |
| Tremor Earrings of Slaying | Earrings | 90 | Blue | 1 |
| Tremor Earrings of Aiming | Earrings | 90 | Blue | 1 |
| Tremor Earrings of Casting | Earrings | 90 | Blue | 1 |
| Tremor Earrings of Healing | Earrings | 90 | Blue | 1 |
| Crag Heart | Material | N/A | Basic | 1 |
| Gullfaxi Whistle | Other | N/A | Basic | 1 |
| Nightmare Whistle | Other | 1 | Basic | 1 |
| Faded Copy of Under the Weight | Orchestrion Roll | N/A | Basic | 1 |


