Difference between revisions of "The Copied Factory"
| Line 155: | Line 155: | ||
Each party in the alliance will receive its own treasure chest, the contents of which will be identical regardless of the route taken. | Each party in the alliance will receive its own treasure chest, the contents of which will be identical regardless of the route taken. | ||
* Players cannot open a treasure chest belonging to another party. | * Players cannot open a treasure chest belonging to another party. | ||
==Achievements== | |||
This duty is associated with the following [[achievements]]: | |||
{| {{STDT|mech1}} | |||
{{achievement table header}} | |||
{{achievement table row|The First Law}} | |||
|} | |||
==Images== | ==Images== | ||
Revision as of 06:17, 15 December 2022
The Copied Factory
- Level
- 80 (Sync: 80)
- Item Level
- 435
- Difficulty
- Normal
- Party size
- Alliance
24 man • 3 6
6  15
15 
- Unsyncing
- Allowed
- Time limit
- 120 minutes
- Duty Finder
- Alliance Raids (Shadowbringers)
- Roulette
- Alliance Raids
- Tomestones
 100
100 - Req. quest
 On the Threshold
- Entrance
- Excavation Tunnels (X:6.0, Y:4.2)
- Location
- The Copied Factory
- Region
- Norvrandt
- Patch
- 5.1
“Anogg and Konogg's explosive efforts have at last opened a path from Komra's excavation tunnels into an expanse of enigmatic ruins─but if the equally enigmatic 2P is to be believed, it will not be the inert and rusting relics of a long-dead civilization that await within, but life unlike any this world has ever seen...
— In-game description
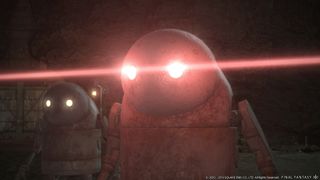
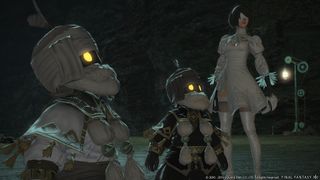
The Copied Factory is a level 80 raid introduced in patch 5.1 with Shadowbringers. It is the first part of YoRHa: Dark Apocalypse.
Once the duty is completed, players may freely explore the location as an instanced zone, which can be entered from the Excavation Tunnels (X: 6.1, Y: 4.2).
Objectives
- Clear Warehouse: 0/1
- Clear Warehouse B: 0/1
- Clear Quality Assurance: 0/1
- Clear Warehouse C: 0/1
- Clear the Forward Deck: 0/1
- Clear the Rear Deck: 0/1
Bosses
 Serial-jointed Command Model
- Clanging Blow: Tankbuster.
- Forceful Impact: High damage to the entire alliance.
- Energy Bombardment: Small ground-targeted circle AoEs below eight random players.
- Energy Assault: The boss will turn toward a random player and fire a very large lingering cone that deals very high damage over time.
- Energy Ring: A series of sequential AoEs that begins with a circle AoE centered on the boss followed by three gradually-expanding ring AoEs.
- Sidestriking Spin: Rectangular AoE on the boss's sides that deal high damage and stuns players hit by launching them into the air. The AoEs are parallel to the boss's hitbox and can be avoided by standing directly in front of or behind it.
- Centrifugal Spin: Rectangular AoE through the boss's center that works identically to Sidestriking Spin.
- Systematic Siege: Summons four untargetable adds on the edges of the platform that move along the edge, occasionally firing extremely slow energy ball projectiles that deal high damage to players they hit. The projectiles dissolve on impact with a player.
- Systematic Targeting: Six untargetable adds will appear around the arena and each target a random player with a crosshair, following them as they move. After a short time, the adds will fire a laser at their targets, dealing high damage in a line.
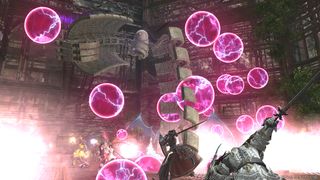
- Systematic Airstrike: Eight untargetable aerial adds will spawn and begin moving along the edges of the grating in the platform. The adds will fire a circle of energy balls downward, dealing high damage to players beneath them.
- Systematic Suppression: Several untargetable adds will spawn on the edge of the platform, eventually blasting half of the arena with lasers.
- Shockwave: Low damage but high knockback on the entire alliance.
 Hobbes
In this fight, each platform has completely different mechanics based on which one they are on, as well as the position of the rotating machine arm above the raid floor.
Platform Specific Mechanics
- Alliance A: Heads. Machine Lifeform heads below the grating of the platform will light up red and eventually begin arcing lightning, dealing high damage.
- Alliance B: Conveyor belts. The belts will push players in the indicated direction. While the belts are active, the edge of the platform inflicts instant death on players that touch it.
- Alliance C: Vents. Four vents on the platform light up orange before spraying oil upwards, dealing damage and inflicting a debuff that causes Hobbes' fire damage to deal lethal damage. After the vents have sprayed, the non-vent area of the platform will perform the same attack.
Attacks by the Machine
- Left Arm: Proximity-based damage on one alliance's platform that drops a shipping container. When the attack lands, the panels of the crate will also open in a cross pattern and instantly kill any player standing beneath them. Finally, four Small Exploder adds will spawn and tether to nearby players. After a short time, these adds will charge their tethered target and self-destruct, dealing extremely high damage. Players should make sure they never have more than one tether. Alternatively, the tank can intercept all the tethers and brute force through the damage with their invulnerability skill.
- Right Arm: The right arm will hover over the platform with two blades and a syringe on its claws to perform three simultaneous attacks. The two blades will cast out small cones from the center of the platform, while the syringe will create a small ring surrounding a small circle AoE centered below the syringe claw. After each attack, the claw will rotate in the marked direction and use the attacks again from the new position.
- Nozzles: The nozzles on the wall will catch fire, eventually shooting a lingering line of fire across the platform that deals damage every second a player stands in it.
Hobbes' Attacks
- Laser-Resistance Test: Moderate alliance-wide damage cast several times in a row. As the fight goes on, the number of laser pulses Hobbes fires will increase.
- Ring Laser: Several ring attacks starting from the edge of the platforms. Can be avoided by either standing in the direct center of the platform or by moving to a part of the platform the attack has already hit.
- Laser Sight: Line-up Stack on a random player in each alliance.
- Short-Range Missile: Marks players with large circle AoEs while also subjecting each alliance to their platform's specific mechanics.
 Engels
Phase One
- Marx Smash: Large AoE inflicting heavy damage and a stack of
 Vulnerability Up. The area of effect can be determined by which arm(s) Engels raises and where.
- Raises one arm as if winding up for a punch (left/right): East or west half, same side as raised arm. Engels will always open with this attack, usually on the east side of the platform, then repeat for the other side.
- Raises both arms high: South side of the platform. This is then shortly followed by a line AoE covering a quarter of the east and west sides of the platform. (Only center is safe.)
- Raises both arms low: North side of the platform, shortly followed by a line AoE covering the middle half of the platform. (Only east & west sides are safe.)
- Precision Guided Missile: Triple tankbuster. Targets each alliance's tank with a unique red AoE marker. Tanks should spread out and away from each other and the remainder of the alliance.
- Incendiary Bombing: Targets one member of each alliance with a standard red AoE marker. Targeted members should take this away from the rest of the alliance as the ensuing AoE will leave a puddle of napalm inflicting
 Burns on anyone that enters it.
 - Guided Missile: Targets one member of each alliance with a unique yellow AoE marker with trailing arrows. This is a chase mechanic similar to the Cloud of Darkness's Feint Particle Beam; affected members should lure the attack away from the remainder of the alliance. Each hit inflicts a stack of
 Vulnerability Up.
 - Diffuse Laser: Raidwide laser attack.
- Energy Barrage: Meteors/Pillars style attack. 14 AoE circles will spawn inside of Engels's hitbox; alliance members should get away from the middle of the platform as Engels will fire a massive laser blast from its head. After the laser blast it will be safe to fill each circle with one alliance member.
- Surface Missile: Traditional AoE attack targeting several alliance members.
After casting Surface Missile, Engels will follow with another Precision Guided Missile and a Diffuse Laser before summoning adds.
Adds Phase
Engels will begin charging, become untargetable, and spawn three Reverse-jointed Goliaths and a half-dozen Small Bipeds. The bipeds can be safely ignored as 2P will destroy them with a blast of missiles. Each alliance should tank and fight one Goliath each, away from the other two. If all adds are not destroyed before Engels's Charge meter hits 100, the raid will wipe.
After the adds are killed Engels will use a powerful raidwide Diffuse Laser; after this he will destroy the platform entirely from underneath. Players should get away from the center of the platform to avoid taking fatal damage. Players will land on a conveniently-placed second platform and Phase Two will begin.
Phase Two
- Marx Activation: Summons Marx sawblade arms to attack from the east and west sides of the platform. The Marx units will attack a quarter of the platform starting from back to front or vice versa; keep out of line of sight of the Marx units to avoid heavy damage and Vulnerability Up stacks.
- Area Bombardment: Attacks with Incendiary Bombing, Surface Missile, Guided Missile, and Precision Guided Missile, one right after the other. This attack starts up toward the end of the Marx attacks so maintain positional awareness.
After Area Bombardment Engels will use another Diffuse Laser, then mix up Surface Missiles with Marx Smashes. It will then follow up with:
- Incendiary Saturation Bombing: Covers the entire south side of the platform with napalm, forcing the alliance to the front of the platform for...
- Marx Crush: Engels will become untargetable again and try to crush the alliance with its Marx Arms on either side. These adds do not need to be tanked, but must be destroyed before the arms reach the center of the platform which will wipe the raid.
After the Marx Arms are destroyed, Engels will repeat previous mechanics excluding the adds phase and Marx Crush until the fight is over.
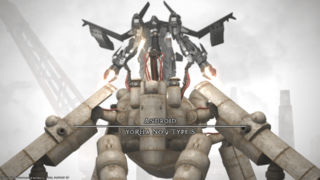
Android: YoRHa No.9 Type S ( 9S-operated Walking Fortress)
- Neutralization: Tankbuster.
- Laser Turret: 9S turns to a random player and fires a laser in a line for high damage.
- Fore-hind Cannons: Two cone attacks from 9S's front and back. Stand to his sides to avoid damage.
- Dual-flank Cannons: Two cone attacks from 9S's sides. Stand to the front or back to avoid damage.
- Laser Saturation: High damage to the entire alliance.
- Ballistic Impact: Six random players are marked with both AoE circles targeting them and below them.
- Engage Marx Support: Two of Engels' arms slam the ground below them, dealing massive damage in a large circle. Each circle takes up roughly a quarter of the platform. Later, 9S will summon three arms.
- Undock: 9S undocks from his mech and flies into the sky, becoming untargetable.
- Bombing Run: 9S bombards the platform in straight lines, each taking up a third of the arena. The attack takes time to move from one edge to the other, and can deal damage multiple times. Keep an eye on 2P, as she will stand near the safest edge to dodge from.
- Anti-personnel Missile: Several squares of the arena will light up red in sequence, then explode in order and deal high damage to players standing on them. Patterns include:
- Alternating squares like a checkerboard
- The four center tiles and four corner tiles (X-shape)
- The inverse of the above, every tile but the center and corner eight (O-shape)
- The eight tiles on one edge of the platform and its direct opposite (North/South and East/West)
- The inverse of the above, targeting the eight inner tiles with two edges safe
- Engage Goliath Tank Support: Summons two Goliath Tank adds on the southwestern and northeastern corners of the arena that tether to 9S and grant him Invulnerability.
- Laser Turret: Tankbuster. A red crosshair appears on the highest enmity player, causing the Goliath Tank to follow their position. Unlike 9S's version, the targeted players cannot dodge the attack, so point them away from the alliance.
- Hack Goliath Tank: Once both tanks have been defeated, 9S will hack one, forcing it to self-destruct.
- Convenient Self-Destruct 1: Deals lethal damage to the entire room, but can be blocked by standing behind the other tank.
- Convenient Self-Destruct 2: After the first tank explodes, the second will also explode in a much smaller radius.
- Total Annihilation Maneuver: 9S becomes untargetable and begins hacking, shown via a Hacking meter. Meanwhile, three Serial-jointed Service Models will spawn. These adds have identical attacks to the Serial-jointed Command Model fought earlier, but with a Stack attack added and lacking its energy ball attacks.
- After the adds are destroyed, 2P will raise a barrier to shield the alliance. Allowing 9S to complete his hacking will result in the alliance wiping. After this attack, the fight will continue.
Loot
 Serial-jointed Command Model
| Name | Type | Item Level | Rarity | Quantity |
|---|---|---|---|---|
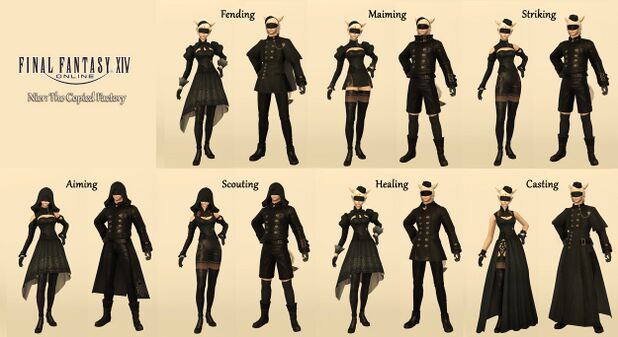
| YoRHa Type-51 Boots of Aiming | Feet | 460 | Blue | 1 |
| YoRHa Type-51 Boots of Casting | Feet | 460 | Blue | 1 |
| YoRHa Type-51 Boots of Fending | Feet | 460 | Blue | 1 |
| YoRHa Type-51 Boots of Healing | Feet | 460 | Blue | 1 |
| YoRHa Type-51 Boots of Maiming | Feet | 460 | Blue | 1 |
| YoRHa Type-51 Boots of Scouting | Feet | 460 | Blue | 1 |
| YoRHa Type-51 Boots of Striking | Feet | 460 | Blue | 1 |
| YoRHa Type-51 Cap of Casting | Head | 460 | Blue | 1 |
| YoRHa Type-51 Cap of Healing | Head | 460 | Blue | 1 |
| YoRHa Type-51 Cap of Striking | Head | 460 | Blue | 1 |
| YoRHa Type-51 Headband of Fending | Head | 460 | Blue | 1 |
| YoRHa Type-51 Headband of Maiming | Head | 460 | Blue | 1 |
| YoRHa Type-51 Hood of Aiming | Head | 460 | Blue | 1 |
| YoRHa Type-51 Hood of Scouting | Head | 460 | Blue | 1 |
 Hobbes
| Name | Type | Item Level | Rarity | Quantity |
|---|---|---|---|---|
| YoRHa Type-51 Gloves of Aiming | Hands | 460 | Blue | 1 |
| YoRHa Type-51 Gloves of Casting | Hands | 460 | Blue | 1 |
| YoRHa Type-51 Gloves of Fending | Hands | 460 | Blue | 1 |
| YoRHa Type-51 Gloves of Healing | Hands | 460 | Blue | 1 |
| YoRHa Type-51 Gloves of Maiming | Hands | 460 | Blue | 1 |
| YoRHa Type-51 Gloves of Scouting | Hands | 460 | Blue | 1 |
| YoRHa Type-51 Gloves of Striking | Hands | 460 | Blue | 1 |
| YoRHa Type-51 Halfslops of Maiming | Legs | 460 | Blue | 1 |
| YoRHa Type-51 Halfslops of Scouting | Legs | 460 | Blue | 1 |
| YoRHa Type-51 Halfslops of Striking | Legs | 460 | Blue | 1 |
| YoRHa Type-51 Trousers of Aiming | Legs | 460 | Blue | 1 |
| YoRHa Type-51 Trousers of Casting | Legs | 460 | Blue | 1 |
| YoRHa Type-51 Trousers of Fending | Legs | 460 | Blue | 1 |
| YoRHa Type-51 Trousers of Healing | Legs | 460 | Blue | 1 |
 Engels
| Name | Type | Item Level | Rarity | Quantity |
|---|---|---|---|---|
| YoRHa Type-51 Boots of Aiming | Feet | 460 | Blue | 1 |
| YoRHa Type-51 Boots of Casting | Feet | 460 | Blue | 1 |
| YoRHa Type-51 Boots of Fending | Feet | 460 | Blue | 1 |
| YoRHa Type-51 Boots of Healing | Feet | 460 | Blue | 1 |
| YoRHa Type-51 Boots of Maiming | Feet | 460 | Blue | 1 |
| YoRHa Type-51 Boots of Scouting | Feet | 460 | Blue | 1 |
| YoRHa Type-51 Boots of Striking | Feet | 460 | Blue | 1 |
| YoRHa Type-51 Coat of Aiming | Body | 460 | Blue | 1 |
| YoRHa Type-51 Jacket of Fending | Body | 460 | Blue | 1 |
| YoRHa Type-51 Jacket of Healing | Body | 460 | Blue | 1 |
| YoRHa Type-51 Jacket of Maiming | Body | 460 | Blue | 1 |
| YoRHa Type-51 Jacket of Scouting | Body | 460 | Blue | 1 |
| YoRHa Type-51 Jacket of Striking | Body | 460 | Blue | 1 |
| YoRHa Type-51 Robe of Casting | Body | 460 | Blue | 1 |
 9S-operated Walking Fortress
- 40 Allagan Tomestone of Poetics
- 9S Card (Drops at a fixed rate)
| Name | Type | Item Level | Rarity | Quantity |
|---|---|---|---|---|
| No.2 Type B Materiel Storage Crate | Other | N/A | Basic | 3 |
| Pod 054 | Minion | N/A | Basic | 1 |
| Pod 316 | Minion | N/A | Basic | 1 |
| City Ruins (Rays of Light) Orchestrion Roll | Orchestrion Roll | N/A | Basic | 1 |
| Alien Manifestation Orchestrion Roll | Orchestrion Roll | N/A | Basic | 1 |
| Song of the Ancients (Atonement) Orchestrion Roll | Orchestrion Roll | N/A | Basic | 1 |
| The Sound of the End Orchestrion Roll | Orchestrion Roll | N/A | Basic | 1 |
| Weight of the World (Prelude Version) Orchestrion Roll | Orchestrion Roll | N/A | Basic | 1 |
Rewards
When originally released, you could receive only one reward item per week for completing duties in The Copied Factory. This restriction was removed in Patch 5.2
Each party in the alliance will receive its own treasure chest, the contents of which will be identical regardless of the route taken.
- Players cannot open a treasure chest belonging to another party.
Achievements
This duty is associated with the following achievements:
| Name | Points | Task | Reward | Patch |
|---|---|---|---|---|
| The First Law | 5 | Complete the Copied Factory. | - | 5.1 |


