Difference between revisions of "Eden's Verse: Furor"
| Line 13: | Line 13: | ||
| time-limit = 90 | | time-limit = 90 | ||
| tomestones = 10 poetics | | tomestones = 10 poetics | ||
| duty-finder = Normal Raids (Shadowbringers) | |||
| roulette = normal raids | | roulette = normal raids | ||
| entrance = The Core | | entrance = The Core | ||
Revision as of 21:03, 10 December 2022
- See also: Eden's Verse and Eden's Verse: Furor (Savage)
Eden's Verse: Furor
- Level
- 80 (Sync: 80)
- Item Level
- 455
- Difficulty
- Normal
- Party size
- Full Party
8 man • 2 2
2  4
4 
- Unsyncing
- Allowed
- Time limit
- 90 minutes
- Duty Finder
- Normal Raids (Shadowbringers)
- Roulette
- Normal Raids
- Tomestones
 10
10 - Req. quest
 Into the Firestorm
- Entrance
- The Core (X:23.4, Y:23.2)
- Location
- Ashfall
- Region
- Norvrandt
- Patch
- 5.2
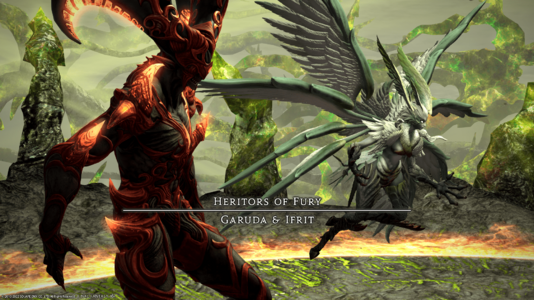
“According to Urianger, the elements of fire and wind must be restored simultaneously to successfully complete the cycle of rainfall and evaporation. Unfortunately for you, this equates to facing the combined might of a pair of raging primals. Images of the ferocious Ifrit and the maniacal Garuda are made flesh, and you steel yourself for battle.
— In-game description
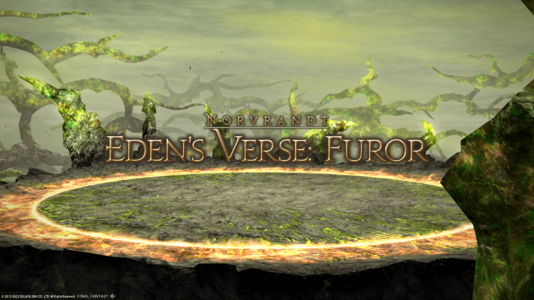
Eden's Verse: Furor is a level 80 raid introduced in patch 5.2 with Shadowbringers. The raid is also known as E6N.
Phases & Abilities
 Heritors of Fury: Garuda & Ifrit
NOTE: Players who touch the edge of the circular arena will instantly die.
Phase 1: Garuda
- Ferrostorm - spawns two feather-like blades at the opposite sides of Garuda. After a brief delay, the feather-blades will shoot large conal AoE's in the direction they are facing, slicing anyone in their path for moderate damage.
- Superstorm - deals unavoidable raid-wide damage that will require shielding and/or healing.
- Aerial Stack - places a blue-circle marker on two random players. Marked players must ensure that at least one other unmarked player stands within the circle as well. If done right, players will receive a Magic Vulnerability Debuff while an AoE circle appears in place of the blue circle which should be avoided. If nobody attempts to stack on the marker at all, the marked victim will be launched into the air and fall onto a wind-like blade for near-fatal damage. Bear in mind that the two marked players should not stack with each other.
- Central Knockback - spawns a large, blue circle in the arena centre. After a brief delay, everyone will be knocked back from the circle. As a result, everyone should move as close to the blue circle as possible (but not within it) if they wish to avoid being punted into the death-wall surrounding the arena. Alternatively, players can also utilize Knockback Immunity cooldowns.
- Storm of Fury - creates a large point-blank AoE directly underneath Garuda that should be avoided. Simultaneously, Garuda will tether herself to two random players via windy looking light-blue lines. After a brief delay, conal AoE attacks will be blasted from Garuda in the direction of both tethers. To avoid, tethered players should move away from each other, whilst everyone else should move away from the tethered players to avoid taking unnecessary damage.
- Vacuum Slice - causes Garuda to dash to the arena centre and charge a straight-line AoE through the middle. After a delay, the arena will essentially be sliced in half with void-like energy, leaving behind a persistent purple effect that will kill anybody who attempts to pass through it. The purple line will persist for quite some time, so be wary!
- Occluded Front - spawns multiple windy orbs around each safe side arena, leaving only one obvious safe spot on each side. After a brief delay, Garuda will charge up a knockback from the outer edge of the arena that will eventually push all players (and the orbs) towards the central line. As a result, players on each side of the sliced arena should move between the orbs (near the edge), wait for the pushback to launch the orbs (and themselves inwards), then move once again to the outer edges. Shortly after, each orb will omit a point-blank AoE underneath, damaging anyone too close to the orbs.
Once you have reached this point, Garuda will fly out of the arena.
Phase 2: Ifrit
- Ifrit Arrives - creates a proximity marker within the arena that players must move away from. After a brief delay, Ifrit will slam into the battlefield dealing raid-wide damage depending on how close they are to the proximity marker at the time of impact.
- Hands of Flame - tethers the main target to Ifrit, who prepares a devastating teleport-punch. After a delay, Ifrit slams into the target and applies Light Headed - a debuff that can lead to a very long stun should the victim acquire an additional Light Headed stack from other concussive abilities. Beware!
- Hands of Hell - applies three tethers to a single random player. Once the tethers have been activated, all but one tether can be passed onto other players (or collected from the victim, depending on your point of view). Once the cast is complete, all players with a tether will receive high damage. As a result, it is always best to grab (or pass on) tethers to other teammates rather than hold onto more than one (as the damage will likely be fatal otherwise).
- Instant Incineration - a vicious tank-buster indicated by a large pulsating red-marker on the chosen target. After a delay, Ifrit will perform a devastating uppercut on the target for major damage.
- Eruption - creates flaming AoE circles around the arena that will explode after a brief delay. Move away from these circles as soon as possible.
- Hot Foot - summons a circular pattern of flaming orbs around the outer edge of the arena. After a delay, Ifrit will teleport to a random orb and prepare to kick it into the centre of the arena. As a result of this, the location where Ifrit teleports to will become the only safe spot in the battlefield, so move as close to Ifrit as possible. After an orb has been kicked, they will simultaneously explode for major AoE damage unto anyone caught in the blast.
- Infernal Howl - inflicts unavoidable raid-wide damage that should be healed at your earliest convenience.
On reaching this point of the fight, Garuda will descend into the arena and the raid will now have to contend with both primals simultaneously. Each tank should ensure that they each have the enmity of one primal (eg. one tank on Garuda, one tank on Ifrit). Now that both are together, participants must be ready to face mechanics from both primals simultaneously.
Phase 3: Garuda & Ifrit
- Vacuum Slice - cuts the arena in half (just like before) using a void-like AoE that will outright slay any player who is caught in the slice or tries to traverse through it after it is placed.
- Eruption - creates more flaming AoE circles beneath random players that should be avoided.
- Occluded Front + Hot Foot - spawns multiple windy orbs around each safe side arena, just like earlier, leaving only one obvious safe spot on each side. However, Ifrit will also select one of these orbs and prepare to kick it (sideways) out of position. If this orb happens to be on the side of the arena you are standing on, be ready to reposition to the new safe-spot near Ifrit's location. Don't forget that all players (and the orbs) will also be knocked into the centre of the arena by an upcoming knockback, just like before.
- Aerial Stack - the blue-circle markers from earlier - will once again be applied to two random players. Make sure that at least one other unmarked player stands within each circle to prevent the marked player from being launched into the air and impaled.
- Hands of Hell - applies three tethers to another random player. Once the tethers have been activated, make sure to pass them onto other players. Just like earlier in the battle, all players with a tether will receive high damage after a moderate delay.
- Ferrostorm - spawns two more feather-like blades at the opposite sides of Garuda that will eventually shoot large conal AoE's in the direction they are facing, slicing anyone in their path for moderate damage. Be ready to move away!
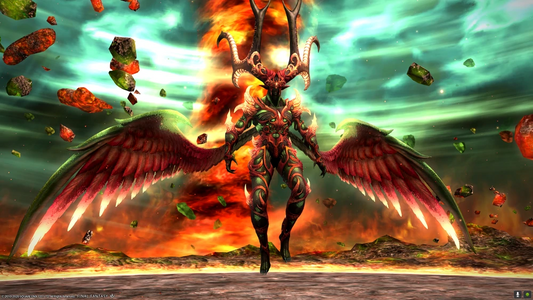
On reaching this point, both Garuda and Ifrit will bewail their situation and begin to merge into a new form - Raktapaksa - dealing tremendous raid-wide damage in the process.
Phase 4: Raktapaksa
- Flaming Circles (5 in total) will engulf the arena, leaving only three safe-spots near the outer edges. Participants must be ready to dash for these safe-spots if they wish to avoid heavy damage from upcoming explosions. At the same time, the raid will also have to contend with another Ferrostorm shortly after the Flaming Circles have exploded - spawning two more feather-like blades beside Raktapaksa that will eventually shoot large conal AoE's in the direction they are facing. Stay on your toes!
- Hands of Flame - Raktapaksa turns towards its main target and prepares a teleporting punch. Simultaneously, the left and right sides of the arena next to Raktapaksa will be marked for an explosion, leaving a safe spot in the form of a straight line the centre of the arena.
- Aerial Stack + Hands of Hell - marks two random players with the blue-circle markers from earlier, whilst also marking another player with triple-tethers, forcing the raid to decide between picking up tethers and moving away from the group (to help spread the damage), or standing within a circle to prevent marked players from being fatally launched. To make matters worse, Eruption will cause more flaming AoE circles to form underneath random players than must also be avoided. Once Hands of Hell (tethers) have concluded, the boss (and clones of the boss) will dash towards tethered players, leaving massive AoE telegraphs in their wake. Only a small section of the arena will be safe from the impending blasts, so move into it as soon as possible.
- Central Knockback - spawns a large blue circle in the arena centre. Just like earlier, everyone will be knocked back from the circle after a brief delay. Everyone should move as close to the blue circle as possible (but not within it) if they wish to avoid being punted into the death-wall surrounding the arena. Don't forget that Knockback Immunity cooldowns can also work in a pinch.
- Conflag Strike - after teleporting to the centre of the arena, Raktapaska will beging to long-cast Conflag Strike. While doing so, the entire battlefield will once again be smothered in flaming AoE circles, leaving only a few safe-spots at the outer-edges of the arena. After exploding, Eruption will leave flaming AoE circles beneath random players that must also be avoided. This process will repeat until Conflag Strike has been charged up, creating a gigantic frontal-cone AoE telegraph over the entire arena (except for a small section directly behind Raktapaksa). To avoid, move behind the boss as soon as the flaming circles and eruptions have ceased to avoid being fatally sliced.
On reaching this point, you have successfully witnessed all mechanics and will continue through a mechanical loop until either the boss (or the raid) has been defeated.
Loot
Treasure Coffer 1
| Name | Type | Item Level | Rarity | Quantity |
|---|---|---|---|---|
| Helm of Golden Antiquity | Other | N/A | Basic | 1 |
| Armor of Golden Antiquity | Other | N/A | Basic | 1 |
| Greaves of Golden Antiquity | Other | N/A | Basic | 1 |
| Bangle of Golden Antiquity | Other | N/A | Basic | 1 |
Treasure Coffer 2
| Name | Type | Item Level | Rarity | Quantity |
|---|---|---|---|---|
| Gauntlets of Golden Antiquity | Other | N/A | Basic | 1 |
| Chausses of Golden Antiquity | Other | N/A | Basic | 1 |
| Greaves of Golden Antiquity | Other | N/A | Basic | 1 |
| Bangle of Golden Antiquity | Other | N/A | Basic | 1 |
Treasure Coffer 3
| Name | Type | Item Level | Rarity | Quantity |
|---|---|---|---|---|
| Primal Angel Orchestrion Roll | Orchestrion Roll | N/A | Basic | 1 |


