Difference between revisions of "The Bowl of Embers (Hard)"
Freedom4556 (talk | contribs) (Converted loot to {{Drops list}}) |
Freedom4556 (talk | contribs) m (→Loot) |
||
| Line 61: | Line 61: | ||
==Loot== | ==Loot== | ||
* | *{{Item icon|Ifrit Card}} (Drops at a fixed rate.) | ||
===[[File:Gold Coffer (small).png|link=]] Treasure Coffer=== | ===[[File:Gold Coffer (small).png|link=]] Treasure Coffer=== | ||
{{Drops table header}} | {{Drops table header}} | ||
| Line 80: | Line 80: | ||
{{Drops table row|Ifrit's Codex}} | {{Drops table row|Ifrit's Codex}} | ||
{{Drops table row|Ifrit's Star Globe}} | {{Drops table row|Ifrit's Star Globe}} | ||
{{Drops table row|Ifrit's Horn}} | |||
{{Table footer}} | {{Table footer}} | ||
Revision as of 06:20, 17 October 2021
- See also: The Bowl of Embers and The Bowl of Embers (Extreme)
The Bowl of Embers (Hard)
- Level
- 50 (Sync: 50)
- Item Level
- 49
- Difficulty
- Normal
- Party size
- Full Party
8 man • 2 2
2  4
4 
- Unsyncing
- Allowed
- Time limit
- 60 minutes
- Roulette
- Trials
- Tomestones
 12
12 - Req. quest
 Ifrit Bleeds, We Can Kill It
- Patch
- 2.0
“While your victory over the Ultima Weapon has set off waves of celebration across the land, the jubilation is short-lived, for the beast tribes are seeking to summon their gods once more. Confirmation has arrived that Amalj'aa have already succeeded in calling forth Ifrit, who is returned far mightier than his last incarnation owing to the vast amounts of crystals he has gorged upon. Prepare yourself for a scorching encounter.
— In-game description
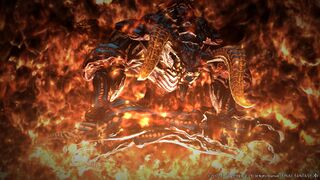
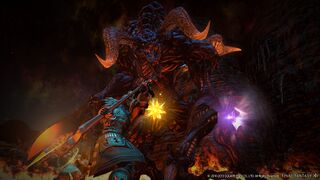
The Bowl of Embers (Hard) is a level 50 trial introduced in patch 2.0.
Unlock
Players must be level 50 and must have completed the following:
Main Scenario Quest
Sidequest
Strategy
- As of patch 2.1 the strategy for this fight has changed. Eruption can no longer be stunned indefinitely. The new format allows stun to work three times before full resistance is built for 1 minute or so. Make sure if you are stunning Ifrit, that no other players are using stuns, and that you only stun eruption.
Phase 1
For the first phase, non-tank players should not stand in front of Ifrit. This is due to several of his abilities:
- Incinerate is an instant frontal breath attack that deals a moderate amount of damage to all targets in front of Ifrit.
- Vulcan Burst is an instant attack that deals small amount of damage to all players near Ifrit. Also causes knockback.
- Eruption is an ability that appears as red crackling glow under a random player. After a few seconds the ground will erupt, dealing heavy damage to all players within.
- Crimson Cyclone is an ability used by Ifrit. He stands at the edge of the boss room, in a sprinting pose for a few seconds. Ifrit then dashes forward, dealing heavy damage to all players caught in his path.
Tanks should tank the boss at the edge of the boss room so ranged damage dealers and casters do not get hit by Vulcan Burst. Players should interrupt Ifrit's Eruption with stuns as often as possible. When Ifrit uses Crimson Cyclone, his charging attack, players should not be in front of the boss.
At about 3/4 HP, phase 2 begins.
Phase 2
During phase 2, Ifrit will gain two new abilities:
- Sear is an instant attack that deals small amount of damage to all players near Ifrit.
- Radiant Plume is an ability that places glowing red circles on the ground. The circles will explode and deal heavy damage to all targets within after a few seconds.
Plumes in this phase are outer plumes then inner plumes. Followed by Eruption then Cyclone.
Phase 3
At roughly 50% hp. Ifrit will summon 4 nails. The nails are top priority. After a period of time Ifrit will perform his signature ability Hellfire. If any nails remain, Hellfire will instantly kill all players, but if they are all destroyed Hellfire will instead only do heavy damage to all players. It is highly recommended to gather up when Hellfire occurs but not on top of the main tank. If the healers are slow at healing this damage, vulcan burst could follow doing damage to all in range.
It is recommended that any BLM's or SMN's in the party use the Limit Break on the Nails to make quick work of them. Although not a necessity, it can provide breathing space to a party lacking good DPS.
As of patch 2.1, Ifrit's Infernal Nails have had a drastic upgrade to damage nullification from Limit Breaks. Pre 2.1 a caster dps Limit Break 2 or better would destroy the nails outright. Now in 2.1 the nails will still have around 20-30% hp. If you do not have caster dps limit break, have the melee dps down the first nail. One dps should advance to the second nail and Limit break. Destroy the 3rd nail. Limit break should be up again at this point for the 4th nail (if not, it should be really close). Limit break then finish off the fourth nail.
Phase 4
After Hellfire has been cast, Ifrit enters phase 4 where he has all the abilities from phase 2 excluding Hellfire.
The order of attacks is:
- Outer Radiant Plumes
- Inner Radiant Plumes
- Eruption (should be stunned)
- Zone wide Radiant plumes (safe spot is behind Ifrit)
- Followed by Dashes. Left Ifrit always dashes first. (3 Ifrits)
Loot
- Ifrit Card (Drops at a fixed rate.)
 Treasure Coffer
| Name | Type | Item Level | Rarity | Quantity |
|---|---|---|---|---|
| Ifrit's Blade | Gladiator's Arm | 60 | Blue | 1 |
| Ifrit's Battleaxe | Marauder's Arm | 60 | Blue | 1 |
| Ifrit's Faussar | Dark Knight's Arm | 60 | Blue | 1 |
| Ifrit's Harpoon | Lancer's Arm | 60 | Blue | 1 |
| Ifrit's Claws | Pugilist's Arm | 60 | Blue | 1 |
| Ifrit's Katana | Samurai's Arm | 60 | Blue | 1 |
| Ifrit's Kris | Rogue's Arm | 60 | Blue | 1 |
| Ifrit's Bow | Archer's Arm | 60 | Blue | 1 |
| Ifrit's Musketoon | Machinist's Arm | 60 | Blue | 1 |
| Ifrit's Rod | Two-handed Thaumaturge's Arm | 60 | Blue | 1 |
| Ifrit's Grimoire | Arcanist's Grimoire | 60 | Blue | 1 |
| Ifrit's Rapier | Red Mage's Arm | 60 | Blue | 1 |
| Ifrit's Cane | Two-handed Conjurer's Arm | 60 | Blue | 1 |
| Ifrit's Codex | Scholar's Arm | 60 | Blue | 1 |
| Ifrit's Star Globe | Astrologian's Arm | 60 | Blue | 1 |
| Ifrit's Horn | Material | N/A | Basic | 1 |


