Difference between revisions of "Sastasha"
Andrealinia (talk | contribs) (→Loot: Finished acolyte's set data) |
Andrealinia (talk | contribs) (→Loot: Added Foestriker's set) |
||
| Line 25: | Line 25: | ||
!Item | !Item | ||
!Icon | !Icon | ||
!Level | !Item Level | ||
!Requirement | !Requirement | ||
!Slot | !Slot | ||
! | !Defence | ||
!Magic | !Magic Defence | ||
!Stats and Attributes | !Stats and Attributes | ||
|- | |- | ||
|[[Acolyte's Halfgloves]] || ||17 || [[Disciples of Magic]] <br /> Level 15 ||Hands ||10 ||21 ||align = "left" |[[Vitality]] +1, [[Intelligence]] +2, [[Mind]] +2, [[Accuracy]] +2, [[Determination]] +1 | |[[Acolyte's Halfgloves]] || ||17 || [[Disciples of Magic]] <br /> Level 15 ||Hands ||10 ||21 ||align = "left" |[[Vitality]] +1, [[Intelligence]] +2, [[Mind]] +2, [[Accuracy]] +2, [[Determination]] +1 | ||
|- | |- | ||
|[[Acolyte's Robe]] || ||17 || [[Disciples of Magic]] <br /> Level 15 ||Body ||14 ||29 ||align = "left" |[[Vitality]] +2, [[Intelligence]] +3, [[Mind]] +3, [[Critical Hit Rate|Critical Hit Rating]] +3, [[Determination]] +1 | |[[Acolyte's Robe]] || ||17 || [[Disciples of Magic]] <br /> Level 15 ||Body ||14 ||29 ||align = "left" |[[Vitality]] +2, [[Intelligence]] +3, [[Mind]] +3, [[Critical Hit Rate|Critical Hit Rating]] +3, [[Determination]] +1 | ||
| Line 40: | Line 40: | ||
|[[Acolyte's Thighboots]] || ||17 || [[Disciples of Magic]] <br /> Level 15 ||Feet ||10 ||21 ||align = "left" |[[Vitality]] +1, [[Intelligence]] +2, [[Mind]] +2, [[Critical Hit Rate|Critical Hit Rating]] +2, [[Determination]] +1 | |[[Acolyte's Thighboots]] || ||17 || [[Disciples of Magic]] <br /> Level 15 ||Feet ||10 ||21 ||align = "left" |[[Vitality]] +1, [[Intelligence]] +2, [[Mind]] +2, [[Critical Hit Rate|Critical Hit Rating]] +2, [[Determination]] +1 | ||
|- | |- | ||
|[[Foestriker's | |[[Foestriker's Mitts]] || ||17 || [[Disciples of War]] <br /> Level 15 ||Hands ||16 ||16 ||align = "left" |[[Strength]] +2, [[Dexterity]] +2, [[Vitality]] +2, [[Accuracy]] +2, [[Determination]] +1 | ||
|- | |- | ||
|[[Foestriker's | |[[Foestriker's Tabard]] || ||17 || [[Disciples of War]] <br /> Level 15 ||Body ||22 ||22 ||align = "left" |[[Strength]] +3, [[Dexterity]] +3, [[Vitality]] +3, [[Determination]] +1, [[Skill Speed]] +3 | ||
|- | |- | ||
|[[Foestriker's Skirt]] || || | |[[Foestriker's Skirt]] || ||17 || [[Disciples of War]] <br /> Level 15 ||Legs ||22 ||22 ||align = "left" |[[Strength]] +3, [[Dexterity]] +3, [[Vitality]] +3, [[Accuracy]] +3, [[Determination]] +2 | ||
|- | |- | ||
|[[Foestriker's | |[[Foestriker's Boots]] || ||17 || [[Disciples of War]] <br /> Level 15 ||Feet ||16 ||16 ||align = "left" |[[Strength]] +2, [[Dexterity]] +2, [[Vitality]] +2, [[Critical Hit Rate|Critical Hit Rating]] +2, [[Determination]] +1 | ||
|- | |- | ||
|[[Nightprowler's Shield]] || || || || || || ||align = "left" | | |[[Nightprowler's Shield]] || || || || || || ||align = "left" | | ||
Revision as of 14:58, 27 January 2014
"After a period of relative silence following the Calamity, the Serpent Reavers have once again taken to terrorizing the inland hamlets of La Noscea, killing the men, kidnapping the women and children, plundering the storehouses and burning what little they leave behind. For years, it was not known how the pirates were able to raid areas so far from the coast, until a local shepherd sighted a band of painted ruffians entering the Sastasha Seagrot, carrying large quantities of sacks and crates. Could it be that there is more to this cave than meets the eye?" — Game Description
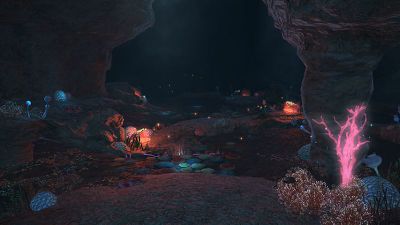
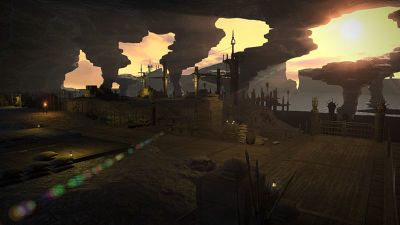
Sastasha Seagrot is a level 15-18 dungeon in Western La Noscea. It is the first dungeon the players will encounter and unlock through the main storyline quests. Sastasha Seagrot requires a light party of 4 players.
- Players who are level 19 or above will be level sync'd down to level 18 upon entrance.
Bosses
Chopper
Chopper is the first boss of Sastasha Seagrot. It is a coeurl. Once in a while Chopper will perform an AoE attack. A red circle will appear on the ground before it executes the attack. Get out of the circle as soon as possible.
Pirate Captain Madison
Players will need to defeat Pirate Captain Madison twice. In first encounter, kill his crew members first then hurt him until he runs away. In the second encounter, he will summon a pack of guard dogs at about a quarter HP. AoE the dogs down then attack the Captain util he flees.
Denn the Orcatoothed
Denn the Orcatoothed is the final boss of Sastasha. The boss room features 4 grates with bubbling water at the left and right sides of the room. During the boss fight, adds will spawn from the bubbling water. Players can interact with the grate when it's bubbling to prevent an add from spawning. To this extent, casters should position themselves to be in range to cast, while still able to quickly interact with the grates when they bubble.
- Should adds spawn, try and keep their numbers down to prevent the tank from being overwhelmed. If a caster is targeted by the adds, caster should run near the tank so that the tank can remove hate while staying by the boss.

