|
|
| Line 284: |
Line 284: |
|
| |
|
| ===Diabolos Loot=== | | ===Diabolos Loot=== |
| | Guaranteed: |
| *[[Mhachi Shilling]] | | *[[Mhachi Shilling]] |
| *[[Mhachi Matter]] | | *[[Mhachi Matter]] |
| | |
| | Rolled on: |
| *[[Void Matter]] | | *[[Void Matter]] |
| *[[Wind-up Scathach]] | | *[[Wind-up Scathach]] |
Revision as of 21:21, 24 April 2017
Template:Dungeon Infobox
General Information
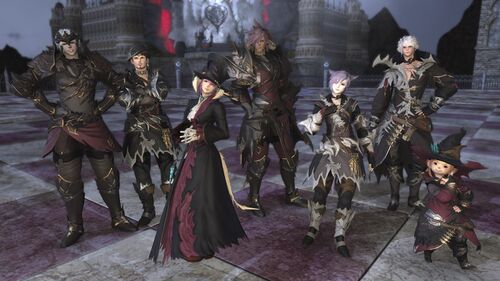
Dun Scaith is a level 60 raid released in patch 3.5. It is the third and final 24-player raid of Heavensward expansion. Dun Scaith requires the players to have item levels of 235 or higher. The raid composition is 3 tanks, 6 healers and 15 DPS (1:2:5 ratio).
Unlock
Bosses
Temporary notes, please clean up with proper names and such:
Haven't seen a guide up yet but I ran it last night after the patch and here's my notes if anyone wants to use them. I left out some obvious aoe dodges but I think I got all of it. I'm sure you guys will find other things.
Deathgaze Hollow
- Void Doom: Red/Black AOE in center will pull you in, keep running away from it, as it will try to pull you in again a second time, then explode for massive damage.
- Doom: randomly cast on 2 people, must be cleansed by healers.
- Bolt of Darkness: Perpendicular AoE, deals damage and applies Bleeding to players affected.
- Void Aero II: Random players will be marked with a green icon over head and will drop a tornado after the boss finishes the cast. Drop these away from others and towards edges of ship.
- Void Blizzard II: Big cone AoE with safe cone spots.
- Void Aero III: Green AoE in center will explode and push you away, dealing proximity-based damage. Either stay in the center to avoid the knockback (big damage), or run to the walls that block the boss area. Please note that after a certain point in the battle, the boss will fly to a section of the room and cast Bolt of Darkness.
- Void Blizzard IV: Two AoEs will appear, dealing proximity-based damage and dropping ice crystals in the center of the area. After they fall, the boss will cast Void Aero IV.
- Void Aero IV: Boss will appear in one side of the arena and push players. Line with a crystal dropped from Void Blizzard IV to avoid falling off.
- As the battle progresses, gray squares will appear on the floor. Those will deal damage to anyone standing on them when the boss casts Void Death IV.
- Void Death IV: Instantly kills any player standing on a gray square.
Ferdiad Hollow
- Throughout the fight, Ferdiad will mark 3 players with red markers and throw Abyssal Scythes on them. The scythes will stay on the ground, dealing damage to anyone close to them.
- Also throughout the fight, Ferdiad will summon Atmos, and tether to one or two of them and cast Wormhole.
- Wormhole: Shoots a ball in a straight line into the tethered Atmos. The tethered ones disappear after the cast, transferring their balls to a same-colored Atmos.
- Yellow Atmos transfers ball to another yellow Atmos, and blue Atmos transfers ball to another blue Atmos; the ball color will not change.
- The yellow ball explodes in a room-wide donut-AoE (safe zone near it), and the blue ball explodes in a big AoE (no safe zone).
- Jester's Reap: Big cone AoE in front of the boss.
- Jongleur's X: Tankbuster.
- Blackblot: Marks a target. Others should stack on the targeted player to share damage.
- Blackfire: AoEs will cover the arena. Those become gradually bigger as the cast progresses.
- Debilitator: Reduces all players' weakness to fire or water, and spawns various puddles on the floor. Stepping on a puddle changes its element (blue = water, red = fire). The boss will cast Flameflow after a while.
- Players should change puddles' element to the one contrary to their weakness - if you have fire weakness, change puddles to blue (water).
- Flameflow: Deals damage to all players. Damage can be reduced by avoiding puddles of the same element of the group weakness.
- At around 60% health, the boss will go to the middle of the room and become untargetable, spawning Atmos around him which mobs will shot from them.
- Anyone in front of the Atmos will take damage and a stack of vulnerability.
- From time to time, the boss will cover a half of the arena with a long-cast AoE. It will kill any players standing on that side when the cast finishes.
- The adds will either cast:
- Lucky Pierrot: Atmos will spawn around the edges of the room, and adds will dash to them, dealing damage to anyone on the way. The adds will reappear from the Atmos in the center, dealing damage to players nearby.
- Icafall: Small AoEs.
- After the adds are killed, the boss will deal damage to all players.
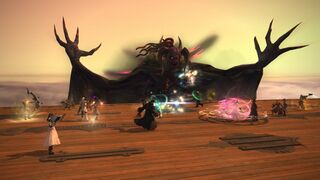
Scathach
- When wings(?) get really big be in front or behind THEM, boss direction doesn't matter
- When she ports she will do large aoe a few seconds later
- When message about shadows on the ground pops up, stop all movement, otherwise little arms grab you and do a good amount of damage
- Occasionally she will turn toward party and do line aoe, sidestep it
- Move adds away and kill, if they get too close they tether and buff her
- Shadow Limb (giant hands) link to a player when spawned and will be pulled toward that player, killing the player if they reach the player. The tethered player can face the Shadow Limb to make it stand still. The Limbs must be DPSed, and can switch tethers to a different player.
- At 50%, Scathach will enter a cocoon and spawn adds, including a Chimera with the typical Chimera moveset.
- These adds must be killed, or she will wipe upon emerging from the cocoon.
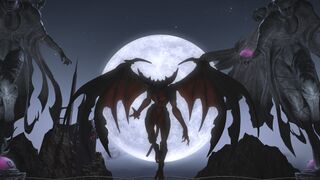
Diabolos
- Lots of familiar moves
- Gates are priority
- After a while there will be 2 doors that spawn things and 1 big door. Kill small doors asap
- Watch for more small doors as you kill big door 3 times
5th boss Diabolos Hollow(2nd form)
NEW GAME MECHANIC
- He will do a large "group up" type AOE COMBINED with a "look away" AOE. People should stack on this person BUT also look away from them
- All the mechanics from last fight plus some from queen
- Watch for the line aoe from queen
- Uses Earthshakers
- Gates again
- A large gate will spawn that one alliance should enter to kill an add
Loot
Deathgaze Hollow Loot
| Item
|
Icon
|
Level
|
Item Level
|
Requirement
|
Slot
|
Defence
|
Magic Defence
|
Materia Slots
|
Stats and Attributes
|
| Diabolic Belt of Aiming |
 |
60 |
260 |
ARC, BRD, MCH |
Waist |
162 |
162 |
1 |
Dexterity +72, Vitality +80, Critical Hit Rate +40, Determination +54
|
| Diabolic Belt of Casting |
 |
60 |
260 |
THM, ACN, BLM, SMN |
Waist |
118 |
206 |
1 |
Vitality +72, Intelligence +72, Critical Hit Rate +40, Spell Speed +57
|
| Diabolic Belt of Fending |
 |
60 |
260 |
GLA, MRD, PLD, WAR, DRK |
Waist |
295 |
295 |
1 |
Strength +72, Vitality +80, Determination +38, Skill Speed +57
|
| Diabolic Belt of Healing |
 |
60 |
260 |
CNJ, WHM, SCH, AST |
Waist |
118 |
206 |
1 |
Vitality +72, Mind +72, Determination +38, Spell Speed +57
|
| Diabolic Belt of Maiming |
 |
60 |
260 |
LNC, DRG |
Waist |
206 |
162 |
1 |
Strength +72, Vitality +80, Determination +54, Skill Speed +40
|
| Diabolic Belt of Scouting |
 |
60 |
260 |
ROG, NIN |
Waist |
162 |
162 |
1 |
Dexterity +72, Vitality +80, Determination +38, Skill Speed +57
|
| Diabolic Belt of Striking |
 |
60 |
260 |
PGL, MNK |
Waist |
162 |
162 |
1 |
Strength +72, Vitality +80, Critical Hit Rate +57, Determination +38
|
| Diabolic Circlet of Maiming |
 |
60 |
260 |
LNC, DRG |
Head |
238 |
187 |
2 |
Strength +96, Vitality +107, Critical Hit Rate +76, Skill Speed +53
|
| Diabolic Dress Gloves of Healing |
 |
60 |
260 |
CNJ, WHM, SCH, AST |
Hands |
136 |
238 |
2 |
Vitality +96, Mind +96, Piety +77, Determination +51
|
| Diabolic Gauntlets of Fending |
 |
60 |
260 |
GLA, MRD, PLD, WAR, DRK |
Hands |
340 |
340 |
2 |
Strength +96, Vitality +107, Accuracy +53, Critical Hit Rate +76
|
| Diabolic Gauntlets of Maiming |
 |
60 |
260 |
LNC, DRG |
Hands |
238 |
187 |
2 |
Strength +96, Vitality +107, Critical Hit Rate +53, Skill Speed +76
|
| Diabolic Gloves of Scouting |
 |
60 |
260 |
ROG, NIN |
Hands |
187 |
187 |
2 |
Dexterity +96, Vitality +107, Accuracy +53, Determination +72
|
| Diabolic Gloves of Striking |
 |
60 |
260 |
PGL, MNK |
Hands |
187 |
187 |
2 |
Strength +96, Vitality +107, Accuracy +76, Skill Speed +53
|
| Diabolic Halfgloves of Aiming |
 |
60 |
260 |
ARC, BRD, MCH |
Hands |
187 |
187 |
2 |
Dexterity +96, Vitality +107, Accuracy +53, Determination +72
|
| Diabolic Halfgloves of Casting |
 |
60 |
260 |
THM, ACN, BLM, SMN |
Hands |
136 |
238 |
2 |
Vitality +96, Intelligence +96, Accuracy +53, Determination +72
|
| Diabolic Hat of Aiming |
 |
60 |
260 |
ARC, BRD, MCH |
Head |
187 |
187 |
2 |
Dexterity +96, Vitality +107, Critical Hit Rate +53, Skill Speed +76
|
| Diabolic Hat of Casting |
 |
60 |
260 |
THM, ACN, BLM, SMN |
Head |
136 |
238 |
2 |
Vitality +96, Intelligence +96, Critical Hit Rate +76, Determination +51
|
| Diabolic Hat of Healing |
 |
60 |
260 |
CNJ, WHM, SCH, AST |
Head |
136 |
238 |
2 |
Vitality +96, Mind +96, Critical Hit Rate +76, Spell Speed +53
|
| Diabolic Helm of Fending |
 |
60 |
260 |
GLA, MRD, PLD, WAR, DRK |
Head |
340 |
340 |
2 |
Strength +96, Vitality +107, Accuracy +53, Skill Speed +76
|
| Diabolic Turban of Scouting |
 |
60 |
260 |
ROG, NIN |
Head |
187 |
187 |
2 |
Dexterity +96, Vitality +107, Critical Hit Rate +76, Determination +51
|
| Diabolic Turban of Striking |
 |
60 |
260 |
PGL, MNK |
Head |
187 |
187 |
2 |
Strength +96, Vitality +107, Critical Hit Rate +53, Skill Speed +76
|
Ferdiad Hollow Loot
| Item
|
Icon
|
Level
|
Item Level
|
Requirement
|
Slot
|
Defence
|
Magic Defence
|
Materia Slots
|
Stats and Attributes
|
| Diabolic Boots of Aiming |
 |
60 |
260 |
ARC, BRD, MCH |
Feet |
187 |
187 |
2 |
Dexterity +96, Vitality +107, Accuracy +53, Critical Hit Rate +76
|
| Diabolic Boots of Casting |
 |
60 |
260 |
THM, ACN, BLM, SMN |
Feet |
136 |
238 |
2 |
Vitality +96, Intelligence +96, Accuracy +76, Determination +51
|
| Diabolic Boots of Healing |
 |
60 |
260 |
CNJ, WHM, SCH, AST |
Feet |
136 |
238 |
2 |
Vitality +96, Mind +96, Piety +54, Critical Hit Rate +76
|
| Diabolic Bottoms of Aiming |
 |
60 |
260 |
ARC, BRD, MCH |
Legs |
262 |
262 |
2 |
Dexterity +157, Vitality +174, Critical Hit Rate +123, Determination +82
|
| Diabolic Bottoms of Casting |
 |
60 |
260 |
THM, ACN, BLM, SMN |
Legs |
190 |
333 |
2 |
Vitality +157, Intelligence +157, Critical Hit Rate +86, Spell Speed +123
|
| Diabolic Bottoms of Fending |
 |
60 |
260 |
GLA, MRD, PLD, WAR, DRK |
Legs |
476 |
476 |
2 |
Strength +157, Vitality +174, Accuracy +123, Critical Hit Rate +86
|
| Diabolic Bottoms of Maiming |
 |
60 |
260 |
LNC, DRG |
Legs |
333 |
262 |
2 |
Strength +157, Vitality +174, Accuracy +86, Critical Hit Rate +123
|
| Diabolic Bottoms of Scouting |
 |
60 |
260 |
ROG, NIN |
Legs |
262 |
262 |
2 |
Dexterity +157, Vitality +174, Accuracy +123, Critical Hit Rate +86
|
| Diabolic Bottoms of Striking |
 |
60 |
260 |
PGL, MNK |
Legs |
262 |
262 |
2 |
Strength +157, Vitality +174, Accuracy +86, Determination +117
|
| Diabolic Circlet of Maiming |
 |
60 |
260 |
LNC, DRG |
Head |
238 |
187 |
2 |
Strength +96, Vitality +107, Critical Hit Rate +76, Skill Speed +53
|
| Diabolic Hat of Aiming |
 |
60 |
260 |
ARC, BRD, MCH |
Head |
187 |
187 |
2 |
Dexterity +96, Vitality +107, Critical Hit Rate +53, Skill Speed +76
|
| Diabolic Hat of Casting |
 |
60 |
260 |
THM, ACN, BLM, SMN |
Head |
136 |
238 |
2 |
Vitality +96, Intelligence +96, Critical Hit Rate +76, Determination +51
|
| Diabolic Hat of Healing |
 |
60 |
260 |
CNJ, WHM, SCH, AST |
Head |
136 |
238 |
2 |
Vitality +96, Mind +96, Critical Hit Rate +76, Spell Speed +53
|
| Diabolic Helm of Fending |
 |
60 |
260 |
GLA, MRD, PLD, WAR, DRK |
Head |
340 |
340 |
2 |
Strength +96, Vitality +107, Accuracy +53, Skill Speed +76
|
| Diabolic Sabatons of Fending |
 |
60 |
260 |
GLA, MRD, PLD, WAR, DRK |
Feet |
340 |
340 |
2 |
Strength +96, Vitality +107, Parry +76, Skill Speed +53
|
| Diabolic Sabatons of Maiming |
 |
60 |
260 |
LNC, DRG |
Feet |
238 |
187 |
2 |
Strength +96, Vitality +107, Accuracy +76, Determination +51
|
| Diabolic Thighboots of Scouting |
 |
60 |
260 |
ROG, NIN |
Feet |
187 |
187 |
2 |
Dexterity +96, Vitality +107, Accuracy +76, Determination +51
|
| Diabolic Thighboots of Striking |
 |
60 |
260 |
PGL, MNK |
Feet |
187 |
187 |
2 |
Strength +96, Vitality +107, Determination +72, Skill Speed +53
|
| Diabolic Trousers of Healing |
 |
60 |
260 |
CNJ, WHM, SCH, AST |
Legs |
190 |
333 |
2 |
Vitality +157, Mind +157, Piety +124, Spell Speed +86
|
| Diabolic Turban of Scouting |
 |
60 |
260 |
ROG, NIN |
Head |
187 |
187 |
2 |
Dexterity +96, Vitality +107, Critical Hit Rate +76, Determination +51
|
| Diabolic Turban of Striking |
 |
60 |
260 |
PGL, MNK |
Head |
187 |
187 |
2 |
Strength +96, Vitality +107, Critical Hit Rate +53, Skill Speed +76
|
Scathach Loot
| Item
|
Icon
|
Level
|
Item Level
|
Requirement
|
Slot
|
Defence
|
Magic Defence
|
Materia Slots
|
Stats and Attributes
|
| Diabolic Belt of Aiming |
 |
60 |
260 |
ARC, BRD, MCH |
Waist |
162 |
162 |
1 |
Dexterity +72, Vitality +80, Critical Hit Rate +40, Determination +54
|
| Diabolic Belt of Casting |
 |
60 |
260 |
THM, ACN, BLM, SMN |
Waist |
118 |
206 |
1 |
Vitality +72, Intelligence +72, Critical Hit Rate +40, Spell Speed +57
|
| Diabolic Belt of Fending |
 |
60 |
260 |
GLA, MRD, PLD, WAR, DRK |
Waist |
295 |
295 |
1 |
Strength +72, Vitality +80, Determination +38, Skill Speed +57
|
| Diabolic Belt of Healing |
 |
60 |
260 |
CNJ, WHM, SCH, AST |
Waist |
118 |
206 |
1 |
Vitality +72, Mind +72, Determination +38, Spell Speed +57
|
| Diabolic Belt of Maiming |
 |
60 |
260 |
LNC, DRG |
Waist |
206 |
162 |
1 |
Strength +72, Vitality +80, Determination +54, Skill Speed +40
|
| Diabolic Belt of Scouting |
 |
60 |
260 |
ROG, NIN |
Waist |
162 |
162 |
1 |
Dexterity +72, Vitality +80, Determination +38, Skill Speed +57
|
| Diabolic Belt of Striking |
 |
60 |
260 |
PGL, MNK |
Waist |
162 |
162 |
1 |
Strength +72, Vitality +80, Critical Hit Rate +57, Determination +38
|
| Diabolic Boots of Aiming |
 |
60 |
260 |
ARC, BRD, MCH |
Feet |
187 |
187 |
2 |
Dexterity +96, Vitality +107, Accuracy +53, Critical Hit Rate +76
|
| Diabolic Boots of Casting |
 |
60 |
260 |
THM, ACN, BLM, SMN |
Feet |
136 |
238 |
2 |
Vitality +96, Intelligence +96, Accuracy +76, Determination +51
|
| Diabolic Boots of Healing |
 |
60 |
260 |
CNJ, WHM, SCH, AST |
Feet |
136 |
238 |
2 |
Vitality +96, Mind +96, Piety +54, Critical Hit Rate +76
|
| Diabolic Coat of Aiming |
 |
60 |
260 |
ARC, BRD, MCH |
Body |
262 |
262 |
2 |
Dexterity +157, Vitality +174, Accuracy +123, Determination +82
|
| Diabolic Coat of Casting |
 |
60 |
260 |
THM, ACN, BLM, SMN |
Body |
190 |
333 |
2 |
Vitality +157, Intelligence +157, Accuracy +123, Spell Speed +86
|
| Diabolic Coat of Healing |
 |
60 |
260 |
CNJ, WHM, SCH, AST |
Body |
190 |
333 |
2 |
Vitality +157, Mind +157, Critical Hit Rate +86, Determination +117
|
| Diabolic Dolman of Scouting |
 |
60 |
260 |
ROG, NIN |
Body |
262 |
262 |
2 |
Dexterity +157, Vitality +174, Critical Hit Rate +86, Skill Speed +123
|
| Diabolic Dolman of Striking |
 |
60 |
260 |
PGL, MNK |
Body |
262 |
262 |
2 |
Strength +157, Vitality +174, Accuracy +86, Critical Hit Rate +123
|
| Diabolic Mail of Fending |
 |
60 |
260 |
GLA, MRD, PLD, WAR, DRK |
Body |
476 |
476 |
2 |
Strength +157, Vitality +174, Parry +86, Determination +117
|
| Diabolic Mail of Maiming |
 |
60 |
260 |
LNC, DRG |
Body |
333 |
262 |
2 |
Strength +157, Vitality +174, Accuracy +123, Critical Hit Rate +86
|
| Diabolic Sabatons of Fending |
 |
60 |
260 |
GLA, MRD, PLD, WAR, DRK |
Feet |
340 |
340 |
2 |
Strength +96, Vitality +107, Parry +76, Skill Speed +53
|
| Diabolic Sabatons of Maiming |
 |
60 |
260 |
LNC, DRG |
Feet |
238 |
187 |
2 |
Strength +96, Vitality +107, Accuracy +76, Determination +51
|
| Diabolic Thighboots of Scouting |
 |
60 |
260 |
ROG, NIN |
Feet |
187 |
187 |
2 |
Dexterity +96, Vitality +107, Accuracy +76, Determination +51
|
| Diabolic Thighboots of Striking |
 |
60 |
260 |
PGL, MNK |
Feet |
187 |
187 |
2 |
Strength +96, Vitality +107, Determination +72, Skill Speed +53
|
Diabolos Loot
Guaranteed:
Rolled on:
| Item
|
Icon
|
Level
|
Item Level
|
Requirement
|
Slot
|
Defence
|
Magic Defence
|
Materia Slots
|
Stats and Attributes
|
| Diabolic Bottoms of Aiming |
 |
60 |
260 |
ARC, BRD, MCH |
Legs |
262 |
262 |
2 |
Dexterity +157, Vitality +174, Critical Hit Rate +123, Determination +82
|
| Diabolic Bottoms of Casting |
 |
60 |
260 |
THM, ACN, BLM, SMN |
Legs |
190 |
333 |
2 |
Vitality +157, Intelligence +157, Critical Hit Rate +86, Spell Speed +123
|
| Diabolic Bottoms of Fending |
 |
60 |
260 |
GLA, MRD, PLD, WAR, DRK |
Legs |
476 |
476 |
2 |
Strength +157, Vitality +174, Accuracy +123, Critical Hit Rate +86
|
| Diabolic Bottoms of Maiming |
 |
60 |
260 |
LNC, DRG |
Legs |
333 |
262 |
2 |
Strength +157, Vitality +174, Accuracy +86, Critical Hit Rate +123
|
| Diabolic Bottoms of Scouting |
 |
60 |
260 |
ROG, NIN |
Legs |
262 |
262 |
2 |
Dexterity +157, Vitality +174, Accuracy +123, Critical Hit Rate +86
|
| Diabolic Bottoms of Striking |
 |
60 |
260 |
PGL, MNK |
Legs |
262 |
262 |
2 |
Strength +157, Vitality +174, Accuracy +86, Determination +117
|
| Diabolic Coat of Aiming |
 |
60 |
260 |
ARC, BRD, MCH |
Body |
262 |
262 |
2 |
Dexterity +157, Vitality +174, Accuracy +123, Determination +82
|
| Diabolic Coat of Casting |
 |
60 |
260 |
THM, ACN, BLM, SMN |
Body |
190 |
333 |
2 |
Vitality +157, Intelligence +157, Accuracy +123, Spell Speed +86
|
| Diabolic Coat of Healing |
 |
60 |
260 |
CNJ, WHM, SCH, AST |
Body |
190 |
333 |
2 |
Vitality +157, Mind +157, Critical Hit Rate +86, Determination +117
|
| Diabolic Dolman of Scouting |
 |
60 |
260 |
ROG, NIN |
Body |
262 |
262 |
2 |
Dexterity +157, Vitality +174, Critical Hit Rate +86, Skill Speed +123
|
| Diabolic Dolman of Striking |
 |
60 |
260 |
PGL, MNK |
Body |
262 |
262 |
2 |
Strength +157, Vitality +174, Accuracy +86, Critical Hit Rate +123
|
| Diabolic Dress Gloves of Healing |
 |
60 |
260 |
CNJ, WHM, SCH, AST |
Hands |
136 |
238 |
2 |
Vitality +96, Mind +96, Piety +77, Determination +51
|
| Diabolic Gauntlets of Fending |
 |
60 |
260 |
GLA, MRD, PLD, WAR, DRK |
Hands |
340 |
340 |
2 |
Strength +96, Vitality +107, Accuracy +53, Critical Hit Rate +76
|
| Diabolic Gauntlets of Maiming |
 |
60 |
260 |
LNC, DRG |
Hands |
238 |
187 |
2 |
Strength +96, Vitality +107, Critical Hit Rate +53, Skill Speed +76
|
| Diabolic Gloves of Scouting |
 |
60 |
260 |
ROG, NIN |
Hands |
187 |
187 |
2 |
Dexterity +96, Vitality +107, Accuracy +53, Determination +72
|
| Diabolic Gloves of Striking |
 |
60 |
260 |
PGL, MNK |
Hands |
187 |
187 |
2 |
Strength +96, Vitality +107, Accuracy +76, Skill Speed +53
|
| Diabolic Halfgloves of Aiming |
 |
60 |
260 |
ARC, BRD, MCH |
Hands |
187 |
187 |
2 |
Dexterity +96, Vitality +107, Accuracy +53, Determination +72
|
| Diabolic Halfgloves of Casting |
 |
60 |
260 |
THM, ACN, BLM, SMN |
Hands |
136 |
238 |
2 |
Vitality +96, Intelligence +96, Accuracy +53, Determination +72
|
| Diabolic Mail of Fending |
 |
60 |
260 |
GLA, MRD, PLD, WAR, DRK |
Body |
476 |
476 |
2 |
Strength +157, Vitality +174, Parry +86, Determination +117
|
| Diabolic Mail of Maiming |
 |
60 |
260 |
LNC, DRG |
Body |
333 |
262 |
2 |
Strength +157, Vitality +174, Accuracy +123, Critical Hit Rate +86
|
| Diabolic Trousers of Healing |
 |
60 |
260 |
CNJ, WHM, SCH, AST |
Legs |
190 |
333 |
2 |
Vitality +157, Mind +157, Piety +124, Spell Speed +86
|
Images
Gear Images

Dungeon Images
Lore
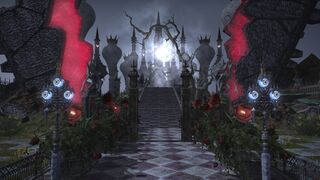
The ancient tome recovered by Captain Radlia of the Talons tells of a floating refuge─an island created by Mhachi sorcerers to provide safe haven from calamitous floodwaters. With the disaster that befell the Void Ark, however, the island's intended residents never arrived. Cait Sith is convinced that Diabolos has instead claimed this refuge as his own, transforming what was to be a bastion of hope into a voidsent nest of shadowy nightmare.
Template:Dungeons
