Difference between revisions of "The Navel"
Tag: Undo |
|||
| (37 intermediate revisions by 17 users not shown) | |||
| Line 1: | Line 1: | ||
{{ | {{otheruses|the [[Main Scenario]] [[trial]]|the level 50 story-mode [[trial]]|The Navel (Hard)|the level 50 challenge-mode [[trial]]|The Navel (Extreme)|the [[Ultimate Raid]] involving [[Titan]]|The Weapon's Refrain (Ultimate)}} | ||
| | {{Duty infobox | ||
| name = The Navel | |||
| image = The navel banner1.png | |||
| description = Having passed the seemingly endless trials imposed upon you by the Company of Heroes, you have been entrusted with the knowledge of a secret way into the Navel, the domain of the primal [[Titan]]. Courtesy of Y'shtola's magicks, the beastman aetheryte is now primed to send you to a confrontation with the Lord of Crags. Gird your loins for a struggle of titanic proportions. | |||
|level | | type = Trial | ||
| | | level = 34 | ||
| level-sync = 36 | |||
| | | ilvl = | ||
| ilvl-sync = | |||
| | | difficulty = normal | ||
| | | size = 4 | ||
| time-limit = 60 | |||
| duty-finder = Trials (A Realm Reborn) | |||
| roulette = leveling | |||
}} | | location = The Navel | ||
{{ | | region = La Noscea | ||
| entrance = Upper La Noscea | |||
| entrance-coordinates = 29.1, 18.6 | |||
| tomestones = | |||
== | | req-quest = Lord of Crags | ||
| modes = duty support | |||
| patch = 2.0 | |||
| echo = trial | |||
}} {{TOC limit|3}} | |||
==Duty Support== | |||
{| {{STDT|pve align-left}} | |||
! | |||
! Scion Marauder | |||
! Scion Conjurer | |||
! Scion Thaumaturge | |||
! Scion Lancer | |||
|- | |||
| | |||
| [[File:DS Marauder3.png]] | |||
| [[File:DS Conjurer3.png]] | |||
| [[File:DS Thaumaturge3.png]] | |||
| [[File:DS Lancer3.png]] | |||
|- | |||
| '''Class''' | |||
| {{MRD}} [[Marauder]] | |||
| {{CNJ}} [[Conjurer]] | |||
| {{THM}} [[Thaumaturge]] | |||
| {{LNC}} [[Lancer]] | |||
|- | |||
| '''Role''' | |||
| Tank | |||
| Healer | |||
| DPS | |||
| DPS | |||
|} | |||
==Strategy== | ==Strategy== | ||
{{#ev:youtube|IJ2o_ytMZuE|350|right|Titan Guide}} | {{#ev:youtube|IJ2o_ytMZuE|350|right|Titan Guide}} | ||
The fight is | ===[[File:Aggressive difficulty r6.png|link=]] Lord of Crags: [[Titan]]=== | ||
The fight is rather straightforward. Titan periodically stomps causing damage to the entire party, but he sticks to melee attacks on his primary target until 80% HP. | |||
At | At 80%, Titan will jump in the air and leave the battlefield, only to return a few seconds later doing massive AoE damage and destroying the walls around the platform. A red ring will take up the outer edge, indicating where the ground will crumble away. Standing as close to the ring as possible will also reduce the damage taken from the attack. Titan will then gain the ability to send out a large shockwave in a line that will knock players off the platform to their death. There is plenty of time to dodge this attack and it should always be avoided. | ||
At around 50% | At around 50%, Titan will leap into the air once again and come back down dealing damage. Shortly thereafter, Titan's heart will be exposed and Titan himself will no longer be attackable. Titan's heart needs to be killed as fast as possible to prevent the upcoming enrage from wiping the party. At this point, he also gains the ability to encase a party member in a rock tomb similar to the bubble mechanic from Hellbender in [[Brayflox's Longstop|Brayflox's Longstop]], though the tomb will not allow the CC'd person to cast spells unlike the bubble, so it's best to clear this quickly. | ||
Once the heart has been destroyed, Titan gains one final ability on top of all his previous ones to call down rocks from the ceiling. Aside from the one new ability, Titan is easily killed after his heart has been destroyed. Avoiding the falling rocks, dodging his shockwave, and quickly freeing other party members are the keys to staying alive and defeating him. | Once the heart has been destroyed, Titan gains one final ability on top of all his previous ones to call down rocks from the ceiling. He will also use his stomp twice in succession. Aside from the one new ability, Titan is easily killed after his heart has been destroyed. Avoiding the falling rocks, dodging his shockwave, and quickly freeing other party members are the keys to staying alive and defeating him. In this phase, Titan has an attack rotation. He will cast the rock tomb (gaol) two punches after every landslide. | ||
==Images== | ==Images== | ||
<gallery heights=200px mode=packed> | |||
file:titan1.jpg | |||
file:titan2.jpg | |||
File:Titan3.png | |||
</gallery> | |||
{{ | {{Duties nav|trial}} | ||
Latest revision as of 15:13, 8 October 2023
 This article is about the Main Scenario trial. For the level 50 story-mode trial, see The Navel (Hard). For the level 50 challenge-mode trial, see The Navel (Extreme). For the Ultimate Raid involving Titan, see The Weapon's Refrain (Ultimate).
The Navel
- Level
- 34 (Sync: 36)
- Difficulty
- Normal
- Party size
- Light Party
4 man • 1 1
1  2
2 
- Unsyncing
- Allowed
- Time limit
- 60 minutes
- Duty Finder
- Trials (A Realm Reborn)
- Roulette
- Leveling
- Req. quest
 Lord of Crags
- Entrance
- Upper La Noscea (X:29.1, Y:18.6)
- Location
- The Navel
- Region
- La Noscea
- Modes
- Duty Support
- Patch
- 2.0
 The Echo
- On wipe: +10% (max +50%)
“Having passed the seemingly endless trials imposed upon you by the Company of Heroes, you have been entrusted with the knowledge of a secret way into the Navel, the domain of the primal Titan. Courtesy of Y'shtola's magicks, the beastman aetheryte is now primed to send you to a confrontation with the Lord of Crags. Gird your loins for a struggle of titanic proportions.
— In-game description
The Navel is a level 34 trial introduced in patch 2.0.
Duty Support
| Scion Marauder | Scion Conjurer | Scion Thaumaturge | Scion Lancer | |
|---|---|---|---|---|

|

|

|

| |
| Class | ||||
| Role | Tank | Healer | DPS | DPS |
Strategy
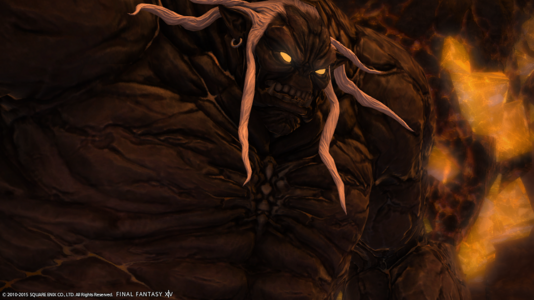
 Lord of Crags: Titan
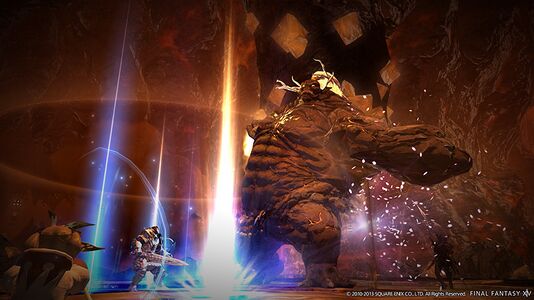
The fight is rather straightforward. Titan periodically stomps causing damage to the entire party, but he sticks to melee attacks on his primary target until 80% HP.
At 80%, Titan will jump in the air and leave the battlefield, only to return a few seconds later doing massive AoE damage and destroying the walls around the platform. A red ring will take up the outer edge, indicating where the ground will crumble away. Standing as close to the ring as possible will also reduce the damage taken from the attack. Titan will then gain the ability to send out a large shockwave in a line that will knock players off the platform to their death. There is plenty of time to dodge this attack and it should always be avoided.
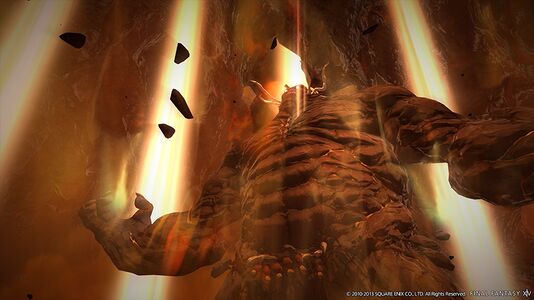
At around 50%, Titan will leap into the air once again and come back down dealing damage. Shortly thereafter, Titan's heart will be exposed and Titan himself will no longer be attackable. Titan's heart needs to be killed as fast as possible to prevent the upcoming enrage from wiping the party. At this point, he also gains the ability to encase a party member in a rock tomb similar to the bubble mechanic from Hellbender in Brayflox's Longstop, though the tomb will not allow the CC'd person to cast spells unlike the bubble, so it's best to clear this quickly.
Once the heart has been destroyed, Titan gains one final ability on top of all his previous ones to call down rocks from the ceiling. He will also use his stomp twice in succession. Aside from the one new ability, Titan is easily killed after his heart has been destroyed. Avoiding the falling rocks, dodging his shockwave, and quickly freeing other party members are the keys to staying alive and defeating him. In this phase, Titan has an attack rotation. He will cast the rock tomb (gaol) two punches after every landslide.


