Difference between revisions of "Striking Dummy"
Jump to navigation
Jump to search
(→Housing Furniture: Added level of some striking dummies. Need to research the others) |
(add image showing how to reset striking dummy enmity) |
||
| (3 intermediate revisions by 2 users not shown) | |||
| Line 3: | Line 3: | ||
[[File:Glade Striking Dummy1.jpg|right|300px|link=Glade Striking Dummy]] | [[File:Glade Striking Dummy1.jpg|right|300px|link=Glade Striking Dummy]] | ||
[[File:Oasis Striking Dummy1.jpg|right|300px|link=Oasis Striking Dummy]] | [[File:Oasis Striking Dummy1.jpg|right|300px|link=Oasis Striking Dummy]] | ||
[[Striking Dummy|Striking Dummies]] are targets used to practice combat abilities in relative safety. There are several varieties and levels of dummy both in the overworld and available as [[housing]] furniture. | [[Striking Dummy|Striking Dummies]] are targets used to practice combat abilities in relative safety. There are several varieties and levels of dummy both in the overworld and available as [[housing]] furniture. | ||
You can reset [[enmity]] against a striking dummy by right-clicking its target bar and selecting ''Reset Striking Dummy Enmity'' as shown in the image below. | |||
[[File:Reset striking dummy enmity.png|center|300px]] | |||
__TOC__ | __TOC__ | ||
==Overworld Locations== | ==Overworld Locations== | ||
===[[A Realm Reborn]]=== | ===[[A Realm Reborn]]=== | ||
| Line 33: | Line 40: | ||
*[[Labyrinthos]] (31.4, 13.6) Level 80 | *[[Labyrinthos]] (31.4, 13.6) Level 80 | ||
*[[Ultima Thule]] (30.6, 26.8) Level 90 | *[[Ultima Thule]] (30.6, 26.8) Level 90 | ||
===[[Dawntrail]]=== | |||
*[[Urqopacha]] (29.9, 12.9) Level 90 | |||
*[[Kozama'uka]] (21.2, 11.1) Level 90 | |||
*[[Living Memory]] (21.4, 38.5) Level 100 | |||
==[[Player Housing|Housing]] [[Outdoor Furnishing|Furniture]]== | ==[[Player Housing|Housing]] [[Outdoor Furnishing|Furniture]]== | ||
| Line 50: | Line 62: | ||
| [[Oasis Striking Dummy]] || [[File:Oasis striking dummy icon1.png]] || [[Hunt_Billmaster_(Immortal_Flames)#vendor102|Hunt Billmaster (Immortal Flames)]] || [[Ul'dah - Steps of Nald]] (8.1, 9.3) || {{allied seal|180}} || 50 | | [[Oasis Striking Dummy]] || [[File:Oasis striking dummy icon1.png]] || [[Hunt_Billmaster_(Immortal_Flames)#vendor102|Hunt Billmaster (Immortal Flames)]] || [[Ul'dah - Steps of Nald]] (8.1, 9.3) || {{allied seal|180}} || 50 | ||
|- | |- | ||
| [[Alps Striking Dummy]] || [[File:Alps striking dummy icon1.png]] || Crafted || Level 50★★★ [[Carpenter]] || || | | [[Alps Striking Dummy]] || [[File:Alps striking dummy icon1.png]] || Crafted || Level 50★★★ [[Carpenter]] || || 50 | ||
|- | |- | ||
| [[Oriental Striking Dummy]] || [[File:Oriental striking dummy icon1.png]] || Crafted || Level 50★★★ [[Carpenter]] || || | | [[Oriental Striking Dummy]] || [[File:Oriental striking dummy icon1.png]] || Crafted || Level 50★★★ [[Carpenter]] || || 50 | ||
|- | |- | ||
| [[Old World Striking Dummy]] || [[File:Old world striking dummy icon1.png]] || [[Ardolain#vendor3|Ardolain]] || [[Foundation]] (13.1, 11.9) || {{centurio seal|300}} || | | [[Old World Striking Dummy]] || [[File:Old world striking dummy icon1.png]] || [[Ardolain#vendor3|Ardolain]] || [[Foundation]] (13.1, 11.9) || {{centurio seal|300}} || 60 | ||
|- | |- | ||
| [[Faust Striking Dummy]] || [[File:Faust striking dummy icon1.png]] || Crafted || Level 60★★★ [[Armorer]]<br>({{item icon|Master Armorer IV}}) || {{scrip|White Crafter|100}}<sup>[1]</sup> || | | [[Faust Striking Dummy]] || [[File:Faust striking dummy icon1.png]] || Crafted || Level 60★★★ [[Armorer]]<br>({{item icon|Master Armorer IV}}) || {{scrip|White Crafter|100}}<sup>[1]</sup> || 60 | ||
|- | |- | ||
| [[Gyr Abanian Striking Dummy]] || [[File:Gyr abanian striking dummy icon1.png]] || [[Eschina#vendor152|Eschina]] || [[Rhalgr's Reach]] (13.8, 11.8) || [[File:Veterans clan mark log icon1.png|link=Veteran's Clan Mark Log|20px]] 5<sup>[2]</sup> || | | [[Gyr Abanian Striking Dummy]] || [[File:Gyr abanian striking dummy icon1.png]] || [[Eschina#vendor152|Eschina]] || [[Rhalgr's Reach]] (13.8, 11.8) || [[File:Veterans clan mark log icon1.png|link=Veteran's Clan Mark Log|20px]] 5<sup>[2]</sup> || 70 | ||
|- | |- | ||
| [[Crystarium Striking Dummy]] || [[File:Crystarium striking dummy icon1.png]] || [[Ilfroy#vendor3|Ilfroy]]<br>[[Xylle#vendor3|Xylle]] || [[Eulmore]] (11, 10.8)<br>[[The Crystarium]] (9.4, 9.5) || {{sack of nuts|300}} || 80 | | [[Crystarium Striking Dummy]] || [[File:Crystarium striking dummy icon1.png]] || [[Ilfroy#vendor3|Ilfroy]]<br>[[Xylle#vendor3|Xylle]] || [[Eulmore]] (11, 10.8)<br>[[The Crystarium]] (9.4, 9.5) || {{sack of nuts|300}} || 80 | ||
|- | |- | ||
| [[Thavnairian Striking Dummy]] || [[File:Thavnairian striking dummy icon1.png]] || [[J'lakshai#vendor3|J'lakshai]]<br>[[Wilmetta#vendor3|Wilmetta]] || [[Old Sharlayan]] (11.8, 13.2)<br>[[Radz-at-Han]] (10.5, 7.4) || {{sack of nuts|300}} || 90 | | [[Thavnairian Striking Dummy]] || [[File:Thavnairian striking dummy icon1.png]] || [[J'lakshai#vendor3|J'lakshai]]<br>[[Wilmetta#vendor3|Wilmetta]] || [[Old Sharlayan]] (11.8, 13.2)<br>[[Radz-at-Han]] (10.5, 7.4) || {{sack of nuts|300}} || 90 | ||
|- | |||
| [[Everkeep Striking Dummy]] || [[File:Everkeep striking dummy icon1.png|40px]] || [[Ryubool Ja#vendor4|Ryubool Ja]] || [[Tuliyollal]] (13.9, 13.5) || {{sack of nuts|300}} || 100 | |||
|- | |- | ||
|} | |} | ||
Latest revision as of 17:34, 14 September 2024
- See also: Stone, Sky, Sea
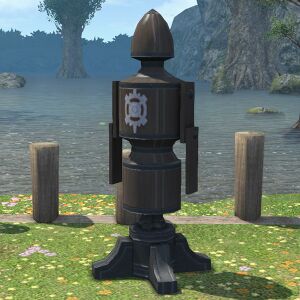
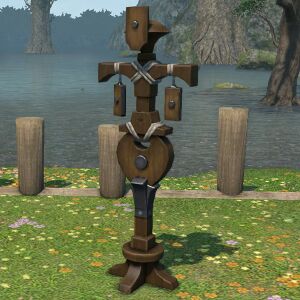
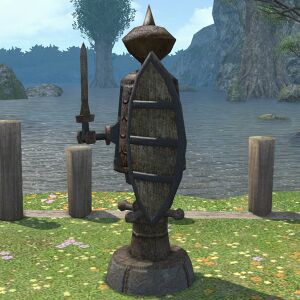
Striking Dummies are targets used to practice combat abilities in relative safety. There are several varieties and levels of dummy both in the overworld and available as housing furniture.
You can reset enmity against a striking dummy by right-clicking its target bar and selecting Reset Striking Dummy Enmity as shown in the image below.
Overworld Locations
A Realm Reborn
- Central Shroud (24.0, 19.5), east of Bentbranch Meadows, level 1
- Middle La Noscea (26.4, 17.2) at Summerford Farms, level 1
- Western Thanalan at Scorpion Crossing (26.4, 24.7), level 1
- Coerthas Central Highlands at Whitebrim Front (13.2, 16.9), level 1 and 50
- Wolves' Den Pier - PvP Actions active while in this zone
Heavensward
- Coerthas Western Highlands (31.5, 38.6) Level 50
- The Dravanian Forelands (32.7, 24.8) Level 50
Stormblood
- The Fringes (10.0, 11.8) Level 60
- Yanxia (31.2, 16.7) Level 60
- The Lochs (10.5, 20.6) level 70
Shadowbringers
- Kholusia (35.7, 27.0) Level 70
- Amh Araeng (27.7, 14.4) Level 70
- The Tempest (32.0, 19.3) Level 80
- The Bozjan Southern Front / Zadnor Level 80
Endwalker
- Thavnair (23.2, 34.1) Level 80
- Labyrinthos (31.4, 13.6) Level 80
- Ultima Thule (30.6, 26.8) Level 90
Dawntrail
- Urqopacha (29.9, 12.9) Level 90
- Kozama'uka (21.2, 11.1) Level 90
- Living Memory (21.4, 38.5) Level 100
Housing Furniture
| Item | Icon | Vendor | Location | Cost | Level |
|---|---|---|---|---|---|
| Riviera Striking Dummy | Hunt Billmaster (Maelstrom) | Limsa Lominsa Upper Decks (13.2, 12.5) | 50 | ||
| Glade Striking Dummy | Hunt Billmaster (Twin Adder) | New Gridania (9.7, 11.2) | 50 | ||
| Oasis Striking Dummy | Hunt Billmaster (Immortal Flames) | Ul'dah - Steps of Nald (8.1, 9.3) | 50 | ||
| Alps Striking Dummy | Crafted | Level 50★★★ Carpenter | 50 | ||
| Oriental Striking Dummy | Crafted | Level 50★★★ Carpenter | 50 | ||
| Old World Striking Dummy | Ardolain | Foundation (13.1, 11.9) | 60 | ||
| Faust Striking Dummy | Crafted | Level 60★★★ Armorer ( Master Armorer IV) |
60 | ||
| Gyr Abanian Striking Dummy | Eschina | Rhalgr's Reach (13.8, 11.8) | 70 | ||
| Crystarium Striking Dummy | Ilfroy Xylle |
Eulmore (11, 10.8) The Crystarium (9.4, 9.5) |
80 | ||
| Thavnairian Striking Dummy | J'lakshai Wilmetta |
Old Sharlayan (11.8, 13.2) Radz-at-Han (10.5, 7.4) |
90 | ||
| Everkeep Striking Dummy | Ryubool Ja | Tuliyollal (13.9, 13.5) | 100 |
[1]This is the cost of Master Armorer IV, which is required to craft the item.
[2]This is equivalent to ![]() 2,500 Centurio Seals.
2,500 Centurio Seals.
Explorer Mode
Most dungeons support Explorer Mode, which allows you to freely explore a dungeon as it appears in its completed state, without any enemies. While in Explorer Mode, you can place a target dummy anywhere you like, as well as try out your Limit Breaks.


