Difference between revisions of "The Abyssal Fracture (Extreme)"
Freedom4556 (talk | contribs) m |
Chadimus Rex (talk | contribs) |
||
| (28 intermediate revisions by 3 users not shown) | |||
| Line 1: | Line 1: | ||
{{otheruses|the level 90 challenge-mode [[trial]]|the story-mode [[Main Scenario]] [[trial]]|The Abyssal Fracture}} | {{otheruses|the level 90 challenge-mode [[trial]]|the story-mode [[Main Scenario]] [[trial]]|The Abyssal Fracture}} | ||
{{Duty infobox | {{Duty infobox | ||
| description = | | description = Fueled by a yearning not its own, the voidsent Zeromus was poised to shatter the barrier between worlds. Its passage would be halted thanks in part to another denizen of the void, one who wielded splendorous Light to change both her fate and that of the Thirteenth. Yet what if Light's refulgence proved too great for this voidsent vagabond steeped in Darkness? Would aught else have stayed Zeromus's hand? These questions and more fuel the Wandering Minstrel's imagination as he weaves his benighted ballad, its measured tones calling your mind back to a most harrowing encounter. | ||
| image = The Abyssal Fracture (Extreme).png | | image = The Abyssal Fracture (Extreme).png | ||
| type = Trial | | type = Trial | ||
| level = 90 | | level = 90 | ||
| level-sync = | | level-sync = 90 | ||
| ilvl = 640 | | ilvl = 640 | ||
| ilvl-sync = | | ilvl-sync = | ||
| Line 12: | Line 11: | ||
| size = full | | size = full | ||
| time-limit = 60 | | time-limit = 60 | ||
| duty-finder = | | duty-finder = High-end Trials (Endwalker) | ||
| roulette = | | roulette = Mentor | ||
| tomestones = 25 | | tomestones = 25 Poetics | ||
| location = | | location = The Abyssal Fracture | ||
| region = | | region = ??? | ||
| entrance = | | entrance = | ||
| entrance-coordinates = | | entrance-coordinates = | ||
| Line 23: | Line 22: | ||
| release = Endwalker | | release = Endwalker | ||
| stone-sky-sea = The Abyssal Fracture (Extreme) | | stone-sky-sea = The Abyssal Fracture (Extreme) | ||
| echo = ex-trial | |||
}} {{TOC limit|3}} | }} {{TOC limit|3}} | ||
==Guide== | ==Guide== | ||
===[[File:Aggressive difficulty r6.png|link=]] | {{#ev:youtube|KZbUwAMt4T4|350|right|Video guide by Mrhappy1227}} | ||
{{#ev:youtube|3bWCM5cSxZM|350|right|Animated guide by Big Kobe}} | |||
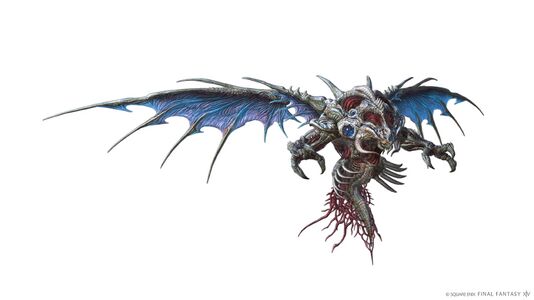
===[[File:Aggressive difficulty r6.png|link=]] Insatiable Vessel: [[Zeromus]]=== | |||
Note that players can fall off the arena to their death but can be resurrected after a moderate delay. Players should assign light parties (1 tank, 1 healer, 2 DPS) and corner partners (DPS + support) with tanks/melees going north. | |||
''Note that meteors can be skipped'' with enough damage (ie unsynced, 5 DPS, significant echo bonuses) - Zeromus seems to transition out of phase with Big Crunch (then into Rend the Rift) at bit over 20% HP. | |||
'''Phase 1''' | |||
*'''Abyssal Nox''': Reduces everyone to 1 HP and inflicts {{status effect|doom}} '''[[Doom (status effect)|Doom]]''' that can be removed by healing to full. | |||
**Meanwhile, multiple rays of light will travel to random cardinals and intercardinals, indicating the locations of large circular AoEs. Dodge in a location without a light ray. Two sets of light rays and AoEs will occur sequentially. | |||
**North will always be safe followed by west, or vice versa. | |||
*'''Sable Thread''': Multi-hit line stack AoE that deals heavy damage, requiring mitigation. The two tanks should stack in front and use personal mitigation as it deals more damage to the two front players. | |||
*'''Dark Matter''': Three-hit AoE tankbuster targeting both tanks. (In contrast to many extreme trials, this does not target the top two enmity players.) | |||
*'''Visceral Whirl''': The boss will place its claws over the arena, telegraphing sets of perpendicular line AoEs, leaving two triangular safe spots. | |||
**After the initial AoEs go off, three X-shaped marks will appear in semi-random locations in the original AoEs. These will each do a cross AoE with from the points of the X, leaving two triangular safe spots in different locations. The AoEs will only have a brief orange indicator. | |||
*'''Flare''': Spawns two tower with a stack marker, one northwest and one southeast. Tanks/melee DPS should take the northwest tower, and healers/ranged DPS should take the southeast tower. | |||
**Each tower will leave behind a large fireball that will damage anyone lingering in it emit several fiery lines, indicating line AoEs. The party should dodge in an area not overlapped by a line. | |||
*'''Void Bio''': Spawns a row of poison orbs ('''Toxic Bubbles''') at the north of the arena, which will gradually begin moving south at various speeds, leaving gaps to dodge through. Anyone hit by these will be inflicted with [[File:Toxicosis icon1.png|link=]] '''Pollen''' and take massive damage-over-time, which will likely kill them. | |||
*The boss casts another '''Visceral Whirl''' when the poison orbs are still moving, so the party needs to dodge these while going to the triangular safe spots. | |||
*'''Big Bang''': Spawns spread AoE telegraphs on each player and other circular AoE telegraphs at semi-random locations during the cast. The spread AoEs inflict {{status effect|magic vulnerability up}} '''[[Magic Vulnerability Up]]''', making overlap lethal. The attack itself deals high raidwide damage that should be mitigated and transitions the arena. Inflicts several debuffs: | |||
**[[File:Big bounce icon.png|link=]] '''Big Bounce''' (all players): Deals damage-over-time | |||
**[[File:Acceleration bomb icon.png|link=]] '''Acceleration Bomb''' (all players): When the debuff timer expires, the player must remain still and not attack, or they will take damage and be knocked up in the air. There will be an overhead timer when the debuff is about to expire. | |||
**[[File:Divisive dark icon.png|link=]] '''Divisive Dark''' (all players): Telegraphed spread AoE that inflicts {{status effect|magic vulnerability up}} '''Magic Vulnerability Up'''. | |||
**[[File:Beckoning dark icon.png|link=]] '''Beckoning Dark''' (1 non-tank player): Stack AoE that inflicts {{status effect|magic vulnerability up}} '''Magic Vulnerability Up'''. | |||
**[[File:Forked lightning icon1.png|link=]] '''Forked Lightning''' (2 DPS): Spread AoE that resolves at the same time as [[File:Beckoning dark icon.png|link=]] '''Beckoning Dark''' and inflicts {{status effect|magic vulnerability up}} '''Magic Vulnerability Up'''. | |||
**[[File:HP penalty icon1.png|link=]] '''HP Penalty''' (all players): Reduces everyone's maximum HP by around 25%. | |||
*The above debuffs can be ignored for the next mechanic, although '''Big Bounce''' will last for several seconds and require healing. | |||
*'''Void Meteor''': Spawns numerous proximity markers. Stack middle to mitigate. Each proximity AoE will leave behind a meteor. There will be numerous meteors scattered at the front half of the room, and one meteor located at the south wall. | |||
*'''Meteor Impact''': Two meteor markers will spawn next to the south meteor. | |||
**One of the markers will tether all the tanks and healers, then the other one will then tether all DPS (or vice versa). | |||
**These tethers will also have a blue AoE telegraph surrounding them. | |||
**Tethered players must stretch their tether to reduce the proximity damage while ensuring that their AoE does not overlap any existing meteors, as indicated by the telegraph turning red, or the meteor will explode and instantly wipe the party. | |||
**Failing to stretch the tether so it is no longer spiky will inflict lethal damage, which will bypass tank invulnerabilities. | |||
**Once the first group's tethers resolve, those players will be temporarily bound and be hit with an attack that inflicts {{status effect|blunt resistance down}} '''Blunt Resistance Down''' and spawns a meteor where they were standing, giving less room for the second group to place their meteors. The first group of players should therefore place their meteors as far north as possible. | |||
**If two players drop their meteors too close to each other (even if their AoEs are still blue), their meteors will overlap and explode. | |||
**To prevent confusion, it is recommended to have rough assigned positions (e.g. ranged - melee - melee - ranged from west to east) although it is not possible to assign fixed positions due to the semi-random arrangement of meteors. | |||
**If you cannot stretch your tether in time, it is recommended to sacrifice yourself instead of overlapping a meteor and causing a wipe. | |||
**Be careful not to overlap your tether with the meteor at the south of the room, which will always appear. | |||
*After all meteors are placed, they will each emit a telegraphed point-blank AoE to be dodged. | |||
*'''Bonds of Darkness''': Each tank/healer is chained to one DPS, which must be broken by running away. The boss will cast '''Visceral Whirl''' again, creating two safe spots for each role to go to (e.g. DPS north and supports south). The [[File:Acceleration bomb icon.png|link=]] '''Acceleration Bomb''' from '''Big Bang''' will also resolve here, so players should stop moving once they break their chains. | |||
*After the follow-up cross AoEs from '''Visceral Whirl''' resolve, the [[File:Divisive dark icon.png|link=]] '''Divisive Dark''' spread AoEs, which are telegraphed, will resolve. | |||
*Finally, the two tanks will be targeted for '''Dark Matter''', while the player with [[File:Beckoning dark icon.png|link=]] '''Beckoning Dark''' will receive a stack marker. All non-tanks should stack, excluding the two players with [[File:Forked lightning icon1.png|link=]] '''Forked Lightning''', who must be isolated. | |||
*'''Black Hole''': | |||
**One player will receive a blue overhead marker, indicating they will drop an expanding black hole AoE at their location when the marker disappears. Anyone hit by the black hole will be sucked in and instantly killed. | |||
**Meanwhile, Zeromus will cast '''Fractured Eventide''', an untelegraphed line AoE that originates from the direction it is facing and will sweep across most of the arena. | |||
**The party should start by the top corner nearest to where the boss is facing, with the black hole player at the bottom corner. | |||
**The black hole and laser AoEs will initiate at the same time. The black hole player should regroup with the party immediately after dropping their AoE. | |||
*'''Big Crunch''': Similar to '''Big Bang''', but removes [[File:HP penalty icon1.png|link=]] '''HP Penalty'''. No other debuffs will be applied except for [[File:Big bounce icon.png|link=]] '''Big Bounce''', dealing damage-over-time. The arena will transition back to the start of the phase. | |||
*'''Abyssal Nox''' and '''Sable Thread''' are used again. | |||
*'''Sparking Flare''' or '''Branding Flare''': | |||
**Spawns two stack marker towers near the middle of the room, one west and one east. Players should soak these in their light parties. | |||
**The flares will emit line AoEs that will always leave the four corners safe, so players should go to their assigned corner with their partner. | |||
**If '''Sparking Flare''' was used, each player will be hit with an untelegraphed spread AoE, so the partners should spread. If '''Branding Flare''' was used, the partners should stack instead. | |||
**Meanwhile, two players will be targeted by '''Nox''', a chasing AoE. They should bait these to the far corners and then run around the edges of the arena, while the non-targeted players remain near the middle. | |||
*The mechanics for Phase 1 repeat (excluding the mechanics between '''Big Bang''' and '''Big Crunch''') until the boss reaches ~25% HP or enrages (see below). | |||
'''Phase 2''' | |||
*'''Rend the Rift''': Raidwide damage and transitions the arena and background music. | |||
*'''Void Thunder''': Multiple sets of baited AoE telegraphs on players. | |||
*'''Nostalgia''': Seven hits of raidwide damage, the first four dealing [[physical damage]], and the last three dealing [[magical damage]]. Mitigate and heal through. | |||
*'''Flow of the Abyss''': The boss tethers a fissure at the side of the room, which will emit a line AoE that covers around a third of the arena. Meanwhile, the boss will do one of three mechanics. | |||
**Stack marker on random player ('''Umbral Rays''') | |||
**Orange spread markers on all players ('''Akh Rhai''') that leave behind a persistent AoE for several seconds | |||
**Two-player enumeration markers ('''Umbral Prism''') on all tanks or all healers. Stack with assigned partners. | |||
*'''Flow of the Abyss''' is used again but will be combined with '''Void Thunder''' AoEs to dodge and '''Chasmic Nails''', sequential telegraphed conal AoEs, so dodge accordingly. Anyone who is hit by the nails will receive a damage-over-time debuff that can be cleansed with {{action icon|Esuna}}. | |||
*These mechanics will repeat until the boss is defeated or it eventually enrages with '''Big Bang''' and wipes the party, so it must be defeated before then. (Because the phase transition is HP based while the enrage is time based, it is possible reach the hard enrage even before phase 2.) | |||
==Loot== | ==Loot== | ||
*Each player will receive 2 {{Item icon| | {{see also|Voidvessel Weapons}} | ||
*{{tomestone| | *Each player will receive 2 {{Item icon|Voidvessel Totem}}s per kill. Collect 10 tokens to exchange for a weapon or 99 for a {{Item icon|Lynx of Abyssal Grief Flute}} at [[Nesvaaz]] in [[Radz-at-Han]] (X:10.6 Y:10.0). | ||
*{{ | *{{tomestone|poetics|25}} [[Allagan Tomestone of Poetics]] | ||
*{{Item icon|Zeromus Card}} (Drops at a fixed rate.) | |||
===[[File:Gold Coffer (small).png|link=]] Treasure Coffer=== | ===[[File:Gold Coffer (small).png|link=]] Treasure Coffer=== | ||
{{Drops table header}} | {{Drops table header}} | ||
{{Drops table row|Paladin's Voidvessel Arms (IL 655)}} | |||
{{Drops table row|Voidvessel Bardiche}} | |||
{{Drops table row|Voidvessel Guillotine}} | |||
{{Drops table row|Voidvessel Gunblade}} | |||
{{Drops table row|Voidvessel Spear}} | |||
{{Drops table row|Voidvessel War Scythe}} | |||
{{Drops table row|Voidvessel Claws}} | |||
{{Drops table row|Voidvessel Blade}} | |||
{{Drops table row|Voidvessel Cleavers}} | |||
{{Drops table row|Voidvessel Cavalry Bow}} | |||
{{Drops table row|Voidvessel Pistol}} | |||
{{Drops table row|Voidvessel Tathlums}} | |||
{{Drops table row|Voidvessel Rod}} | |||
{{Drops table row|Voidvessel Index}} | |||
{{Drops table row|Voidvessel Smallsword}} | |||
{{Drops table row|Voidvessel Cane}} | |||
{{Drops table row|Voidvessel Codex}} | |||
{{Drops table row|Voidvessel Torquetum}} | |||
{{Drops table row|Voidvessel Pendulums}} | |||
{{Drops table row|Voidvessel Weapon Coffer (IL 655)}} | |||
{{Drops table row|Lynx of Abyssal Grief Flute}} | |||
{{Drops table row|Faded Copy of FINAL FANTASY IV: The Final Battle (Endwalker)}} | |||
{{Drops table row|Abyssal Diamond}} | |||
{{Table footer}} | {{Table footer}} | ||
| Line 42: | Line 130: | ||
{| {{STDT|mech1}} | {| {{STDT|mech1}} | ||
{{achievement table header}} | {{achievement table header}} | ||
{{achievement table row|Dusk to Dusk}} | |||
|} | |} | ||
==Images== | ==Images== | ||
<gallery heights=200px mode=packed> | <gallery heights=200px mode=packed> | ||
The Abyssal Fracture EX.jpg | |||
The Abyssal Fracture boss.jpg | |||
File:The abyssal fracture (extreme) img1.png | |||
File:Zeromus img3.jpg | |||
File:Zeromus render.jpg | |||
</gallery> | </gallery> | ||
{{Duties nav|trial}} | {{Duties nav|trial}} | ||
Latest revision as of 13:13, 27 September 2024
 This article is about the level 90 challenge-mode trial. For the story-mode Main Scenario trial, see The Abyssal Fracture.
The Abyssal Fracture (Extreme)
- Level
- 90 (Sync: 90)
- Item Level
- 640
- Difficulty
- Extreme
- Party size
- Full Party
8 man • 2 2
2  4
4 
- Unsyncing
- Allowed
- Time limit
- 60 minutes
- Duty Finder
- High-end Trials (Endwalker)
- Roulette
- Mentor
- Tomestones
 25
25 - Req. quest
 I Wandered Sharlayan as a Minstrel
- Location
- The Abyssal Fracture
- Region
- ???
- Stone, Sky, Sea
- Available
- Patch
- 6.5
 The Echo
- On wipe: +5% (max +25%)
“Fueled by a yearning not its own, the voidsent Zeromus was poised to shatter the barrier between worlds. Its passage would be halted thanks in part to another denizen of the void, one who wielded splendorous Light to change both her fate and that of the Thirteenth. Yet what if Light's refulgence proved too great for this voidsent vagabond steeped in Darkness? Would aught else have stayed Zeromus's hand? These questions and more fuel the Wandering Minstrel's imagination as he weaves his benighted ballad, its measured tones calling your mind back to a most harrowing encounter.
— In-game description
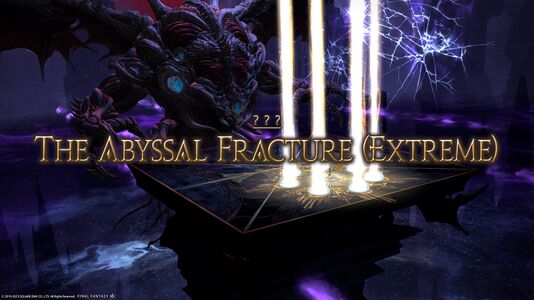
The Abyssal Fracture (Extreme) is a level 90 trial introduced in patch 6.5 with Endwalker.
Guide
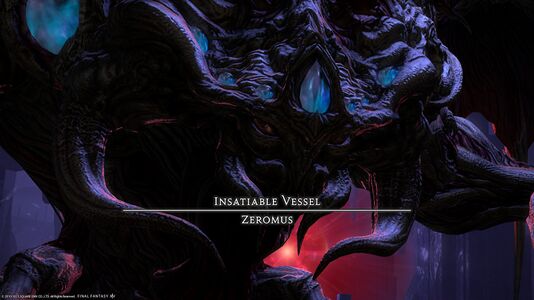
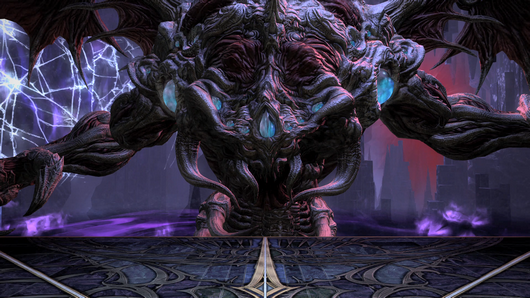
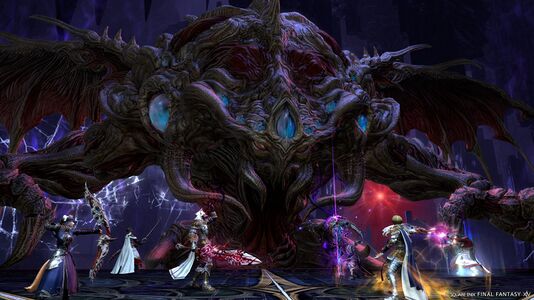
 Insatiable Vessel: Zeromus
Note that players can fall off the arena to their death but can be resurrected after a moderate delay. Players should assign light parties (1 tank, 1 healer, 2 DPS) and corner partners (DPS + support) with tanks/melees going north.
Note that meteors can be skipped with enough damage (ie unsynced, 5 DPS, significant echo bonuses) - Zeromus seems to transition out of phase with Big Crunch (then into Rend the Rift) at bit over 20% HP.
Phase 1
- Abyssal Nox: Reduces everyone to 1 HP and inflicts
 Doom that can be removed by healing to full.
- Meanwhile, multiple rays of light will travel to random cardinals and intercardinals, indicating the locations of large circular AoEs. Dodge in a location without a light ray. Two sets of light rays and AoEs will occur sequentially.
- North will always be safe followed by west, or vice versa.
- Sable Thread: Multi-hit line stack AoE that deals heavy damage, requiring mitigation. The two tanks should stack in front and use personal mitigation as it deals more damage to the two front players.
- Dark Matter: Three-hit AoE tankbuster targeting both tanks. (In contrast to many extreme trials, this does not target the top two enmity players.)
- Visceral Whirl: The boss will place its claws over the arena, telegraphing sets of perpendicular line AoEs, leaving two triangular safe spots.
- After the initial AoEs go off, three X-shaped marks will appear in semi-random locations in the original AoEs. These will each do a cross AoE with from the points of the X, leaving two triangular safe spots in different locations. The AoEs will only have a brief orange indicator.
- Flare: Spawns two tower with a stack marker, one northwest and one southeast. Tanks/melee DPS should take the northwest tower, and healers/ranged DPS should take the southeast tower.
- Each tower will leave behind a large fireball that will damage anyone lingering in it emit several fiery lines, indicating line AoEs. The party should dodge in an area not overlapped by a line.
- Void Bio: Spawns a row of poison orbs (Toxic Bubbles) at the north of the arena, which will gradually begin moving south at various speeds, leaving gaps to dodge through. Anyone hit by these will be inflicted with
 Pollen and take massive damage-over-time, which will likely kill them.
 - The boss casts another Visceral Whirl when the poison orbs are still moving, so the party needs to dodge these while going to the triangular safe spots.
- Big Bang: Spawns spread AoE telegraphs on each player and other circular AoE telegraphs at semi-random locations during the cast. The spread AoEs inflict
 Magic Vulnerability Up, making overlap lethal. The attack itself deals high raidwide damage that should be mitigated and transitions the arena. Inflicts several debuffs:
 Big Bounce (all players): Deals damage-over-time
 Acceleration Bomb (all players): When the debuff timer expires, the player must remain still and not attack, or they will take damage and be knocked up in the air. There will be an overhead timer when the debuff is about to expire.
 Divisive Dark (all players): Telegraphed spread AoE that inflicts
  Magic Vulnerability Up.
 Beckoning Dark (1 non-tank player): Stack AoE that inflicts
  Magic Vulnerability Up.
 Forked Lightning (2 DPS): Spread AoE that resolves at the same time as
  Beckoning Dark and inflicts
  Magic Vulnerability Up.
 HP Penalty (all players): Reduces everyone's maximum HP by around 25%.
- The above debuffs can be ignored for the next mechanic, although Big Bounce will last for several seconds and require healing.
- Void Meteor: Spawns numerous proximity markers. Stack middle to mitigate. Each proximity AoE will leave behind a meteor. There will be numerous meteors scattered at the front half of the room, and one meteor located at the south wall.
- Meteor Impact: Two meteor markers will spawn next to the south meteor.
- One of the markers will tether all the tanks and healers, then the other one will then tether all DPS (or vice versa).
- These tethers will also have a blue AoE telegraph surrounding them.
- Tethered players must stretch their tether to reduce the proximity damage while ensuring that their AoE does not overlap any existing meteors, as indicated by the telegraph turning red, or the meteor will explode and instantly wipe the party.
- Failing to stretch the tether so it is no longer spiky will inflict lethal damage, which will bypass tank invulnerabilities.
- Once the first group's tethers resolve, those players will be temporarily bound and be hit with an attack that inflicts
 Blunt Resistance Down and spawns a meteor where they were standing, giving less room for the second group to place their meteors. The first group of players should therefore place their meteors as far north as possible.
 - If two players drop their meteors too close to each other (even if their AoEs are still blue), their meteors will overlap and explode.
- To prevent confusion, it is recommended to have rough assigned positions (e.g. ranged - melee - melee - ranged from west to east) although it is not possible to assign fixed positions due to the semi-random arrangement of meteors.
- If you cannot stretch your tether in time, it is recommended to sacrifice yourself instead of overlapping a meteor and causing a wipe.
- Be careful not to overlap your tether with the meteor at the south of the room, which will always appear.
- After all meteors are placed, they will each emit a telegraphed point-blank AoE to be dodged.
- Bonds of Darkness: Each tank/healer is chained to one DPS, which must be broken by running away. The boss will cast Visceral Whirl again, creating two safe spots for each role to go to (e.g. DPS north and supports south). The
 Acceleration Bomb from Big Bang will also resolve here, so players should stop moving once they break their chains.
 - After the follow-up cross AoEs from Visceral Whirl resolve, the
 Divisive Dark spread AoEs, which are telegraphed, will resolve.
 - Finally, the two tanks will be targeted for Dark Matter, while the player with
 Beckoning Dark will receive a stack marker. All non-tanks should stack, excluding the two players with
  Forked Lightning, who must be isolated.
 - Black Hole:
- One player will receive a blue overhead marker, indicating they will drop an expanding black hole AoE at their location when the marker disappears. Anyone hit by the black hole will be sucked in and instantly killed.
- Meanwhile, Zeromus will cast Fractured Eventide, an untelegraphed line AoE that originates from the direction it is facing and will sweep across most of the arena.
- The party should start by the top corner nearest to where the boss is facing, with the black hole player at the bottom corner.
- The black hole and laser AoEs will initiate at the same time. The black hole player should regroup with the party immediately after dropping their AoE.
- Big Crunch: Similar to Big Bang, but removes
 HP Penalty. No other debuffs will be applied except for
  Big Bounce, dealing damage-over-time. The arena will transition back to the start of the phase.
 - Abyssal Nox and Sable Thread are used again.
- Sparking Flare or Branding Flare:
- Spawns two stack marker towers near the middle of the room, one west and one east. Players should soak these in their light parties.
- The flares will emit line AoEs that will always leave the four corners safe, so players should go to their assigned corner with their partner.
- If Sparking Flare was used, each player will be hit with an untelegraphed spread AoE, so the partners should spread. If Branding Flare was used, the partners should stack instead.
- Meanwhile, two players will be targeted by Nox, a chasing AoE. They should bait these to the far corners and then run around the edges of the arena, while the non-targeted players remain near the middle.
- The mechanics for Phase 1 repeat (excluding the mechanics between Big Bang and Big Crunch) until the boss reaches ~25% HP or enrages (see below).
Phase 2
- Rend the Rift: Raidwide damage and transitions the arena and background music.
- Void Thunder: Multiple sets of baited AoE telegraphs on players.
- Nostalgia: Seven hits of raidwide damage, the first four dealing physical damage, and the last three dealing magical damage. Mitigate and heal through.
- Flow of the Abyss: The boss tethers a fissure at the side of the room, which will emit a line AoE that covers around a third of the arena. Meanwhile, the boss will do one of three mechanics.
- Stack marker on random player (Umbral Rays)
- Orange spread markers on all players (Akh Rhai) that leave behind a persistent AoE for several seconds
- Two-player enumeration markers (Umbral Prism) on all tanks or all healers. Stack with assigned partners.
- Flow of the Abyss is used again but will be combined with Void Thunder AoEs to dodge and Chasmic Nails, sequential telegraphed conal AoEs, so dodge accordingly. Anyone who is hit by the nails will receive a damage-over-time debuff that can be cleansed with Esuna.
- These mechanics will repeat until the boss is defeated or it eventually enrages with Big Bang and wipes the party, so it must be defeated before then. (Because the phase transition is HP based while the enrage is time based, it is possible reach the hard enrage even before phase 2.)
Loot
- See also: Voidvessel Weapons
- Each player will receive 2 Voidvessel Totems per kill. Collect 10 tokens to exchange for a weapon or 99 for a Lynx of Abyssal Grief Flute at Nesvaaz in Radz-at-Han (X:10.6 Y:10.0).
 25 Allagan Tomestone of Poetics
- Zeromus Card (Drops at a fixed rate.)
 Treasure Coffer
Achievements
This duty is associated with the following achievements:
| Name | Points | Task | Reward | Patch |
|---|---|---|---|---|
| Dusk to Dusk | 10 | Defeat Zeromus in the Abyssal Fracture (Extreme). | - | 6.5 |

