Difference between revisions of "The Jade Stoa (Extreme)"
Freedom4556 (talk | contribs) m |
Tag: Undo |
||
| (16 intermediate revisions by 3 users not shown) | |||
| Line 1: | Line 1: | ||
{{ | {{EX notice}} | ||
{{otheruses|the level 70 challenge-mode [[trial]]|the optional story-mode level 70 [[trial]]|The Jade Stoa}} | |||
{{Duty infobox | {{Duty infobox | ||
| name = The Jade Stoa (Extreme) | | name = The Jade Stoa (Extreme) | ||
| Line 12: | Line 13: | ||
| size = full | | size = full | ||
| time-limit = 60 | | time-limit = 60 | ||
| roulette = | | duty-finder = High-end Trials (Stormblood) | ||
| roulette = Mentor | |||
| entrance = Yanxia | |||
| entrance-coordinates = 31.4, 6.1 | |||
| location = The Jade Stoa | |||
| region = Othard | |||
| tomestones = 20 Poetics | | tomestones = 20 Poetics | ||
| req-quest = Songs in the Key of Kugane | | req-quest = Songs in the Key of Kugane | ||
| patch = 4.2 | | patch = 4.2 | ||
| release = Stormblood | | release = Stormblood | ||
| echo = ex-trial | |||
| stone-sky-sea = The Jade Stoa (Extreme) | |||
== | }} {{TOC limit|3}} | ||
==Strategy== | |||
===[[File:Aggressive difficulty r6.png|link=]] [[Auspice]]: [[Byakko]]=== | ===[[File:Aggressive difficulty r6.png|link=]] [[Auspice]]: [[Byakko]]=== | ||
Players will enter a circular arena and witness Byakko's transformation from a White Tiger into a more humanoid form. Bear in mind that the outer edges of the arena during the first and second phase are entirely safe. However, this does not apply during the transitional '''Free-Fall Phase''' in-between. | Players will enter a circular arena and witness Byakko's transformation from a White Tiger into a more humanoid form. Bear in mind that the outer edges of the arena during the first and second phase are entirely safe. However, this does not apply during the transitional '''Free-Fall Phase''' in-between. | ||
| Line 91: | Line 96: | ||
==Loot== | ==Loot== | ||
*Each player will receive {{Item | {{see also|Byakko's Weapons}} | ||
*Each player will receive 1 {{Item icon|Byakko Totem}} per kill. Collect 10 totems to exchange for a weapon or 99 for a {{Item icon|Auspicious Kamuy Fife}} at [[Eschina]] in [[Rhalgr's Reach]] (X:13.8 Y:11.8). | |||
*{{tomestone|Poetics|20}} [[Allagan Tomestone of Poetics]] | |||
*{{Item icon|Byakko Card}} (Drops at a fixed rate.) | *{{Item icon|Byakko Card}} (Drops at a fixed rate.) | ||
===[[File:Gold Coffer (small).png|link=]] Treasure Coffer=== | ===[[File:Gold Coffer (small).png|link=]] Treasure Coffer=== | ||
{{Drops table header}} | {{Drops table header}} | ||
{{Drops table row|Byakko's | {{Drops table row|Byakko's Paladin Arms (IL 355)}} | ||
{{Drops table row|Byakko's Greataxe}} | {{Drops table row|Byakko's Greataxe}} | ||
{{Drops table row|Byakko's Greatsword}} | {{Drops table row|Byakko's Greatsword}} | ||
| Line 111: | Line 118: | ||
{{Drops table row|Byakko's Codex}} | {{Drops table row|Byakko's Codex}} | ||
{{Drops table row|Byakko's Ephemeris}} | {{Drops table row|Byakko's Ephemeris}} | ||
{{Drops table row|Byakko's Mane}} | {{Drops table row|Byakko's Mane}} | ||
{{Drops table row|Byakko Weapon Coffer (IL 355)}} | |||
{{Drops table row|Auspicious Kamuy Fife}} | {{Drops table row|Auspicious Kamuy Fife}} | ||
{{Drops table row|Faded Copy of the Jade Stoa}} | {{Drops table row|Faded Copy of the Jade Stoa}} | ||
{{Table footer}} | {{Table footer}} | ||
==Achievements== | |||
This duty is associated with the following [[achievements]]: | |||
{| {{STDT|mech1}} | |||
{{achievement table header}} | |||
{{achievement table row|Rock Warrior}} | |||
{{achievement table row|Mightier than the White}} | |||
|} | |||
==Images== | ==Images== | ||
| Line 124: | Line 140: | ||
The Jade Stoa4.jpg | The Jade Stoa4.jpg | ||
The Jade Stoa5.jpg | The Jade Stoa5.jpg | ||
File:Byakko.png | |||
</gallery> | </gallery> | ||
{{Duties nav|trial}} | {{Duties nav|trial}} | ||
Latest revision as of 22:18, 13 August 2024
 This article is about the level 70 challenge-mode trial. For the optional story-mode level 70 trial, see The Jade Stoa.
The Jade Stoa (Extreme)
- Level
- 70 (Sync: 70)
- Item Level
- 340
- Difficulty
- Extreme
- Party size
- Full Party
8 man • 2 2
2  4
4 
- Unsyncing
- Allowed
- Time limit
- 60 minutes
- Duty Finder
- High-end Trials (Stormblood)
- Roulette
- Mentor
- Tomestones
 20
20 - Req. quest
 Songs in the Key of Kugane
- Entrance
- Yanxia (X:31.4, Y:6.1)
- Location
- The Jade Stoa
- Region
- Othard
- Stone, Sky, Sea
- Available
- Patch
- 4.2
 The Echo
- On wipe: +5% (max +25%)
“A devoted student of the fine arts, the wandering minstrel has recently begun studying a form of classical Hingan poetry. Duly inspired by your account of the battle for Byakko's soul, he tries his hand at one such "tanka", seeking to capture the essence of who the auspice truly is. Even absent music, his words nevertheless have a hypnotic feeling, and you find it rather easy to recall the encounter, albeit in a more dramatic fashion...
— In-game description
The Jade Stoa (Extreme) is a level 70 trial introduced in patch 4.2 with Stormblood.
Strategy
 Auspice: Byakko
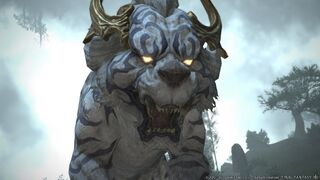
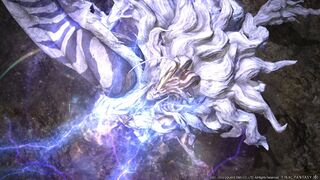
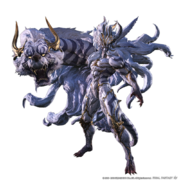
Players will enter a circular arena and witness Byakko's transformation from a White Tiger into a more humanoid form. Bear in mind that the outer edges of the arena during the first and second phase are entirely safe. However, this does not apply during the transitional Free-Fall Phase in-between.
Phase 1
- Storm Pulse - an unavoidable raid-wide AoE to keep healers on their toes.
- Heavenly Strike - a vicious tankbuster against Byakko's main target which should be mitigated via defensive cooldowns.
- State of Shock - a two-part mechanic where Byakko will physically hoist his main target into the air, rendering them unable to act. Simultaneously, a stack-marker will form on the opposite side of the arena - the location where Byakko will slam the grabbed target. Participants should move to the stack marker to help absorb incoming damage. If not absorbed, the slammed target (typically the main-tank) will take a fatal blow. State of Shock will inflict vulnerability stacks on both the slammed target and those who share the damage. It will also be executed twice in a row.
- NOTE: Due to the vulnerability debuff placed on the slammed target and those who share the damage, and the fact that this mechanic will happen twice in a row, the raid should split into two groups, one for each slam. Also, the off-tank should Provoke Byakko during the first grab so that they will take the second slam. If one tank takes both slams, or if people absorb more than one slam, results are typically fatal.
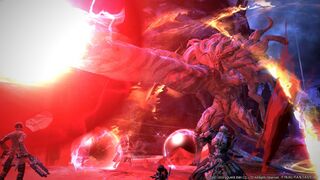
- Unrelenting Anguish - after moving to the centre of the arena, Byakko will begin firing a spiral of large red orbs from himself that will travel to the arena edges. Players must make every effort to avoid colliding with these orbs. At the same time, a tank, healer and damage-dealer will be marked with Ominous Wind, a debuff that will explode if two (or more) players with the debuff move close to each other.
- Fire & Lightning - after targeting a random player, this massive column AoE will be charged up and fired from Byakko during the above Unrelenting Anguish mechanic (and various other moments during the battle). To avoid, move out of the large red telegraph as quickly as possible.
- Hakutei (Tiger) - Byakko will unleash the White Tiger from his arm into the centre of the arena, requiring the off-tank to pick it up as soon as possible and turn it away from the party. This add is capable of a devastating cleave attack against everyone directly in front of it. While burning the add down as soon as possible, participants must also be ready to deal with Aramata.
- Aramata - Byakko marks two random players who will eventually drop a vicious AoE puddle on the ground at their location after a brief delay (three times in a row). These puddles will inflict a devastating bleed on anyone who collides with them. Those marked by Aramata should move as far away from the group as possible (preferably to the outer edge of the arena) and drop all three puddles in a manner that won't inconvenience the party.
- Storm Pulse will once again be cast during the above overlap; thus healers must be ready to heal or help mitigate unavoidable AoE damage while the group focuses on burning down the White Tiger add.
- Distant Clap - a doughnut AoE that is cast at Byakko's hitbox, requiring players to either move to the opposite end of the arena or into Byakko himself to avoid damage. Simultaneously, the White Tiger will leap into the air and mark its main target with a vicious proximity tank buster, forcing them to move away from the group to avoid damaging them. As a result, the tank controlling the add should move to the outer edge of the arena (opposite of Byakko) while the rest move into Byakko.
- Fire & Lightning will be cast once more (column AoE), followed by an additional Storm Pulse (unavoidable AoE).
- Roar of Thunder - an unavoidable AoE that deals damage based on the amount of health the White Tiger has remaining. If insufficient damage has been inflicted to it by the time it is fully cast, the raid may suffer a wipe. The White Tiger will begin charging this after Byakko exits the arena, along with an additional mechanic, Aramata Orbs.
- Aramata Orbs - forms large orbs at the outer edges of the arena that will slowly move towards the centre. If they collide with the White Tiger, it'll be healed. Seeing as it is charging up an AoE attack based on its total health, the group must run through these orbs to pop them before they reach the centre.
- NOTE: Before the release of Shadowbringers, popping Aramata Orbs used to steal TP from the player. Due to Healers having no use for TP at the time, the normal strategy was to have either (or both) healers pop all the orbs themselves. However, TP no longer exists. The Orbs now inflict a debuff reducing physical damage dealt for a few seconds so the strategy still applies
- Should you survive the oncoming Roar of Thunder, the next phase will begin with Byakko launching the entire raid into the air for a free-fall mini-phase.
Free-Fall Transition
- After being launched into the air, the raid will begin free-falling. No actions (e.g. attacks or healing) can be performed at this time. During the phase, the outer ring of the arena will kill any player who touches it. Additionally, Byakko will begin firing orbs from far below which players must avoid. Periodically, Byakko will leap up and cast a doughnut AoE which must be avoided by moving into the centre. Lastly, Hakutei (the White Tiger) will occasionally cast a straight line AoE through the centre, forcing players to move out.
- Should you survive the onslaught, the raid will land (stunned) in a new arena be blasted with a massive unavoidable AoE attack from Byakko, killing any player who took too much damage during the free-fall.
Phase 2
- Heavenly Strike - the phase immediately begins with a vicious tank buster against the main target.
- Hundredfold Havoc - a set of outward-firing AoE lightning patterns that are telegraphed by an arrow icon, displaying the direction they will travel from Byakko (arena centre). Two patterns will be fired simultaneously (the second being slightly delayed), giving players enough time for the first pattern to fire outward so that they can move into the now safe area to avoid the delayed pattern.
- State of Shock will be cast at the near-end of the previous mechanic (identical to the first in phase 1). The off-tank should be ready to provoke Byakko after it grabs the main-tank, while the group split up and prepare to soak the two upcoming slams.
- Sweep Of The Leg - a massive frontal-cone AoE that Byakko will cast after every State of Shock during phase 2. Unlike normal mode, this will not have any telegraph whatsoever; thus players must be ready to stand behind Byakko after the double-slams to avoid being round-house kicked into oblivion. After executing this move, Byakko will leap into the centre of the arena.
- Unrelenting Anguish - similar to the version in phase 1, except now, a tank, healer and damage-dealer will be marked with Gale Force, a large AoE marker that will drop a slowly expanding puddle at their location after a brief delay. Should any of these puddles collide with another puddle, the raid will wipe, forcing the group to position these puddles as far away from each other as possible (all while avoiding Orbs of Anguish).
- NOTE: After dropping Gale Force, a tank, healer and damage-dealer will once again be marked by Ominous Wind which must be dealt with in the same manner as Phase 1. Marked players should avoid approaching any other player with the debuff as failure to do so will cause the debuffs to explode.
- Fire & Lightning will be cast from the edge of the arena while players are dodging Anguish Orbs and Gale Force Puddles. If the Gale Force puddles have been appropriately placed, players can quickly move to a safe spot between them to avoid the last remaining Anguish Orbs and the oncoming column AoE.
- NOTE: From this point onward, a collective set of previously seen mechanics will be executed in sequence. Assuming the group survives the ordeal, Byakko will enter a mechanical loop.
- Hakutei (Tiger) - similar to phase 1, the off-tank will need to pick up the White Tiger while the main-tank pulls Byakko to the outer edges. The mechanics are identical (with a few extra overlaps), such as Fire & Lightning (column AoE), Distant Clap (doughnut AoE from Byakko), the proximity marker on the off-tank, and Heavenly Strike (tank buster).
- Roar of Thunder will be cast after the above string of mechanics, causing the White Tiger to jump into the centre and begin charging an unavoidable AoE with the damage based on its current health (just like phase 1, including the presence of Aramata Orbs). Additionally, the group will have to deal with mechanics from Byakko, such as Storm Pulse, while dealing with this slightly stricter DPS check. Fire & Lightning will be cast shortly afterwards, followed by two Storm Pulse casts back-to-back.
- NOTE: Some groups may choose to use a Limit Break 3 (Tank) to absorb the Roar of Thunder instead of damaging the White Tiger. This is a good option if the group is concerned over the 12minute enrage timer, or to finish off Byakko if his health is low.
- Hundredfold Havoc will be cast once more, except now it will stack with Gale Force (puddles) which should be placed the same way as they were before. Remember, should a puddle collide with another, the raid will wipe.
- State of Shock will be used once more, forcing a tank-swap and group-split to absorb the incoming slams while the Gale Force puddles expand. Bear in mind that Sweep The Leg will be cast after the double-slam with no telegraph. Once Byakko has slammed both tanks, be sure to move behind him to avoid his vicious round-house kick.
- NOTE: Byakko will now combo various mechanics on a loop (such as Unrelenting Anguish and Gale Force) until he is defeated or he hits the enrage timer (12 minutes). Should the fight go on for that long, he will repeatedly cast Storm Pulse three times before charging up a forced raid-wipe with a fourth cast.
Loot
- See also: Byakko's Weapons
- Each player will receive 1 Byakko Totem per kill. Collect 10 totems to exchange for a weapon or 99 for a Auspicious Kamuy Fife at Eschina in Rhalgr's Reach (X:13.8 Y:11.8).
 20 Allagan Tomestone of Poetics
- Byakko Card (Drops at a fixed rate.)
 Treasure Coffer
| Name | Type | Item Level | Rarity | Quantity |
|---|---|---|---|---|
| Byakko's Paladin Arms (IL 355) | Other | N/A | Blue | 1 |
| Byakko's Greataxe | Marauder's Arm | 355 | Blue | 1 |
| Byakko's Greatsword | Dark Knight's Arm | 355 | Blue | 1 |
| Byakko's Lance | Lancer's Arm | 355 | Blue | 1 |
| Byakko's Fists | Pugilist's Arm | 355 | Blue | 1 |
| Byakko's Katana | Samurai's Arm | 355 | Blue | 1 |
| Byakko's Handscythes | Rogue's Arm | 355 | Blue | 1 |
| Byakko's Lutebow | Archer's Arm | 355 | Blue | 1 |
| Byakko's Revolver | Machinist's Arm | 355 | Blue | 1 |
| Byakko's Rod | Two-handed Thaumaturge's Arm | 355 | Blue | 1 |
| Byakko's Grimoire | Arcanist's Grimoire | 355 | Blue | 1 |
| Byakko's Estoc | Red Mage's Arm | 355 | Blue | 1 |
| Byakko's Cane | Two-handed Conjurer's Arm | 355 | Blue | 1 |
| Byakko's Codex | Scholar's Arm | 355 | Blue | 1 |
| Byakko's Ephemeris | Astrologian's Arm | 355 | Blue | 1 |
| Byakko's Mane | Material | N/A | Basic | 1 |
| Byakko Weapon Coffer (IL 355) | Other | N/A | Basic | 1 |
| Auspicious Kamuy Fife | Other | N/A | Basic | 1 |
| Faded Copy of the Jade Stoa | Orchestrion Roll | N/A | Basic | 1 |
Achievements
This duty is associated with the following achievements:
| Name | Points | Task | Reward | Patch |
|---|---|---|---|---|
| Rock Warrior | 10 | Defeat Byakko in the Jade Stoa (Extreme). | - | 4.2 |
| Mightier than the White | 5 | Complete the Jade Stoa (Extreme) with a party of only blue mages, Silence Echo turned on, and Unrestricted Party turned off. | - | 5.45 |

