Difference between revisions of "Dun Scaith"
| (70 intermediate revisions by 19 users not shown) | |||
| Line 1: | Line 1: | ||
{{ | {{Duty infobox | ||
|name= Dun Scaith | | name = Dun Scaith | ||
|image= | | description = The ancient tome recovered by Captain Radlia of the Talons tells of a floating refuge─an island created by Mhachi sorcerers to provide safe haven from calamitous floodwaters. With the disaster that befell the Void Ark, however, the island's intended residents never arrived. Cait Sith is convinced that Diabolos has instead claimed this refuge as his own, transforming what was to be a bastion of hope into a voidsent nest of shadowy nightmare. And it is into this fiendish lair that you must delve. <br> The Lady Radlia stands ready to bear you across the skies. Assault the island, reclaim the Nullstone, and cast your demonic foes into oblivion! | ||
|type= | | image = Dun_Scaith.png | ||
| | | type = raid | ||
|level=60 | | level = 60 | ||
| | | level-sync = 60 | ||
| | | ilvl = 235 | ||
|time=120 | | ilvl-sync = | ||
|roulette= | | difficulty = normal | ||
| | | size = alliance | ||
| | | time-limit = 120 | ||
| | | duty-finder = Alliance Raids (Heavensward) | ||
| | | roulette = alliance raid | ||
| | | tomestones = 100 poetics + 80 aesthetics + 10 heliometry | ||
| req-quest = Where Shadows Reign | |||
| entrance = The Parrock | |||
| entrance-coordinates = 7.0, 7.1 | |||
| location = Dun Scaith | |||
| region = Abalathia's Spine | |||
| patch = 3.5 | |||
| release = heavensward | |||
}} It is the third part of [[Shadow of Mhach]]. | |||
{{TOC limit|3}} | |||
==Objectives== | |||
#Defeat [[Deathgaze Hollow]]: 0/1 | |||
#Arrive at the Rostrum: 0/1 | |||
#Defeat [[Ferdiad Hollow]]: 0/1 | |||
#Arrive in the Queen's Graces: 0/1 | |||
#Defeat [[Scathach]]: 0/1 | |||
#Defeat [[Diabolos]]: 0/1 | |||
#Defeat [[Diabolos Hollow]]: 0/1 | |||
}} | ==Enemies and Bosses== | ||
===[[File:Aggressive difficulty r6.png|link=]] [[Deathgaze Hollow]]=== | |||
{{#ev:youtube|uNrzJdfTNLs|350|right}} | |||
{{#ev:youtube|D9eM5fT3slg|350|right}} | |||
There are no walls on the left and right side of the ship so be careful not to fall off. Throughout the fight, the boss moves between these sides to attack you and make you fly off to your death. | |||
== | ===== First Half ===== | ||
The boss opens up with ''Void Death''. This is a large red-black, circle area of effect (AoE) at the center that pulls you in a couple times. You must keep running away from it or anyone caught in it dies. | |||
Next, it casts ''Void Aero II'' and marks three players with green spread markers. Go to a place away from everyone to place the tornado. Anyone walking into the tornado will get hurt by Biting Wind, which gives you small damage and the {{status effect|windburn}} '''[[Windburn]]''' debuff. Windburn can be removed with {{action icon|Esuna}}. | |||
When the boss casts ''Void Blizzard II'', avoid the fan AoE by going to either side or on the safe spots in between. If you don’t, you receive a large amount of damage from ''Void Blizzard III'' and get the {{status effect|frostbite}} '''[[Frostbite (status effect)|Frostbite]]''' debuff. Frostbite can be removed with {{action icon|Esuna}} | |||
Throughout the fight, the boss casts ''Doomsay'' which randomly gives {{status effect|doom}} '''[[Doom (status effect)|Doom]]''' to one to two players. [[Healer]]s must use {{action icon|Esuna}} to remove them or they will die when the countdown ends. | |||
[[File:Winddirection-voidaeroiii.png|thumb|Aero III wind direction|200px|left]] | |||
If the boss casts ''Void Aero III'', immediately get close to either purple walls on the top and bottom of the ship. A green circular wind will appear in the center that causes proximity-based damage and knockback, so make sure you aren’t too close to it or you may die from damage. '''If you aren’t against a wall, you may fly off to your death.'''</br>'''''NOTE''''': The wind makes you fly in a straight line from the center, so you must be perpendicular to the purple wall to fly into it. See the image on the left to see the direction of where the wind blows. | |||
[[File:Standingposition-voidveroiv.png|thumb|Where to stand for Blizzard IV|200px|left]] | |||
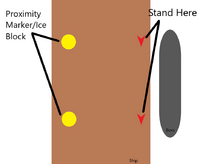
When ''Void Blizzard IV'' is cast, stand directly opposite of either proximity markers and take the damage. Ice blocks are dropped where the marker is located, and the boss immediately casts ''Void Aero IV''. If you try to stand where you take the least amount of damage from the proximity marker, you might not have enough time to get to the ice block. If you stand where the opposite side of the ice block was located, you will fly to the block when ''Void Aero IV'' is cast, blocking you from falling off. '''Anyone who didn’t fly into the block will fall to their deaths.'''</br> | |||
'''''NOTE''''': You can also use {{action icon|Surecast}} or {{action icon|Arm's Length}} to stop you from flying off, but make sure to time it right because you only have a five or six-second duration. | |||
===== Second Half ===== | |||
In the latter half, everything repeats with some differences. | |||
The boss casts ''Doomsay'' more often, and only one proximity marker is placed on the floor when the boss casts ''Void Blizzard IV''. | |||
After ''Void Aero III'' is cast, the boss immediately flies right beside a purple wall and casts ''Bolt of Darkness.'' The boss shoots out a large, column AoE across the ship while the green wind on the center from ''Void Aero III'' blows people away. ''Bolt of Darkness'' gives you {{status effect|bleed}} '''[[Bleed]]''', which can be removed with {{item icon|Esuna}}. If you can, go to the purple wall where the boss isn’t next to, to avoid ''Bolt of Darkness''. | |||
Make sure to kill the two [[Void Sprite]]s that spawn randomly. Avoid their cone AoE when they cast ''Dark II''. | |||
Since the beginning of the fight, the boss places random gray squares on the ship’s floor. In this half, the boss finally uses ''Void Death IV'', which makes the squares pulse. Anyone standing on them when the cast is done, dies. | |||
===== Overview of Skills and Abilities===== | |||
{| {{STDT|mech1}} | |||
|+ | |||
|- | |||
! Skill/Action*!! Details !! Amt of Damage !! AoE? !! Esuna? | |||
|- | |||
| '''''Void Death'''''|| Keep running away from the center even after it pulls you in.|| High-Death|| X|| | |||
|- | |||
| '''''Doomsay'''''|| Remove [[Doom]] from targeted party members.|| Death|| || X | |||
|- | |||
| '''''Void Aero II'''''|| - Green spread marker</br>- Place at away from everyone|| Medium|| || | |||
|- | |||
| '''''Void Blizzard II'''''|| Big fan AoE with safe spots split between.|| Large|| X|| | |||
|- | |||
| '''''Void Aero III'''''|| Get to purple wall on either side to avoid knockback and damage.|| Low-Death|| || | |||
|- | |||
| '''''Bolt of Darkness'''''|| Large column AoE that the boss shoots across the ship.|| Medium|| X|| X | |||
|- | |||
| '''''Void Blizzard IV'''''|| - Proximity markers</br>- Stand directly opposite of the proximity marker and take the damage.|| Small-High || || | |||
|- | |||
| '''''Void Aero IV'''''|| Blows you across the ship. If you can't get to ice block in time, use {{action icon|Surecast}} or {{action icon|Arm's Length}}.|| Small-Death | |||
|| X|| | |||
|- | |||
| '''''Void Death IV''''' || Don’t stand on gray squares.|| Death|| X|| | |||
|} | |||
<nowiki>*</nowiki><small>Italicized words are names of casts that are shown in the cast bar.</small> | |||
===The Mercantile=== | |||
'''Enemies: [[Void Crystal]] x3''' | |||
All three crystals will begin slowly casting '''Void Call''' upon any being aggroed. If allowed to cast, it will turn into a '''[[Dun Scaith Parthenope]]''', which has no notable mechanics. | |||
=== | ===The Thoroughfare=== | ||
'''Enemies: Void Crystal x4, [[Unblinking Eye]] x2''' | |||
The Unblinking Eyes are stationary and will eventually cast '''Petrifying Eye''', a gaze attack that will petrify any hit. A '''[[Dun Scaith Dragon]]''' will eventually spawn and use '''Dark Wave''', a telegraphed point-blank AoE. | |||
===[[File:Aggressive difficulty r6.png|link=]] [[Ferdiad Hollow]]=== | |||
Throughout the fight, the boss marks 3 players with red target markers and throws Abyssal Scythes at them. The scythes stay on the ground, dealing damage to anyone close to them and gives Flesh Wound, which can be removed using {{action icon|Esuna}}. If you are targeted, go to a place away from other players until the boss throws the scythes at you. | |||
The boss has two mechanics that you need to watch out for: ''Wormhole'' and ''Debilitator''. | |||
For ''Wormhole'', look at what is being tethered to the Atomos and what color the tethered Atomos is. If the Atomos is tethered to a yellow ring, stand right below the other same-colored Atomos to avoid the room-wide donut AoE and a stack of {{status effect|vulnerability up}} [[Vulnerability Up]]. If the Atomos is tethered to a blue ball, avoid the other same-colored Atomos to avoid the large circle AoE surrounding it and a stack of {{status effect|vulnerability up}} [[Vulnerability Up]]. At the beginning of the fight, only one Atomos is tethered. Later, two Atomos are tethered. If two Atomos are tethered to blue balls, the safe spot is always at the perpendicular area between them. Try to avoid the center where the two AoEs overlap or you will die. If one is tethered to a yellow ring and the other a blue ball, always stand below the other same-colored Atomos that was tethered to the yellow ring. | |||
For ''Debilitator'', the boss places a debuff on everyone making you weak to either fire or water and spawns several blue and red puddles throughout the room. All the puddles have to be the opposite of what you are debuffed with by stepping on the puddle to change the color. If you are debuffed with Water Resistance Down II, all the puddles must be red. If you are debuffed with Fire Resistance Down II, all the puddles must be blue. Afterwards, Ferdiad casts ''Flameflow'' and deals room-wide damage based on how many puddles are the wrong color. | |||
At around 60% health, the boss goes to the middle of the room and becomes untargetable. Several Wailing Atomos are spawned around him. Avoid the front of the Atomos as they shoot [[Ferdiad's Fool]]s from their mouths. Anyone in front of the Atomos gets hit and receives a stack of {{status effect|vulnerability up}} [[Vulnerability Up]]. | |||
Kill the adds and avoid looking at one of the adds that cast ''Petrifying Eye'', a gaze marker giving anyone looking at its direction {{status effect|petrification}} [[Petrification]]. Afterwards, Atomos spawns around the edge of the room and at the center. The adds cast ''Lucky Pierrot'' in which they dash to the Atomos at the edge and transport back out from the center dealing damage to anyone in the way. At the same time, an add casts ''Icefall'' which leaves a circular AoE under a player. After the transport, the boss casts ''Jester’s Reward'', an AoE that covers half of the room; '''anyone caught in the AoE will die.''' If the adds aren’t all killed, Atomos spawns again to transport the adds. | |||
After all the adds are killed, the boss hits everyone with an unavoidable room-wide damage, '''Jester’s Jig'''. | |||
===== Overview of Skills and Abilities===== | |||
{| {{STDT|mech1}} | |||
|+ | |||
=== | |||
== | |||
|- | |- | ||
! | ! Skill/Action*!! Details !! Amt of Damage !! AoE? !! Esuna? | ||
! | |||
! | |||
! | |||
! | |||
! | |||
! | |||
! | |||
! | |||
|- | |- | ||
| | | '''red target marker'''</br> (Abyssal Scythe)|| Place scythes away from everyone. || Medium|| X|| X | ||
|- | |- | ||
| | | '''''Jongleur’s X'''''|| Tankbuster|| Medium|| || | ||
|- | |- | ||
| | | '''''Jester’s Reap'''''|| Cone AoE in front of boss|| Medium|| X|| | ||
|- | |- | ||
| | | '''''Debilitator'''''|| Step on puddles to change the color to blue if weak against fire or red if weak against water. || || || | ||
|- | |- | ||
| | | '''''Flameflow'''''|| Room-wide damage based on amount of puddles that aren’t the opposite of weakness debuff|| Small-Large|| || | ||
|- | |- | ||
| | | '''''Blackblot'''''|| Stackmarker|| Small-Large|| || | ||
|- | |- | ||
| | | '''''Wormhole'''''|| - Avoid the same-colored tethered Atomos with blue balls.</br>- Stand under the same-colored tethered Atomos with yellow ring.|| Medium-Death|| X|| | ||
|- | |||
|- | |||
|- | |- | ||
| '''''Blackfire'''''|| - Find a large space between the circle AoEs.</br> - Several circle AoEs that gradually grows.|| Medium-Death || X|| | |||
|} | |} | ||
<nowiki>*</nowiki><small>Italicized words are names of casts that are shown in the cast bar.</small> | |||
===[[File:Aggressive difficulty r6.png|link=]] [[Proto Ultima]]=== | |||
* '''Magitek Ray''' (no cast bar): Telegraphed trio of line AoE lasers. The boss will face a random direction for the first laser cast, then while remaining facing in that direction, cast the next two at a 45-degree angle to the left and right of the first one. | |||
* '''Aetherochemical Flare''': Raidwide damage. | |||
* '''Diffractive Laser''' (no cast bar): Untelegraphed frontal cone tankbuster. Do not be in front of the boss if not a tank. | |||
* '''Light Pillar''' (no cast bar): Initially telegraphed circular AoEs that will follow random players. | |||
* After losing enough health, the boss will become untargetable and a stack marker on an orb will appear in the middle ('''Eikonizer'''). The entire party should stack, then move to the walls because a proximity marker ('''Flare Star''') will spawn. The outside of the arena will also become unsafe ('''Aetherial Pool'''). Anyone standing this region will be knocked back. | |||
* Afterwards, two more '''Flare Star''' proximity markers will spawn opposite each other, so the party should move away from both. | |||
* A telegraphed line AoE ('''Citadel Buster''') will then spawn through the middle. | |||
* Two '''[[Allagan Dreadnaught]]s''' will spawn and the tanks should get aggro while the party defeats these. They will do '''Rotoswipe''', a telegraphed conal AoE, and '''Wrecking Ball''', a circle AoE. | |||
* Multiple immobile '''[[Proto Bit]]s''' will spawn, which should be defeated quickly. These will each use a narrow donut AoE ('''Integrated Aetheromodulator''') followed by a large conal AoE ('''Diffractive Laser'''). The boss will also become targetable and use '''Magitek Ray'''. | |||
* After losing more health, the boss will become untargetable again and spawn three immobile '''[[Aether Collector]]s'''. These must all be destroyed to make the boss vulnerable again. | |||
* During this, the boss will slowly cast '''Supernova''' and must be defeated before this cast finishes, or the party will wipe. The DPS check for this encounter is generally a non-issue. | |||
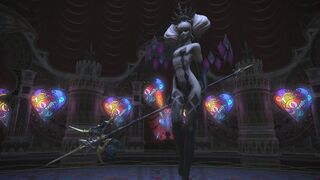
===[[File:Aggressive difficulty r6.png|link=]] [[Scathach]]=== | |||
* '''Thirty Thorns''': Untelegraphed three part tank buster, followed by a very short telegraph melee-range AoE. Move out of melee range to avoid this. | |||
* '''Shadespin''': Wings get big and do an hourglass aoe in the direction they are facing, get between the wings. She will always slap either her front left and back right, or front right and back left (opposite quadrants around the boss's hitbox), so simply move to a quadrant around the boss that her wings are not extended over during the cast. | |||
** While she has the wings out, she will occasionally dash to a location and perform a much larger version of the melee AoE from '''Thirty Thorns'''. Ensure you avoid melee range after she does this dash. | |||
* '''Shadow Links''': When the message "Shadows gather on the floor" appears and the room turns dark, stop all movement, otherwise shadows hands will grab you from below, slowing your movement and inflicting a bleed. | |||
* '''Shadethrust''': Occasionally she will turn toward party and perform a line AoE, sidestep it. | |||
* '''Pitfall''': A proximity marker AoE will spawn somewhere. From it, a '''[[Connla]]''' add will spawn needs to be grabbed by an offtank and killed away from Scathach, if it gets close they tether and increase her damage dealt. If left alive it wipes the raid. | |||
* '''Nox orbs''': Circular red and black marker will be put on some players. Affected players should bait the orbs away from group by constantly moving away from other players. | |||
* '''Shadow Limbs (giant hands)''': link to a player and follows them, if it reaches the players it kills them. The tethered player can face the Shadow Limb to stop their movement. The Limbs must be killed, they can switch tethers to a different player. | |||
* '''Thirty Arrows''': Periodically, a blue pool will appear at a random location. Shortly after, either an asterisk pattern of line telegraphs or a sequence of line telegraphs will appear from where the pool was, dealing damage to anyone in those telegraphs shortly thereafter. | |||
* At 50%, Scathach will enter a cocoon and spawn adds ('''[[Shadowcourt Jester]]s''' and '''[[Chimera Poppet (enemy)|Chimera Poppets]]''', including a '''[[Shadowcourt Hound]]''' with the typical Chimera moveset, which can be interrupted. | |||
* These adds must be killed, or she will wipe upon emerging from the cocoon. | |||
* During this phase, towers will spawn around the room that require one person each in them to avoid raid-wide damage. | |||
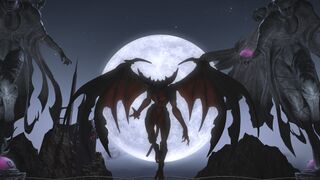
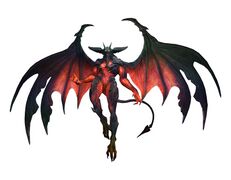
===[[File:Aggressive difficulty r6.png|link=]] [[Diabolos Hollow|Diabolos]]=== | |||
==== Phase 1: Diabolos ==== | |||
* In this phase Diabolos can be stunned. Melees and tanks can stun most casted abilities. | |||
* '''Nightmare''' - Look away from Diabolos, inflicts {{status effect|sleep}} '''[[Sleep]]''' | |||
* '''Ultimate Terror''' - Donut AoE - Stand close or very far away | |||
* '''Ruinous Omen''' - Raidwide AoE | |||
* '''Night Terror''' - Stack marker on random player, stack to share damage. | |||
* '''Shadethrust''' - Line AoE in front of Diabolos, dodge to the sides or back | |||
==== Phase 2: Intermission / Lifegate ==== | |||
Kill ''[[Lifegate]]'' 5 times. Each time it reaches 0 health, it will refill and gain a stack of a buff increasing its max HP. Kill ''[[Deathgate]]s'' when they appear to avoid spawning adds ([[Blood Hound]])s. | |||
==== Phase 3: Diabolos Hollow ==== | |||
Upon pulling Diabolos Hollow, the party will receive a checkpoint that they will restart from if they wipe. Diabolos starts with a large absorb shield that grants the boss 100% crit chance on all attacks. Watch main tank's HP until shield breaks, as the boss will repeatedly cast '''Hollow Camisado''', a tankbuster that can destroy tanks due to the 100% crit chance while the shield is up. | |||
Kill ''Deathgates'', and when a larger ''[[Diabolic Gate]]'' with a glowing circle around it spawns in the center, a portion of the raid should enter it and kill the [[Shadow Dahak]] add inside. Note that within the portal, the area outside of the arena is instant death. Typically, the people who go inside are free-for-all'd. | |||
* Diabolos Casts | |||
** '''Hollow Camisado''' - Heavy Tankbuster, does around 25k damage. Guaranteed crit at the start of the phase due to the boss's absorb shield, so tanks should use CDs and healers should ensure tanks get topped up rapidly. | |||
** '''Shadethrust''' - Line AoE in front of Diabolos, dodge to the sides or back. | |||
** '''Hollow Nightmare''' - Upgraded version of Nightmare. Look away from Diabolos, inflicts {{status effect|doom}} '''[[Doom (status effect)|Doom]]''' | |||
** '''Hollow Terror''' - Upgraded version of Night Terror. Stand at melee range or far away | |||
** '''Hollow Omen''' - Raidwide AoE | |||
** '''Blindside''' - Stack marker on tank | |||
** '''Earthshaker''' - Marks 3 players for a cone AoE, originating from the boss. Stand away from each other. | |||
* Other Mechanics | |||
** '''Nox''' - Chases 2 players with big AoEs. Run away from the party, and keep running until it ends. | |||
** '''Hollow Night''' - Stack marker & gaze attack originating from the marked player. This player should move slightly away from the boss, so everyone else can stand between them and the boss to share the stack damage, but remain faced away from that player. | |||
** '''Particle Beam''' - Stand in the towers to soak damage. Middle tower is for tanks only. | |||
** '''Diabolic Gate''' - Go in and kill the add. ('''This mechanic will wipe the party, if failed.''') | |||
** '''Critical Gravity''' - Soak red orbs at the edges to avoid splashing the party. | |||
** '''Double Edge''' - The boss will receive the Keen Edge buff, increasing its damage dealt but causing it to take damage-over-time. | |||
==Loot== | |||
{{see also|Diabolic Armor}} | |||
===[[File:Silver Coffer (small).png|link=]] [[Deathgaze Hollow]]=== | |||
*{{Item reward|10|Allagan Tomestone of Poetics}} | |||
{{Drops list|Deathgaze Hollow}} | |||
===[[File:Silver Coffer (small).png|link=]] [[Ferdiad Hollow]]=== | |||
*{{Item reward|20|Allagan Tomestone of Poetics}} | |||
{{Drops list|Ferdiad Hollow}} | |||
===[[File:Silver Coffer (small).png|link=]] [[Scathach]]=== | |||
*{{Item reward|30|Allagan Tomestone of Poetics}} | |||
{{Drops list|Scathach}} | |||
=== | ===[[File:Gold Coffer (small).png|link=]] [[Diabolos Hollow|Diabolos]]=== | ||
*{{Item reward|40|Allagan Tomestone of Poetics}} | |||
*1 {{Item icon|Mhachi Matter}} | |||
{{Drops list|Diabolos Hollow}} | |||
{{Drops table header}} | |||
{{Drops table row|Void Matter}} | |||
{{Drops table row|Wind-up Scathach}} | |||
{{Drops table row|Diabolos Hollow Card}} | |||
{{Table footer}} | |||
==Rewards== | |||
When originally released, players could receive only one reward item per week for completing duties in Dun Scaith. Weekly limits were lifted in [[patch 3.57]]. | |||
Each party in the alliance will receive its own treasure chest, the contents of which will be identical regardless of the route taken. | |||
* Players cannot open a treasure chest belonging to another party. | |||
| | |||
| | |||
| | |||
| | |||
|- | |||
| | |||
=== | ==Achievements== | ||
This duty is associated with the following [[achievements]]: | |||
{| {{STDT|mech1}} | |||
{{achievement table header}} | |||
{{achievement table row|What's Dun Is Done}} | |||
{{achievement table row|Mapping the Realm: Dun Scaith}} | |||
{| | |||
| | |||
| | |||
| | |||
|} | |} | ||
==Images== | ==Images== | ||
===Gear Images=== | ===Gear Images=== | ||
[[File:dun scaith gear1.jpg| | [[File:dun scaith gear1.jpg|center|400px]] | ||
===Dungeon Images=== | ===Dungeon Images=== | ||
<gallery mode="packed"> | <gallery mode="packed"> | ||
File:dun scaith1.jpg | |||
File:dun scaith6.jpg | |||
File:dun scaith5.jpg | File:dun scaith5.jpg | ||
File:dun scaith3.jpg | |||
File:dun scaith4.jpg | File:dun scaith4.jpg | ||
File:dun scaith2.jpg | File:dun scaith2.jpg | ||
File: | File:Proto ultima1.jpg | ||
</gallery> | |||
===Concept Art=== | |||
<gallery mode="packed"> | |||
File:Deathgaze Hollow render.jpg | |||
File:Proto ultima2.png | |||
File:Scathach render.jpg | |||
File:Diabolos.jpg | |||
</gallery> | </gallery> | ||
== | ==Additional Information== | ||
{{see also|wikipedia:Dunscaith Castle}} | |||
===Historical=== | |||
*In [[patch 3.55a]], the [[Proto Ultima]] miniboss, which was previously playable at the 2016-2017 Fan Festivals, was added and replaced an existing encounter against the [[Shadowcourt Handmaiden]]. | |||
==Duty Dialogue== | |||
'''Deathgaze Hollow:''' Insolent mortals... | |||
One does not come uninvited to the Shadow Queen's castle! | |||
'''Deathgaze Hollow:''' I see the blossoms of your fragile lives... | |||
I need but reach froth and pluck them from their stems! | |||
'''Deathgaze Hollow:''' Reaping winds, heed my command! | |||
Strip the souls from their worthless shells! | |||
'''Deathgaze Hollow:''' Forgive me, my queen... | |||
This wretched wraith has failed you... | |||
'''Cait Sith:''' There it is up ahead—the island from the tome! | |||
Let's find somewhere to dock this behemoth! | |||
'''Cait Sith:''' These buildings were meant to house the refugees of Mhach. | |||
A promised land, forgotten by time... | |||
'''Ferdiad Hollow:''' What's this? Visitors to our fair abode? | |||
Pray allow me to be the first to ''welcome'' you! | |||
'''Cait Sith:''' ...The voidsent have claimed this place, just as I suspected. | |||
It is become a nest of shadows and despair. | |||
'''Ferdiad Hollow:''' Oh, how I love entertaining unexpected guests! | |||
And do I spy some familiar faces in the crows!? | |||
'''Ferdiad Hollow:''' Dance with me! Prance with me! Choose your stage! | |||
A fiery demise or a watery grave! | |||
'''Ferdiad Hollow:''' Come closer, come closer! | |||
I promise I will give you a show to ''die'' for! | |||
'''Ferdiad Hollow:''' Pay attention, or you'll miss the big reveal! | |||
'''Ferdiad Hollow:''' Where is the laughter? The thunderous applause? | |||
There is simply no pleasing you! | |||
'''Ferdiad Hollow:''' Alas, we come to the ed of my show... | |||
There shall be...no encore... | |||
'''Cait Sith:''' Something comes...but it is no voidsent! | |||
Be ready for anything! | |||
'''Proto Ultima:''' Ultima systems...online. Performing systems check... | |||
'''Proto Ultima:''' Systems check complete. Initializing armageddon sequence... | |||
'''Proto Ultima:''' Reactor capacity exceeded. | |||
Gravitations collapse imminent. | |||
Reactor cells charged. Supernova ready. | |||
'''Proto Ultima:''' Aetheromagnetic induction beacon active. Commending aether transfer. | |||
'''Proto Ultima:''' Reactor cells hypercharging... | |||
'''Cait Sith:''' By the twitching of my whiskers, there is fell magick ahead. | |||
Only the queen herself could radiate malice of this magnitude! | |||
'''Scathach:''' Welcome, mortals, to my citadel of shadows. | |||
Have you come to deepen the gloom with an offering of souls? | |||
'''Scathach:''' Creeping shade and silhouette, gather unto me! | |||
'''Scathach:''' To me, my protege! | |||
Smother these intruders with the arts that I have taught thee! | |||
'''Scathach:''' And still you refuse to dim and submit... | |||
Must I try a different tact? | |||
'''Scathach:''' From a chrysalis of light shall I birth the deepest shadow... | |||
'''Scathach:''' Your fate was sealed the moment you set foot in my domain! | |||
'''Scathach:''' Accept my touch, and bask in tenebrous brilliance! | |||
'''Scathach:''' Such pervasive light... | |||
It doth steal into the darkest corners, and chase away my shadows... | |||
'''Diabolos:''' And thus the Shadow Queen doth fall. | |||
I commend you on your victory. | |||
'''Diabolos:''' Yes, such skill and strength are deserving of a more fitting stage. | |||
Come, mortals—the true master of shadows awaiteth you... | |||
'''Diabolos:''' Shall we begin? | |||
Let dominion of your precious skies be decided here and now! | |||
'''Diabolos:''' You expect the creature I was before, enfeebled by confinement? | |||
Hah! Face me now in the fullness of my power! | |||
'''Diabolos:''' Shall I thrust open the gate to the void? | |||
The night hounds slaver at the scent of your fear... | |||
'''Diabolos:''' Not even in eternal sleep shall you be free from the terror of my weaving! | |||
'''Diabolos:''' This tiresome battle hath dragged on overlong. Enough. | |||
'''Diabolos:''' The energies of the nether will be mine! | |||
I will bathe in primordial darkness! | |||
'''Diabolos:''' Bow before the shrieking majesty of the void! | |||
'''Diabolos:''' What have you done!? | |||
You seek to wrest from me control of the portal!? | |||
'''Diabolos:''' So be it. A contest of strength, then! | |||
A content you have no hope of winning. | |||
'''Diabolos:''' Impossible! I am a lord of the void, you cannot— | |||
Aaarrrggghhh! | |||
'''Diabolos:''' <pant> <pant> Mine imprisonment...weakened me more than I imagined... | |||
'''Diabolos:''' But you have not bested me yet! | |||
Witness now my true purpose for seeking the queen's rebirth! | |||
'''Diabolos Hollow:''' Yes. The glory! An infinite well of shadow! | |||
You have breached Scathach's unholy vessel, and released her power unto me! | |||
'''Diabolos Hollow:''' Shadow itself shall be mine armor! | |||
Come! Strike your feeble blows in vain! | |||
'''Cait Sith:''' Such defenses will be difficult to pierce... | |||
But mind not his boasts! A persistent assault will prevail! | |||
'''Diabolos Hollow:''' Another rift... Another chance to test your might? | |||
'''Diabolos Hollow:''' From the depths of shadow's well shall rise your ruination! | |||
'''Diabolos Hollow:''' Must I entreat the very specter of death to be rid of you!? | |||
I care not! I will wager all for your destruction! | |||
'''Diabolos Hollow:''' What more must I have...? | |||
How great the flood of darkness...to drown out your light... | |||
==Trivia== | |||
*This is the only instanced duty in the game where there is a pre-boss cutscene not before the final boss. | |||
{{ | {{Duties nav|raid}} | ||
Latest revision as of 03:40, 18 January 2025
Dun Scaith
- Level
- 60 (Sync: 60)
- Item Level
- 235
- Difficulty
- Normal
- Party size
- Alliance
24 man • 3 6
6  15
15 
- Unsyncing
- Allowed
- Time limit
- 120 minutes
- Duty Finder
- Alliance Raids (Heavensward)
- Roulette
- Alliance Raids
- Tomestones
 100
100  80
80  10
10 - Req. quest
 Where Shadows Reign
- Entrance
- The Parrock (X:7.0, Y:7.1)
- Location
- Dun Scaith
- Region
- Abalathia's Spine
- Patch
- 3.5
“The ancient tome recovered by Captain Radlia of the Talons tells of a floating refuge─an island created by Mhachi sorcerers to provide safe haven from calamitous floodwaters. With the disaster that befell the Void Ark, however, the island's intended residents never arrived. Cait Sith is convinced that Diabolos has instead claimed this refuge as his own, transforming what was to be a bastion of hope into a voidsent nest of shadowy nightmare. And it is into this fiendish lair that you must delve.
The Lady Radlia stands ready to bear you across the skies. Assault the island, reclaim the Nullstone, and cast your demonic foes into oblivion!— In-game description
Dun Scaith is a level 60 raid introduced in patch 3.5 with Heavensward. It is the third part of Shadow of Mhach.
Objectives
- Defeat Deathgaze Hollow: 0/1
- Arrive at the Rostrum: 0/1
- Defeat Ferdiad Hollow: 0/1
- Arrive in the Queen's Graces: 0/1
- Defeat Scathach: 0/1
- Defeat Diabolos: 0/1
- Defeat Diabolos Hollow: 0/1
Enemies and Bosses
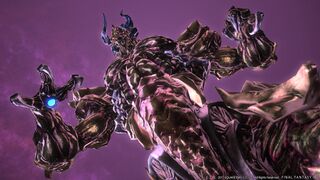
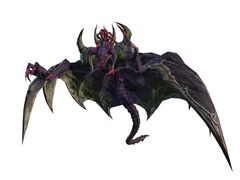
 Deathgaze Hollow
There are no walls on the left and right side of the ship so be careful not to fall off. Throughout the fight, the boss moves between these sides to attack you and make you fly off to your death.
First Half
The boss opens up with Void Death. This is a large red-black, circle area of effect (AoE) at the center that pulls you in a couple times. You must keep running away from it or anyone caught in it dies.
Next, it casts Void Aero II and marks three players with green spread markers. Go to a place away from everyone to place the tornado. Anyone walking into the tornado will get hurt by Biting Wind, which gives you small damage and the ![]() Windburn debuff. Windburn can be removed with Esuna.
Windburn debuff. Windburn can be removed with Esuna.
When the boss casts Void Blizzard II, avoid the fan AoE by going to either side or on the safe spots in between. If you don’t, you receive a large amount of damage from Void Blizzard III and get the ![]() Frostbite debuff. Frostbite can be removed with Esuna
Frostbite debuff. Frostbite can be removed with Esuna
Throughout the fight, the boss casts Doomsay which randomly gives ![]() Doom to one to two players. Healers must use Esuna to remove them or they will die when the countdown ends.
Doom to one to two players. Healers must use Esuna to remove them or they will die when the countdown ends.
If the boss casts Void Aero III, immediately get close to either purple walls on the top and bottom of the ship. A green circular wind will appear in the center that causes proximity-based damage and knockback, so make sure you aren’t too close to it or you may die from damage. If you aren’t against a wall, you may fly off to your death.
NOTE: The wind makes you fly in a straight line from the center, so you must be perpendicular to the purple wall to fly into it. See the image on the left to see the direction of where the wind blows.
When Void Blizzard IV is cast, stand directly opposite of either proximity markers and take the damage. Ice blocks are dropped where the marker is located, and the boss immediately casts Void Aero IV. If you try to stand where you take the least amount of damage from the proximity marker, you might not have enough time to get to the ice block. If you stand where the opposite side of the ice block was located, you will fly to the block when Void Aero IV is cast, blocking you from falling off. Anyone who didn’t fly into the block will fall to their deaths.
NOTE: You can also use Surecast or Arm's Length to stop you from flying off, but make sure to time it right because you only have a five or six-second duration.
Second Half
In the latter half, everything repeats with some differences.
The boss casts Doomsay more often, and only one proximity marker is placed on the floor when the boss casts Void Blizzard IV.
After Void Aero III is cast, the boss immediately flies right beside a purple wall and casts Bolt of Darkness. The boss shoots out a large, column AoE across the ship while the green wind on the center from Void Aero III blows people away. Bolt of Darkness gives you ![]() Bleed, which can be removed with Esuna. If you can, go to the purple wall where the boss isn’t next to, to avoid Bolt of Darkness.
Bleed, which can be removed with Esuna. If you can, go to the purple wall where the boss isn’t next to, to avoid Bolt of Darkness.
Make sure to kill the two Void Sprites that spawn randomly. Avoid their cone AoE when they cast Dark II.
Since the beginning of the fight, the boss places random gray squares on the ship’s floor. In this half, the boss finally uses Void Death IV, which makes the squares pulse. Anyone standing on them when the cast is done, dies.
Overview of Skills and Abilities
| Skill/Action* | Details | Amt of Damage | AoE? | Esuna? |
|---|---|---|---|---|
| Void Death | Keep running away from the center even after it pulls you in. | High-Death | X | |
| Doomsay | Remove Doom from targeted party members. | Death | X | |
| Void Aero II | - Green spread marker - Place at away from everyone |
Medium | ||
| Void Blizzard II | Big fan AoE with safe spots split between. | Large | X | |
| Void Aero III | Get to purple wall on either side to avoid knockback and damage. | Low-Death | ||
| Bolt of Darkness | Large column AoE that the boss shoots across the ship. | Medium | X | X |
| Void Blizzard IV | - Proximity markers - Stand directly opposite of the proximity marker and take the damage. |
Small-High | ||
| Void Aero IV | Blows you across the ship. If you can't get to ice block in time, use Surecast or Arm's Length. | Small-Death | X | |
| Void Death IV | Don’t stand on gray squares. | Death | X |
*Italicized words are names of casts that are shown in the cast bar.
The Mercantile
Enemies: Void Crystal x3
All three crystals will begin slowly casting Void Call upon any being aggroed. If allowed to cast, it will turn into a Dun Scaith Parthenope, which has no notable mechanics.
The Thoroughfare
Enemies: Void Crystal x4, Unblinking Eye x2
The Unblinking Eyes are stationary and will eventually cast Petrifying Eye, a gaze attack that will petrify any hit. A Dun Scaith Dragon will eventually spawn and use Dark Wave, a telegraphed point-blank AoE.
 Ferdiad Hollow
Throughout the fight, the boss marks 3 players with red target markers and throws Abyssal Scythes at them. The scythes stay on the ground, dealing damage to anyone close to them and gives Flesh Wound, which can be removed using Esuna. If you are targeted, go to a place away from other players until the boss throws the scythes at you.
The boss has two mechanics that you need to watch out for: Wormhole and Debilitator.
For Wormhole, look at what is being tethered to the Atomos and what color the tethered Atomos is. If the Atomos is tethered to a yellow ring, stand right below the other same-colored Atomos to avoid the room-wide donut AoE and a stack of ![]() Vulnerability Up. If the Atomos is tethered to a blue ball, avoid the other same-colored Atomos to avoid the large circle AoE surrounding it and a stack of
Vulnerability Up. If the Atomos is tethered to a blue ball, avoid the other same-colored Atomos to avoid the large circle AoE surrounding it and a stack of ![]() Vulnerability Up. At the beginning of the fight, only one Atomos is tethered. Later, two Atomos are tethered. If two Atomos are tethered to blue balls, the safe spot is always at the perpendicular area between them. Try to avoid the center where the two AoEs overlap or you will die. If one is tethered to a yellow ring and the other a blue ball, always stand below the other same-colored Atomos that was tethered to the yellow ring.
Vulnerability Up. At the beginning of the fight, only one Atomos is tethered. Later, two Atomos are tethered. If two Atomos are tethered to blue balls, the safe spot is always at the perpendicular area between them. Try to avoid the center where the two AoEs overlap or you will die. If one is tethered to a yellow ring and the other a blue ball, always stand below the other same-colored Atomos that was tethered to the yellow ring.
For Debilitator, the boss places a debuff on everyone making you weak to either fire or water and spawns several blue and red puddles throughout the room. All the puddles have to be the opposite of what you are debuffed with by stepping on the puddle to change the color. If you are debuffed with Water Resistance Down II, all the puddles must be red. If you are debuffed with Fire Resistance Down II, all the puddles must be blue. Afterwards, Ferdiad casts Flameflow and deals room-wide damage based on how many puddles are the wrong color.
At around 60% health, the boss goes to the middle of the room and becomes untargetable. Several Wailing Atomos are spawned around him. Avoid the front of the Atomos as they shoot Ferdiad's Fools from their mouths. Anyone in front of the Atomos gets hit and receives a stack of ![]() Vulnerability Up.
Vulnerability Up.
Kill the adds and avoid looking at one of the adds that cast Petrifying Eye, a gaze marker giving anyone looking at its direction ![]() Petrification. Afterwards, Atomos spawns around the edge of the room and at the center. The adds cast Lucky Pierrot in which they dash to the Atomos at the edge and transport back out from the center dealing damage to anyone in the way. At the same time, an add casts Icefall which leaves a circular AoE under a player. After the transport, the boss casts Jester’s Reward, an AoE that covers half of the room; anyone caught in the AoE will die. If the adds aren’t all killed, Atomos spawns again to transport the adds.
Petrification. Afterwards, Atomos spawns around the edge of the room and at the center. The adds cast Lucky Pierrot in which they dash to the Atomos at the edge and transport back out from the center dealing damage to anyone in the way. At the same time, an add casts Icefall which leaves a circular AoE under a player. After the transport, the boss casts Jester’s Reward, an AoE that covers half of the room; anyone caught in the AoE will die. If the adds aren’t all killed, Atomos spawns again to transport the adds.
After all the adds are killed, the boss hits everyone with an unavoidable room-wide damage, Jester’s Jig.
Overview of Skills and Abilities
| Skill/Action* | Details | Amt of Damage | AoE? | Esuna? |
|---|---|---|---|---|
| red target marker (Abyssal Scythe) |
Place scythes away from everyone. | Medium | X | X |
| Jongleur’s X | Tankbuster | Medium | ||
| Jester’s Reap | Cone AoE in front of boss | Medium | X | |
| Debilitator | Step on puddles to change the color to blue if weak against fire or red if weak against water. | |||
| Flameflow | Room-wide damage based on amount of puddles that aren’t the opposite of weakness debuff | Small-Large | ||
| Blackblot | Stackmarker | Small-Large | ||
| Wormhole | - Avoid the same-colored tethered Atomos with blue balls. - Stand under the same-colored tethered Atomos with yellow ring. |
Medium-Death | X | |
| Blackfire | - Find a large space between the circle AoEs. - Several circle AoEs that gradually grows. |
Medium-Death | X |
*Italicized words are names of casts that are shown in the cast bar.
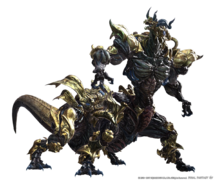
 Proto Ultima
- Magitek Ray (no cast bar): Telegraphed trio of line AoE lasers. The boss will face a random direction for the first laser cast, then while remaining facing in that direction, cast the next two at a 45-degree angle to the left and right of the first one.
- Aetherochemical Flare: Raidwide damage.
- Diffractive Laser (no cast bar): Untelegraphed frontal cone tankbuster. Do not be in front of the boss if not a tank.
- Light Pillar (no cast bar): Initially telegraphed circular AoEs that will follow random players.
- After losing enough health, the boss will become untargetable and a stack marker on an orb will appear in the middle (Eikonizer). The entire party should stack, then move to the walls because a proximity marker (Flare Star) will spawn. The outside of the arena will also become unsafe (Aetherial Pool). Anyone standing this region will be knocked back.
- Afterwards, two more Flare Star proximity markers will spawn opposite each other, so the party should move away from both.
- A telegraphed line AoE (Citadel Buster) will then spawn through the middle.
- Two Allagan Dreadnaughts will spawn and the tanks should get aggro while the party defeats these. They will do Rotoswipe, a telegraphed conal AoE, and Wrecking Ball, a circle AoE.
- Multiple immobile Proto Bits will spawn, which should be defeated quickly. These will each use a narrow donut AoE (Integrated Aetheromodulator) followed by a large conal AoE (Diffractive Laser). The boss will also become targetable and use Magitek Ray.
- After losing more health, the boss will become untargetable again and spawn three immobile Aether Collectors. These must all be destroyed to make the boss vulnerable again.
- During this, the boss will slowly cast Supernova and must be defeated before this cast finishes, or the party will wipe. The DPS check for this encounter is generally a non-issue.
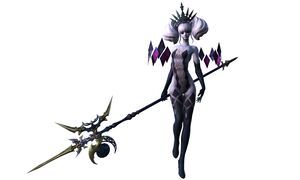
 Scathach
- Thirty Thorns: Untelegraphed three part tank buster, followed by a very short telegraph melee-range AoE. Move out of melee range to avoid this.
- Shadespin: Wings get big and do an hourglass aoe in the direction they are facing, get between the wings. She will always slap either her front left and back right, or front right and back left (opposite quadrants around the boss's hitbox), so simply move to a quadrant around the boss that her wings are not extended over during the cast.
- While she has the wings out, she will occasionally dash to a location and perform a much larger version of the melee AoE from Thirty Thorns. Ensure you avoid melee range after she does this dash.
- Shadow Links: When the message "Shadows gather on the floor" appears and the room turns dark, stop all movement, otherwise shadows hands will grab you from below, slowing your movement and inflicting a bleed.
- Shadethrust: Occasionally she will turn toward party and perform a line AoE, sidestep it.
- Pitfall: A proximity marker AoE will spawn somewhere. From it, a Connla add will spawn needs to be grabbed by an offtank and killed away from Scathach, if it gets close they tether and increase her damage dealt. If left alive it wipes the raid.
- Nox orbs: Circular red and black marker will be put on some players. Affected players should bait the orbs away from group by constantly moving away from other players.
- Shadow Limbs (giant hands): link to a player and follows them, if it reaches the players it kills them. The tethered player can face the Shadow Limb to stop their movement. The Limbs must be killed, they can switch tethers to a different player.
- Thirty Arrows: Periodically, a blue pool will appear at a random location. Shortly after, either an asterisk pattern of line telegraphs or a sequence of line telegraphs will appear from where the pool was, dealing damage to anyone in those telegraphs shortly thereafter.
- At 50%, Scathach will enter a cocoon and spawn adds (Shadowcourt Jesters and Chimera Poppets, including a Shadowcourt Hound with the typical Chimera moveset, which can be interrupted.
- These adds must be killed, or she will wipe upon emerging from the cocoon.
- During this phase, towers will spawn around the room that require one person each in them to avoid raid-wide damage.
 Diabolos
Phase 1: Diabolos
- In this phase Diabolos can be stunned. Melees and tanks can stun most casted abilities.
- Nightmare - Look away from Diabolos, inflicts
 Sleep
Sleep - Ultimate Terror - Donut AoE - Stand close or very far away
- Ruinous Omen - Raidwide AoE
- Night Terror - Stack marker on random player, stack to share damage.
- Shadethrust - Line AoE in front of Diabolos, dodge to the sides or back
Phase 2: Intermission / Lifegate
Kill Lifegate 5 times. Each time it reaches 0 health, it will refill and gain a stack of a buff increasing its max HP. Kill Deathgates when they appear to avoid spawning adds (Blood Hound)s.
Phase 3: Diabolos Hollow
Upon pulling Diabolos Hollow, the party will receive a checkpoint that they will restart from if they wipe. Diabolos starts with a large absorb shield that grants the boss 100% crit chance on all attacks. Watch main tank's HP until shield breaks, as the boss will repeatedly cast Hollow Camisado, a tankbuster that can destroy tanks due to the 100% crit chance while the shield is up.
Kill Deathgates, and when a larger Diabolic Gate with a glowing circle around it spawns in the center, a portion of the raid should enter it and kill the Shadow Dahak add inside. Note that within the portal, the area outside of the arena is instant death. Typically, the people who go inside are free-for-all'd.
- Diabolos Casts
- Hollow Camisado - Heavy Tankbuster, does around 25k damage. Guaranteed crit at the start of the phase due to the boss's absorb shield, so tanks should use CDs and healers should ensure tanks get topped up rapidly.
- Shadethrust - Line AoE in front of Diabolos, dodge to the sides or back.
- Hollow Nightmare - Upgraded version of Nightmare. Look away from Diabolos, inflicts
 Doom
Doom - Hollow Terror - Upgraded version of Night Terror. Stand at melee range or far away
- Hollow Omen - Raidwide AoE
- Blindside - Stack marker on tank
- Earthshaker - Marks 3 players for a cone AoE, originating from the boss. Stand away from each other.
- Other Mechanics
- Nox - Chases 2 players with big AoEs. Run away from the party, and keep running until it ends.
- Hollow Night - Stack marker & gaze attack originating from the marked player. This player should move slightly away from the boss, so everyone else can stand between them and the boss to share the stack damage, but remain faced away from that player.
- Particle Beam - Stand in the towers to soak damage. Middle tower is for tanks only.
- Diabolic Gate - Go in and kill the add. (This mechanic will wipe the party, if failed.)
- Critical Gravity - Soak red orbs at the edges to avoid splashing the party.
- Double Edge - The boss will receive the Keen Edge buff, increasing its damage dealt but causing it to take damage-over-time.
Loot
- See also: Diabolic Armor
 Deathgaze Hollow
| Name | Type | Item Level | Rarity | Quantity |
|---|---|---|---|---|
| Diabolic Boots of Aiming | Feet | 260 | Blue | 1 |
| Diabolic Boots of Casting | Feet | 260 | Blue | 1 |
| Diabolic Boots of Healing | Feet | 260 | Blue | 1 |
| Diabolic Circlet of Maiming | Head | 260 | Blue | 1 |
| Diabolic Hat of Aiming | Head | 260 | Blue | 1 |
| Diabolic Hat of Casting | Head | 260 | Blue | 1 |
| Diabolic Hat of Healing | Head | 260 | Blue | 1 |
| Diabolic Helm of Fending | Head | 260 | Blue | 1 |
| Diabolic Sabatons of Fending | Feet | 260 | Blue | 1 |
| Diabolic Sabatons of Maiming | Feet | 260 | Blue | 1 |
| Diabolic Thighboots of Scouting | Feet | 260 | Blue | 1 |
| Diabolic Thighboots of Striking | Feet | 260 | Blue | 1 |
| Diabolic Turban of Scouting | Head | 260 | Blue | 1 |
| Diabolic Turban of Striking | Head | 260 | Blue | 1 |
 Ferdiad Hollow
| Name | Type | Item Level | Rarity | Quantity |
|---|---|---|---|---|
| Diabolic Bottoms of Aiming | Legs | 260 | Blue | 1 |
| Diabolic Bottoms of Casting | Legs | 260 | Blue | 1 |
| Diabolic Bottoms of Fending | Legs | 260 | Blue | 1 |
| Diabolic Bottoms of Maiming | Legs | 260 | Blue | 1 |
| Diabolic Bottoms of Scouting | Legs | 260 | Blue | 1 |
| Diabolic Bottoms of Striking | Legs | 260 | Blue | 1 |
| Diabolic Dress Gloves of Healing | Hands | 260 | Blue | 1 |
| Diabolic Gauntlets of Fending | Hands | 260 | Blue | 1 |
| Diabolic Gauntlets of Maiming | Hands | 260 | Blue | 1 |
| Diabolic Gloves of Scouting | Hands | 260 | Blue | 1 |
| Diabolic Gloves of Striking | Hands | 260 | Blue | 1 |
| Diabolic Halfgloves of Aiming | Hands | 260 | Blue | 1 |
| Diabolic Halfgloves of Casting | Hands | 260 | Blue | 1 |
| Diabolic Trousers of Healing | Legs | 260 | Blue | 1 |
 Scathach
| Name | Type | Item Level | Rarity | Quantity |
|---|---|---|---|---|
| Diabolic Boots of Aiming | Feet | 260 | Blue | 1 |
| Diabolic Boots of Casting | Feet | 260 | Blue | 1 |
| Diabolic Boots of Healing | Feet | 260 | Blue | 1 |
| Diabolic Coat of Aiming | Body | 260 | Blue | 1 |
| Diabolic Coat of Casting | Body | 260 | Blue | 1 |
| Diabolic Coat of Healing | Body | 260 | Blue | 1 |
| Diabolic Dolman of Scouting | Body | 260 | Blue | 1 |
| Diabolic Dolman of Striking | Body | 260 | Blue | 1 |
| Diabolic Mail of Fending | Body | 260 | Blue | 1 |
| Diabolic Mail of Maiming | Body | 260 | Blue | 1 |
| Diabolic Sabatons of Fending | Feet | 260 | Blue | 1 |
| Diabolic Sabatons of Maiming | Feet | 260 | Blue | 1 |
| Diabolic Thighboots of Scouting | Feet | 260 | Blue | 1 |
| Diabolic Thighboots of Striking | Feet | 260 | Blue | 1 |
 Diabolos
| Name | Type | Item Level | Rarity | Quantity |
|---|---|---|---|---|
| Void Matter | Material | N/A | Basic | 1 |
| Wind-up Scathach | Minion | N/A | Basic | 1 |
| Diabolos Hollow Card | Triple Triad Card | N/A | 1 |
Rewards
When originally released, players could receive only one reward item per week for completing duties in Dun Scaith. Weekly limits were lifted in patch 3.57.
Each party in the alliance will receive its own treasure chest, the contents of which will be identical regardless of the route taken.
- Players cannot open a treasure chest belonging to another party.
Achievements
This duty is associated with the following achievements:
| Name | Points | Task | Reward | Patch |
|---|---|---|---|---|
| What's Dun Is Done | 10 | Complete Dun Scaith. | - | 3.5 |
| Mapping the Realm: Dun Scaith | 10 | Discover every location within Dun Scaith. | - | 3.5 |
Images
Gear Images
Dungeon Images
Concept Art
Additional Information
- See also: wikipedia:Dunscaith Castle
Historical
- In patch 3.55a, the Proto Ultima miniboss, which was previously playable at the 2016-2017 Fan Festivals, was added and replaced an existing encounter against the Shadowcourt Handmaiden.
Duty Dialogue
Deathgaze Hollow: Insolent mortals...
One does not come uninvited to the Shadow Queen's castle!
Deathgaze Hollow: I see the blossoms of your fragile lives...
I need but reach froth and pluck them from their stems!
Deathgaze Hollow: Reaping winds, heed my command!
Strip the souls from their worthless shells!
Deathgaze Hollow: Forgive me, my queen...
This wretched wraith has failed you...
Cait Sith: There it is up ahead—the island from the tome!
Let's find somewhere to dock this behemoth!
Cait Sith: These buildings were meant to house the refugees of Mhach.
A promised land, forgotten by time...
Ferdiad Hollow: What's this? Visitors to our fair abode?
Pray allow me to be the first to welcome you!
Cait Sith: ...The voidsent have claimed this place, just as I suspected.
It is become a nest of shadows and despair.
Ferdiad Hollow: Oh, how I love entertaining unexpected guests!
And do I spy some familiar faces in the crows!?
Ferdiad Hollow: Dance with me! Prance with me! Choose your stage!
A fiery demise or a watery grave!
Ferdiad Hollow: Come closer, come closer!
I promise I will give you a show to die for!
Ferdiad Hollow: Pay attention, or you'll miss the big reveal!
Ferdiad Hollow: Where is the laughter? The thunderous applause?
There is simply no pleasing you!
Ferdiad Hollow: Alas, we come to the ed of my show...
There shall be...no encore...
Cait Sith: Something comes...but it is no voidsent!
Be ready for anything!
Proto Ultima: Ultima systems...online. Performing systems check...
Proto Ultima: Systems check complete. Initializing armageddon sequence...
Proto Ultima: Reactor capacity exceeded.
Gravitations collapse imminent.
Reactor cells charged. Supernova ready.
Proto Ultima: Aetheromagnetic induction beacon active. Commending aether transfer.
Proto Ultima: Reactor cells hypercharging...
Cait Sith: By the twitching of my whiskers, there is fell magick ahead.
Only the queen herself could radiate malice of this magnitude!
Scathach: Welcome, mortals, to my citadel of shadows.
Have you come to deepen the gloom with an offering of souls?
Scathach: Creeping shade and silhouette, gather unto me!
Scathach: To me, my protege!
Smother these intruders with the arts that I have taught thee!
Scathach: And still you refuse to dim and submit...
Must I try a different tact?
Scathach: From a chrysalis of light shall I birth the deepest shadow...
Scathach: Your fate was sealed the moment you set foot in my domain!
Scathach: Accept my touch, and bask in tenebrous brilliance!
Scathach: Such pervasive light...
It doth steal into the darkest corners, and chase away my shadows...
Diabolos: And thus the Shadow Queen doth fall.
I commend you on your victory.
Diabolos: Yes, such skill and strength are deserving of a more fitting stage.
Come, mortals—the true master of shadows awaiteth you...
Diabolos: Shall we begin?
Let dominion of your precious skies be decided here and now!
Diabolos: You expect the creature I was before, enfeebled by confinement?
Hah! Face me now in the fullness of my power!
Diabolos: Shall I thrust open the gate to the void?
The night hounds slaver at the scent of your fear...
Diabolos: Not even in eternal sleep shall you be free from the terror of my weaving!
Diabolos: This tiresome battle hath dragged on overlong. Enough.
Diabolos: The energies of the nether will be mine!
I will bathe in primordial darkness!
Diabolos: Bow before the shrieking majesty of the void!
Diabolos: What have you done!?
You seek to wrest from me control of the portal!?
Diabolos: So be it. A contest of strength, then!
A content you have no hope of winning.
Diabolos: Impossible! I am a lord of the void, you cannot—
Aaarrrggghhh!
Diabolos: <pant> <pant> Mine imprisonment...weakened me more than I imagined...
Diabolos: But you have not bested me yet!
Witness now my true purpose for seeking the queen's rebirth!
Diabolos Hollow: Yes. The glory! An infinite well of shadow!
You have breached Scathach's unholy vessel, and released her power unto me!
Diabolos Hollow: Shadow itself shall be mine armor!
Come! Strike your feeble blows in vain!
Cait Sith: Such defenses will be difficult to pierce...
But mind not his boasts! A persistent assault will prevail!
Diabolos Hollow: Another rift... Another chance to test your might?
Diabolos Hollow: From the depths of shadow's well shall rise your ruination!
Diabolos Hollow: Must I entreat the very specter of death to be rid of you!?
I care not! I will wager all for your destruction!
Diabolos Hollow: What more must I have...?
How great the flood of darkness...to drown out your light...
Trivia
- This is the only instanced duty in the game where there is a pre-boss cutscene not before the final boss.


