Difference between revisions of "The Vault"
| Line 52: | Line 52: | ||
{{#ev:youtube|XtgqxosvhgQ|350|right|The Vault Guide}} | {{#ev:youtube|XtgqxosvhgQ|350|right|The Vault Guide}} | ||
===[[File:Aggressive difficulty r5.png|link=]] [[Ser Adelphel Brightblade]]=== | ===[[File:Aggressive difficulty r5.png|link=]] [[Ser Adelphel Brightblade]]=== | ||
Ser Adelphel uses a few moves. To begin with, he will have 3 adds with him, all of whom have extremely low health. When you've killed the others and gotten Adelphel around 30%, he will change forms, knocking everyone back and beginning the true encounter. | Ser Adelphel uses a few moves. To begin with, he will have 3 adds with him, all of whom have extremely low health. When you've killed the others and gotten Adelphel around 30%, he will change forms, knocking everyone back and beginning the true encounter. | ||
* When he casts Holy Shield Bash, he will target one player, jump to them, and perform a stun and hit combination. | * When he casts Holy Shield Bash, he will target one player, jump to them, and perform a stun and hit combination. | ||
| Line 59: | Line 58: | ||
===[[File:Aggressive difficulty r5.png|link=]] [[Ser Grinnaux The Bull]]=== | ===[[File:Aggressive difficulty r5.png|link=]] [[Ser Grinnaux The Bull]]=== | ||
Like Ser Adelphel, Grinnaux first has a trivial health pool and will at one point change forms, knock everyone back, and unleash his full potential. | Like Ser Adelphel, Grinnaux first has a trivial health pool and will at one point change forms, knock everyone back, and unleash his full potential. | ||
* Grinnaux has multiple ground pattern AOEs to watch out for. | * Grinnaux has multiple ground pattern AOEs to watch out for. | ||
| Line 67: | Line 65: | ||
===[[File:Aggressive difficulty r6.png|link=]] [[Ser Charibert]]=== | ===[[File:Aggressive difficulty r6.png|link=]] [[Ser Charibert]]=== | ||
Ser Charibert does not have a phase switch like the other two; he starts out at full power. | Ser Charibert does not have a phase switch like the other two; he starts out at full power. | ||
* Charibert will do room-wide damage with Altar Pyre. | * Charibert will do room-wide damage with Altar Pyre. | ||
Revision as of 06:46, 19 January 2025
 This article is about the Main Scenario dungeon. For the Ultimate Raid covering similar events, see Dragonsong's Reprise (Ultimate).
The Vault
- Level
- 57 (Sync: 58)
- Item Level
- 115
- Difficulty
- Normal
- Party size
- Light Party
4 man • 1 1
1  2
2 
- Unsyncing
- Allowed
- Time limit
- 90 minutes
- Duty Finder
- Dungeons (Heavensward)
- Roulette
- Leveling
- Req. quest
 A Knight's Calling
- Entrance
- The Pillars (X:11, Y:7)
- Modes
- Command Mission, Duty Support, Explorer
- Patch
- 3.0
“Ser Aymeric's attempt to bring the truth of the Dragonsong War to light has ended in failure. Imprisoned by the archbishop under suspicion of heresy, he now languishes in the gaol underneath the Vault. Yet all is not yet lost, for Lucia has hatched a bold plan to see justice done. While her party frees Ser Aymeric from captivity, you are to lead a party into the highest levels of the Vault and seize Thordan VII. Though the knights of the Heavens' Ward will attempt to bar your passage, you must press on, for the future of Ishgard hangs in the balance!
— In-game description
The Vault is a level 57 dungeon introduced in patch 3.0 with Heavensward. With the addition of Duty Support in patch 6.2, changes to progression and bosses were implemented.
Duty Support
| Haurchefant | Alphinaud | Temple Banneret | |
|---|---|---|---|

|

|

| |
| Class | |||
| Role | Tank or DPS | Healer or DPS | DPS |
Objectives
- Defeat Ser Adelphel.
- Defeat Ser Grinnaux.
- Defeat Ser Charibert.
Bosses
 Ser Adelphel Brightblade
Ser Adelphel uses a few moves. To begin with, he will have 3 adds with him, all of whom have extremely low health. When you've killed the others and gotten Adelphel around 30%, he will change forms, knocking everyone back and beginning the true encounter.
- When he casts Holy Shield Bash, he will target one player, jump to them, and perform a stun and hit combination.
- When he casts Holiest of Holy, he will deal moderate damage to every player in the room.
- At intervals, Adelphel will charge around the room, dealing damage and leaving behind orbs of light. These will deal damage to players upon exploding. When he is done charging, he will target one player and come crashing back down to them.
 Ser Grinnaux The Bull
Like Ser Adelphel, Grinnaux first has a trivial health pool and will at one point change forms, knock everyone back, and unleash his full potential.
- Grinnaux has multiple ground pattern AOEs to watch out for.
- At regular intervals throughout the fight, Grinnaux will put down a Hyperdimensional Slash attack that lays out a red AOE before him in the direction of a random player. When this goes off, it will deal damage to anyone in its wake and leave an Aetherial Tear where it hits the wall of the room. This attack is always repeated twice in a row. Best strategy is to bait the Tears to the same general part of the wall so they aren't spread around; they will tether to and damage any player that gets too close to them. This is exacerbated by....
- After using his Slash attack to put out two Aetherial Tears, Grinnaux will use Faith Unmoving, a room-wide attack with a cast bar. This attack will push all players directly backward from Grinnaux. Make sure your back isn't to one of the Aetherial Tears; this is why it's beneficial to keep them all close together, so you have a safe place to get pushed back to. (Alternatively, you can use Arm's Length or Surecast to nullify the knockback.)
- Grinnaux will also put out a Dimensional Rift circle AOE that will damage players.
 Ser Charibert
Ser Charibert does not have a phase switch like the other two; he starts out at full power.
- Charibert will do room-wide damage with Altar Pyre.
- Charibert will use a Holy Chain to chain two players together. Simply run away from each other to break this chain; otherwise you will take recurring damage.
- Charibert will cast Heavensflame and put out flame rings on the ground.
- At regular intervals, he'll summon a broken row of "knights." Like the mummies in The Sunken Temple of Qarn (Hard), these will march across the room from wherever they spawn (they always spawn on the same side, though). Avoid being run over by these knights, as they will put Slow on you.
- At half health, Charibert will disappear for a moment. When he reappears, he will have a Dawn Knight and Dusk Knight with him, and summon several Holy Flames around the outside of the room. The Knights can safely be ignored; just make sure not to stand in their AOE attacks. Kill the Holy Flames quickly. After a short while, Charibert will cast a room-wide attack which deals more damage if any Holy Flames are left. After that, the normal rotation resumes, but now there will be two rows of knights and two sets of flame rings from Heavensflame.
Loot
- See also: Halonic Weapons, Halonic Armor and Halonic Accessories
 Ser Adelphel Brightblade
| Name | Type | Item Level | Rarity | Quantity |
|---|---|---|---|---|
| Halonic Auditor's Bracelets | Bracelets | 142 | Green | 1 |
| Halonic Auditor's Jackboots | Feet | 142 | Green | 1 |
| Halonic Auditor's Ring | Ring | 142 | Green | 1 |
| Halonic Exorcist's Bracelets | Bracelets | 142 | Green | 1 |
| Halonic Exorcist's Ring | Ring | 142 | Green | 1 |
| Halonic Exorcist's Thighboots | Feet | 142 | Green | 1 |
| Halonic Friar's Bracelets | Bracelets | 142 | Green | 1 |
| Halonic Friar's Jackboots | Feet | 142 | Green | 1 |
| Halonic Friar's Ring | Ring | 142 | Green | 1 |
| Halonic Inquisitor's Bracelets | Bracelets | 142 | Green | 1 |
| Halonic Inquisitor's Ring | Ring | 142 | Green | 1 |
| Halonic Inquisitor's Sollerets | Feet | 142 | Green | 1 |
| Halonic Ostiary's Sollerets | Feet | 142 | Green | 1 |
| Halonic Priest's Bracelets | Bracelets | 142 | Green | 1 |
| Halonic Priest's Ring | Ring | 142 | Green | 1 |
| Halonic Priest's Thighboots | Feet | 142 | Green | 1 |
| Halonic Vicar's Jackboots | Feet | 142 | Green | 1 |
 Ser Grinnaux The Bull
 Ser Charibert
- Charibert Card (Drops at a fixed rate)
- Hallowed Halls Orchestrion Roll (Drops at a fixed rate)
Additional Treasure Coffers
 Treasure Coffer 1 (X: 12.7 Y: 10.6)
| Name | Type | Item Level | Rarity | Quantity |
|---|---|---|---|---|
| Halonic Inquisitor's Sollerets | Feet | 142 | Green | 1 |
| Halonic Ostiary's Sollerets | Feet | 142 | Green | 1 |
| Halonic Friar's Jackboots | Feet | 142 | Green | 1 |
| Halonic Vicar's Jackboots | Feet | 142 | Green | 1 |
| Halonic Auditor's Jackboots | Feet | 142 | Green | 1 |
| Halonic Exorcist's Thighboots | Feet | 142 | Green | 1 |
| Halonic Priest's Thighboots | Feet | 142 | Green | 1 |
| Halonic Inquisitor's Bracelets | Bracelets | 142 | Green | 1 |
| Halonic Friar's Bracelets | Bracelets | 142 | Green | 1 |
| Halonic Auditor's Bracelets | Bracelets | 142 | Green | 1 |
| Halonic Exorcist's Bracelets | Bracelets | 142 | Green | 1 |
| Halonic Priest's Bracelets | Bracelets | 142 | Green | 1 |
| Halonic Inquisitor's Ring | Ring | 142 | Green | 1 |
| Halonic Friar's Ring | Ring | 142 | Green | 1 |
| Halonic Auditor's Ring | Ring | 142 | Green | 1 |
| Halonic Exorcist's Ring | Ring | 142 | Green | 1 |
| Halonic Priest's Ring | Ring | 142 | Green | 1 |
| Clear Prism | Other | N/A | Basic | 1 |
| Snow White Dye | Other | N/A | Basic | 1 |
| Bone White Dye | Other | N/A | Basic | 1 |
| Honey Yellow Dye | Other | N/A | Basic | 1 |
| Cream Yellow Dye | Other | N/A | Basic | 1 |
 Treasure Coffer 2 (X: 12.5 Y: 10.9)
 Treasure Coffer 3 (X: 9.6 Y: 10.9)
 Treasure Coffer 4 (X: 10.0 Y: 10.8)
Achievements
This duty is associated with the following achievements:
| Name | Points | Task | Reward | Patch |
|---|---|---|---|---|
| Mapping the Realm: The Vault | 10 | Discover every location within the Vault. | - | 3.0 |
Images
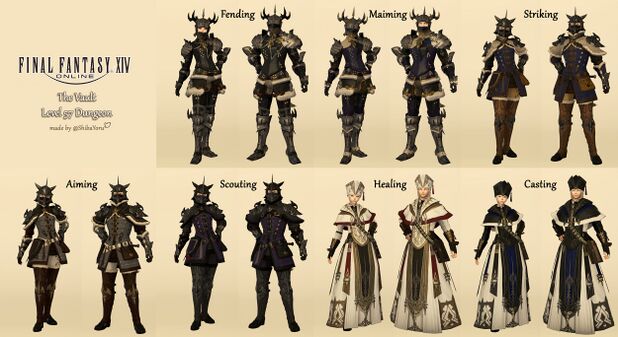
Gear Images
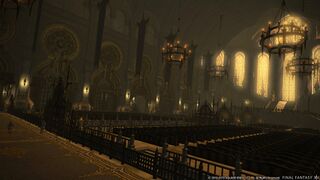
Dungeon Images
Other Images
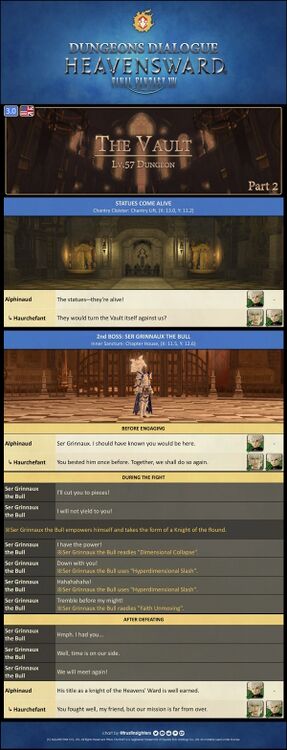
Dungeon Dialogue Infographic Part 1 (credits: TrustInsighters)
Lore
The Sacred Heart Of The Faith
The seat of Ishgard’s theocratic government, the Vault brings the administration of the church and the running of the state under one roof and one leader, the archbishop. Rising from the heart of the Pillars, the city’s upper level, it has long stood as the shining symbol of the nation.
Ordinarily closed to the public, an exception is made during religious observances such as the Starlight Celebration, when citizens are granted entry to Saint Thordan’s Basilica, the church on the ground floor dedicated to the founding father. By special order, its doors were also opened to those who had been displaced by the fires that ravaged the Brume district.
In contrast, but a privileged few outside the clergy have set foot on the upper levels. Accessible via lifts, the area is considered a holy sanctum, housing such facilities as church offices and prayer gardens, as well as the chambers of the archbishop himself. Situated above all of this, crowning the Vault—and indeed Ishgard—is the Hall of the Spear. Built in the image of the ice palace the Fury is said to have carved with Her spear, the temple sees use in official ceremonies such as the coronation of an archbishop.
Ser Grinnaux the Bull
Transformed and empowered, Ser Grinnaux de Dzemael of the Heavens' Ward rose to challenge the Warrior of Light and his comrades, holding them at bay while the archbishop made his escape.
Ser Charibert the Stern
Named to the Heavens' Ward by virtue of his gift for pyromancy, Ser Charibert de Leusignac’s already formidable powers further burgeoned with his transformation. His abundance of arcane strength allowed him to simultaneously command the Vault’s automaton guardians against the Warrior of Light, but he nonetheless found himself overmatched and was forced to withdraw.
Ser Adelphel Brightblade
A brother of the Heavens' Ward, Ser Adelphel de Chevraudan received of the primal King Thordan’s power and attained a stature to rival giants. Despite his additional bulk, the elegant swordsmanship for which he is famed was not diminished in the least.
Dialogue
Duty Support Dialogue
Alphinaud: We must stop the archbishop before it's too late!
Haurchefant: For friends and countrymen!
Haurchefant: Here to delay us, no doubt.
Alphinaud: There's no time. We must force our way through them!
Alphinaud: A knight of the Heavens' Ward!?
Ser Adelphel Brightblade: I trust you know your lives are forfeit.
Haurchefant: Ser Adelphel Brightblade!
Alphinaud: What sorcery is this?
Haurchefant: Do not be disheartened, my friends. We must give it our all!
Alphinaud: How did he transform into that monstrosity?
Haurchefant: I fear we have little time to ruminate. Come, my friends!
Alphinaud: The statues─they're alive!
Haurchefant: They would turn the Vault itself against us?
Alphinaud: Ser Grinnaux. I should have known you would be here.
Ser Grinnaux the Bull: I'll cut you to pieces!
Haurchefant: You bested him once before. Together, we shall do so again.
Alphinaud: His title as a knight of the Heavens' Ward is well earned.
Haurchefant: You fought well, my friend, but our mission is far from over.
Alphinaud: Still no sign of the archbishop.
Haurchefant: He cannot be much farther.
Haurchefant: Gargoyles!?
Alphinaud: I'd expect nothing less from the Vault's defenses.
Haurchefant: He means to escape by airship?
Alphinaud: We have to hurry!
Ser Charibert: Filthy rats!
Ser Charibert: And now the final curtain!
Ser Charibert: This shall be a mercy!
Ser Charibert: What!? No... NO!

