Difference between revisions of "The Lunar Subterrane"
(→Images) |
|||
| Line 268: | Line 268: | ||
The Lunar Subterrane2.jpg | The Lunar Subterrane2.jpg | ||
Durante (boss).jpg | Durante (boss).jpg | ||
</gallery> | |||
===Other Images=== | |||
<gallery mode="packed" heights=500px> | |||
Lunar Subterrane dialogue1.jpg|Dungeon Dialogue Infographic Part 1 (credits: [https://www.reddit.com/r/ffxiv/comments/18ecus8/dungeon_dialogue_infographic_the_lunar_subterrane/ TrustInsighters]) | |||
Lunar Subterrane dialogue2.jpg|Dungeon Dialogue Infographic Part 2 | |||
Lunar Subterrane dialogue3.jpg|Dungeon Dialogue Infographic Part 3 | |||
</gallery> | </gallery> | ||
Revision as of 20:13, 30 March 2024
The Lunar Subterrane
- Level
- 90
- Item Level
- 620
- Difficulty
- Normal
- Party size
- Light Party
4 man • 1 1
1  2
2 
- Unsyncing
- Allowed
- Time limit
- 90 minutes
- Duty Finder
- Dungeons (Endwalker)
- Roulette
- Expert
- Tomestones
- Req. quest
 Down in the Dark
- Entrance
- The Red Moon (X:6.0, Y:2.9)
- Modes
- Duty Support, Trust, Explorer
- Trust EXP
- 0
- Patch
- 6.5
“Long has Golbez guarded the location of his domain, a solemn sanctuary wherein he conspired to break the barrier between worlds. It is there, within the recesses of the Thirteenth's moon, Zeromus bides its time, gathering the strength that will see Golbez's plan to fruition. But what else could he be guarding in this subterranean labyrinth? What secrets might be laid bare by those willing to brave its abyssal depths?
— In-game description
The Lunar Subterrane is a level 90 dungeon introduced in patch 6.5 with Endwalker.
Duty Support
- Party member selection is available.
| Varshahn | Y'shtola | Estinien | Zero | |
|---|---|---|---|---|

|

|

|

| |
| Class | ||||
| Role | Tank or DPS | Healer or DPS | DPS | DPS |
Objectives
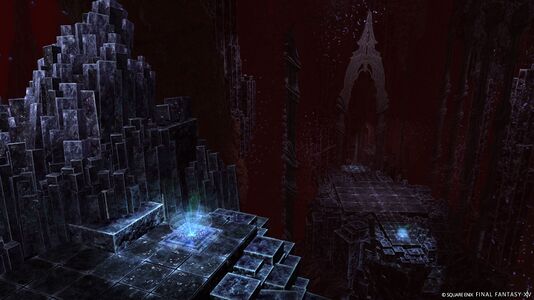
- Arrive at the cloven crystal square: 0/1
- Clear the cloven crystal square: 0/1
- Arrive at the bloodied barbican: 0/1
- Clear the bloodied barbican: 0/1
- Arrive at the Carnelian Courtyard: 0/1
- Clear the Carnelian Courtyard: 0/1
Bosses
 Dark Elf
- Hexing Staves: Summons two staves on two tiles of the arena, each telegraphing a plus-shaped AoE.
- Ruinous Confluence: The staff line AoEs go off. Anyone hit will be inflicted with a cleansable
 Doom and a stack of
  Dark Whispers that lasts indefinitely. The more stacks they have, the shorter the duration of the Doom if they are hit again.
 - Shadowy Sigil: Each tile will have a blue square or purple triangle, while an aura corresponding to one shape will emit from the boss, indicating which shape tiles are unsafe.
- Hexing Staves / Sorcerous Shroud: Causes the two summoned staves to disappear. Players will need to remember their original locations.
- Void Dark II: Spread AoE telegraphs on all players.
- Ruinous Confluence: The staves will reappear and resolve their line AoEs, which will be very briefly telegraphed.
- Hexing Staves / Sorcerous Shroud: Now summons three staves that disappear.
- The boss will then use both Void Dark II and Shadowy Sigil before using Ruinous Confluence to detonate the three staves.
- Staff Smite: Tankbuster
- Abyssal Outburst: Party-wide damage
 Damcyan Antlion
The arena will be surrounded with a dangerous AoE shortly after pulling the boss. Entering this AoE will inflict a moderately strong ![]() Sludge damage over time effect for 20 seconds.
Sludge damage over time effect for 20 seconds.
- Sandblast: Party-wide damage.
- Landslip: Causes four "conveyor" markers to appear parallel to the pillars on the east and west edges of the arena. After a short delay, players will be pushed a distance roughly equal to half of the arena. Anti-knockback abilities will prevent the player from being pushed.
- Antlion March: Telegraphs multiple successive line AoE charges. During the charge, the antlion will target two of the Stone Pillars on the edge of the arena and crash into them, noted with an exclamation point appearing on them.
- Landslip is used again, but this time, any damaged pillars will collapse as a line AoE in front of them, so position to be knocked back to a safe area.
- Earthen Geyser: Stack marker on the healer. This also spawns a puddle of quicksand below the healer. Everyone needs to move out of the puddle before the
 Six Fulms Under debuff timer expires, or they will die.
 - Pound Sand: A large circle AoE targeted below the healer. When this attack resolves, the quicksand created by Earthen Geyser will disappear.
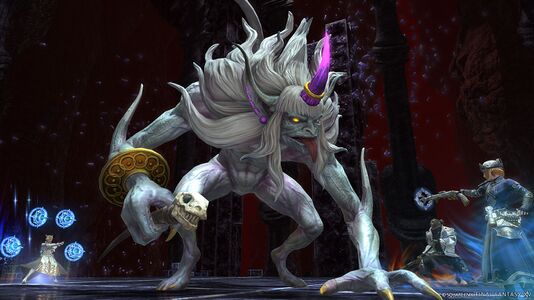
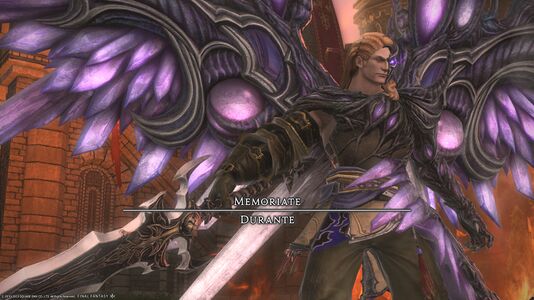
 Memoriate: Durante
- Old Magic: Party-wide damage.
- Duplicitous Battery: Telegraphs two sets of spiraling circle AoEs. Dodge into the first AoE when it resolves.
- Forsaken Fount: Spawns four dark orbs (Aetheric Charges) through the middle of the arena. These will each explode in a point-blank AoE with a brief indicator.
- Duplicitous Battery is used again, but all players will also receive a spread AoE marker (Fallen Grace).
- Forsaken Fount is used again but now spawns three orbs.
- Contrapasso: Party-wide damage and causes each orb to split into two and move in the direction of the arrow telegraphs. Once the orbs finish moving, they will explode as point-blank AoEs. The middle (where the orbs originally were) is safe for this first set.
- Forsaken Fount / Contrapasso is used again but now spawns five orbs, and some may travel diagonally. The resulting AoE patterns will be in a 3x3 grid with one section safe.
- Antipodal Assault: Line AoE stack marker. The boss will charge to the wall.
- Hard Slash: A briefly telegraphed frontal cone AoE used when the boss is at the wall.
- Twilight Phase: Summons two sets of fangs around the boss, telegraphing a line AoE through where the fangs are pointing towards.
- Dark Impact: Tethers a random location and throws a dark sphere towards it, causing it to explode as a massive circular AoE. Move away.
- Death's Journey: A telegraphed point blank AoE and spawns 8 purple lines extending outwards, which indicate the centers of briefly telegraphed narrow conal AoEs.
Loot
- See also: Voidmoon Armor and Voidmoon Accessories
 Dark Elf
 Damcyan Antlion
 Durante
- Durante Card (Drops at a fixed rate.)
| Name | Type | Item Level | Rarity | Quantity |
|---|---|---|---|---|
| Kingdom of Baron (Endwalker) Orchestrion Roll | Orchestrion Roll | N/A | Basic | 1 |
| Voidmoon Bottoms of Aiming | Legs | 635 | Green | 1 |
| Voidmoon Bottoms of Scouting | Legs | 635 | Green | 1 |
| Voidmoon Bottoms of Striking | Legs | 635 | Green | 1 |
| Voidmoon Coat of Casting | Body | 635 | Green | 1 |
| Voidmoon Coat of Fending | Body | 635 | Green | 1 |
| Voidmoon Coat of Healing | Body | 635 | Green | 1 |
| Voidmoon Hose of Casting | Legs | 635 | Green | 1 |
| Voidmoon Hose of Fending | Legs | 635 | Green | 1 |
| Voidmoon Hose of Healing | Legs | 635 | Green | 1 |
| Voidmoon Hose of Maiming | Legs | 635 | Green | 1 |
| Voidmoon Mail of Maiming | Body | 635 | Green | 1 |
| Voidmoon Top of Aiming | Body | 635 | Green | 1 |
| Voidmoon Top of Scouting | Body | 635 | Green | 1 |
| Voidmoon Top of Striking | Body | 635 | Green | 1 |
| Wind-up Golbez | Minion | N/A | Basic | 1 |
Treasure Coffers
 Treasure Coffer 1 (X: 11.3, Y: 17.7)
 Treasure Coffer 2 (X: 11.0, Y: 15.1)
 Treasure Coffer 3 (X: 11.1, Y: 10.2)
 Treasure Coffer 4 (X: 10.4, Y: 6.3)
Achievements
This duty is associated with the following achievements:
| Name | Points | Task | Reward | Patch |
|---|---|---|---|---|
| Mapping the Realm: The Lunar Subterrane | 10 | Discover every location within the Lunar Subterrane. | - | 6.5 |
Images
Gear Images
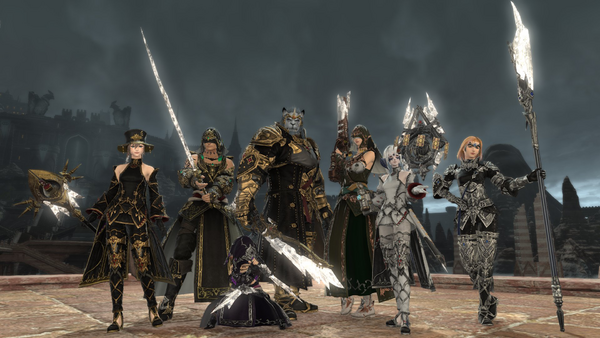
The Voidmoon set is a recolor of the Exarchic Armor set, level 80★★★★ crafted gear.
Dungeon Images
Other Images
Dungeon Dialogue Infographic Part 1 (credits: TrustInsighters)
Trivia
- This dungeon is a direct reference to the final dungeon in Final Fantasy IV. The music theme is remix of the background music in the FFIV incarnation of the kingdom of Baron. In the latter part of the dungeon, the recreation of Baron during the Contramemoria is unique to FFXIV.
- This dungeon is the first main scenario dungeon released in an X.5 patch in which Garlean soldiers are not enemies.

