Difference between revisions of "The Wanderer's Palace (Hard)"
| (38 intermediate revisions by 14 users not shown) | |||
| Line 1: | Line 1: | ||
{{ | {{other uses|the [[patch 2.5]] [[dungeon]]|the [[patch 2.0]] [[dungeon]]|The Wanderer's Palace}} | ||
{{Duty infobox | |||
| name = The Wanderer's Palace (Hard) | |||
| description = Bound no more by the rancor of their fallen king, the tonberries have regained their senses─with a little help from devoted friends. Yet all thoughts of peace have been put to the blade, as a band of Mamool Ja mercenaries known as the Silverscales have stormed the walls and seized the place for their own. Someone must stop the sellswords from turning the Wanderer's Palace into an unassailable fortress, and take a stand against tonberry slaughter and slavery! | |||
|patch | | image = The Wanderer's Palace (Hard).png | ||
| type = dungeon | |||
| level = 50 | |||
| level-sync = 50 | |||
| ilvl = 90 | |||
| ilvl-sync = | |||
| difficulty = hard | |||
| size = 4man | |||
| | | time-limit = 90 | ||
| duty-finder = Dungeons (A Realm Reborn) | |||
| roulette = High-level Dungeons | |||
}} | | tomestones = 100 Poetics | ||
{{ | | entrance = Upper La Noscea | ||
= | | entrance-coordinates = 26,22 | ||
| req-quest = Not Easy Being Green | |||
| modes = command, explorer | |||
| patch = 2.5 | |||
| release = | |||
== | }} {{TOC limit|3}} | ||
==Objectives== | ==Objectives== | ||
#Save the fleeing tonberries: 0/3 | #Save the fleeing tonberries: 0/3 | ||
#Defeat Frumious Koheel Ja: 0/1 | #Defeat [[Frumious Koheel Ja]]: 0/1 | ||
#Breach the defensive line: 0/1 | #Breach the defensive line: 0/1 | ||
#Defeat Slithy Zolool Ja: 0/1 | #Defeat [[Slithy Zolool Ja]]: 0/1 | ||
#Free the imprisoned tonberries: 0/2 | #Free the imprisoned tonberries: 0/2 | ||
#Clear the Bellows: 0/1 | #Clear the Bellows: 0/1 | ||
#Defeat Manxome Molaa Ja Ja: 0/1 | #Defeat [[Manxome Molaa Ja Ja]]: 0/1 | ||
==Enemies== | |||
* [[Silverscales Warder]] | |||
* [[Pack Ziz]] | |||
* [[Bronze Pugil]] | |||
* [[Pteroc Pointer]] | |||
* [[Silverscales Lurker]] | |||
* [[Sacred Spear]] | |||
* [[Silverscales Stabler]] | |||
* [[Sacred Standard]] | |||
* [[Silverscales Sophist]] | |||
* [[Combat Wivre]] | |||
* [[Purulent Abscess]] | |||
* [[Purulent Pustule]] | |||
* [[Bavaroid Waste]] | |||
* [[Wivre Fodder]] | |||
* [[Silverscales Zenist]] | |||
* [[Sacred Idol]] | |||
==Bosses== | ==Bosses== | ||
Note: Despite the (Hard) in the name, the dungeon is not actually more difficult than any other story-mode dungeon. It is easily completed blind with the Duty Finder. | |||
{{#ev:youtube|Urr7jp7OyUk|350|right|Wanderer's Palace HM Video Guide}} | {{#ev:youtube|Urr7jp7OyUk|350|right|Wanderer's Palace HM Video Guide}} | ||
===[[File:Aggressive difficulty r5.png|link=]] [[Frumious Koheel Ja]]=== | |||
Burn boss and kill spears ASAP. Frumious Koheel Ja casts '''{{Action icon|Fire Angon}}''' by throwing burning spears at the ground which cast a stacking debuff to the whole party if they are left alive. | |||
=== | ===[[File:Aggressive difficulty r5.png|link=]] [[Slithy Zolool Ja]]=== | ||
A shaman boss, who summons totems. If after a while no-one has claimed the totems, he will recall all of them and gain the buffs himself. Some of the totems grant buffs while some should be ignored. He will randomly hex a target and turns them into a toad for 12 seconds. He will also randomly cast Fire to the party members and while the damage is not too big, the totems can increase the damage. | A shaman boss, who summons totems. If after a while no-one has claimed the totems, he will recall all of them and gain the buffs himself. Some of the totems grant buffs while some should be ignored. He will randomly hex a target and turns them into a toad for 12 seconds. He will also randomly cast Fire to the party members and while the damage is not too big, the totems can increase the damage. | ||
Standing in a totem gives you a buff or debuff. Clean as many of the flags as possible and don't stack fire resist down. | Standing in a totem gives you a buff or debuff. Clean as many of the flags as possible and don't stack fire resist down. | ||
There will be Purple, Red, Blue and Green Totems. The effects of the various colors are random. One will give you attack up (DPS should pick it up), another will give you the toad debuff or cleanse the toad debuff (only pick it up if you are a toad), another will give you fire resist down and final one will give the player [[Heavy]] debuff. | There will be Purple, Red, Blue and Green Totems. The effects of the various colors are random. One will give you attack up (DPS should pick it up), another will give you the toad debuff or cleanse the toad debuff (only pick it up if you are a toad), another will give you fire resist down and final one will give the player {{status effect|heavy}} [[Heavy]] debuff. | ||
*Because the Totem effects are random, use the first couple Totems to figure out which color has which effect. Do not allow any one player to have too many stacks of the fire debuff or the player will die when the boss casts a random fire spell on them. | *Because the Totem effects are random, use the first couple Totems to figure out which color has which effect. Do not allow any one player to have too many stacks of the fire debuff or the player will die when the boss casts a random fire spell on them. | ||
===Manxome Molaa Ja Ja=== | ===[[File:Aggressive difficulty r6.png|link=]] [[Manxome Molaa Ja Ja]]=== | ||
Stay very close to him to avoid a huge cone AoE. Move away for rotting gas. Person with rotting lung has to stay away from the party when Rotting Gas pops. The person with the lungs will also AoE around them. | Stay very close to him to avoid a huge cone AoE. Move away for rotting gas. Person with rotting lung has to stay away from the party when '''Rotting Gas''' pops. The person with the lungs will also AoE around them. | ||
The boss drops multiple banners on the ground during the fight. The banners' buff the boss' damage and armor, so the tank should just pull the boss away from the banner-range. Tank needs to keep moving the boss so the party doesn't have to fight in the banner AoE. | The boss drops multiple banners on the ground during the fight. The banners' buff the boss' damage and armor, so the tank should just pull the boss away from the banner-range. Tank needs to keep moving the boss so the party doesn't have to fight in the banner AoE. | ||
*Do not allow the boss to stand in purple circle of Sacred Standard, by kiting him around the outer edge of the boss room. | *Do not allow the boss to stand in purple circle of '''Sacred Standard''', by kiting him around the outer edge of the boss room. | ||
He will cast debuffs that makes healing worse and Doom random party members. Healers can remove doom by healing the target to full hp | He will cast debuffs that makes healing worse and '''Soul Douse''', which applies {{status effect|doom}} [[Doom (status effect)|Doom]] on random party members looking at him. Healers can remove doom by healing the target to full hp. | ||
When | When '''Sacred Idol''' spawns (the Idol with a tether to the boss), kill it ASAP! | ||
==Loot== | ==Loot== | ||
===Frumious Koheel Ja | {{see also|Ilvl100 Dungeon Armor|Ilvl100 Dungeon Accessories}} | ||
{| | ===[[File:Silver Coffer (small).png|link=]] [[Frumious Koheel Ja]]=== | ||
| | *{{Item reward|20|Allagan Tomestone of Poetics}} | ||
{{Drops list|Frumious Koheel Ja}} | |||
===[[File:Silver Coffer (small).png|link=]] [[Slithy Zolool Ja]]=== | |||
*{{Item reward|30|Allagan Tomestone of Poetics}} | |||
{{Drops list|Slithy Zolool Ja}} | |||
===[[File:Gold Coffer (small).png|link=]] [[Manxome Molaa Ja Ja]]=== | |||
*{{Item reward|50|Allagan Tomestone of Poetics}} | |||
*{{Item icon|Tonberry Card}} (Drops at a fixed rate) | |||
*{{Item icon|Manxome Molaa Ja Ja Card}} (Drops at a fixed rate) | |||
{{Drops list|Manxome Molaa Ja Ja}} | |||
| | ===Treasure Coffers=== | ||
| | ====[[File:Bronze Coffer (small).png|link=]] Treasure Coffer 1 (X:14.7 Y:18.9)==== | ||
| | {{Drops table header}} | ||
| | {{Drops table row|Varlet's Sabatons}} | ||
| | {{Drops table row|Picaroon's Leggings of Maiming}} | ||
| | {{Drops table row|Picaroon's Leggings of Striking}} | ||
| | {{Drops table row|Picaroon's Leggings of Scouting}} | ||
| | {{Drops table row|Bogatyr's Thighboots of Casting}} | ||
|- | {{Drops table row|Bogatyr's Thighboots of Healing}} | ||
| | {{Drops table row|Varlet's Armillae}} | ||
| | {{Drops table row|Picaroon's Armillae of Slaying}} | ||
| | {{Drops table row|Bogatyr's Armillae of Aiming}} | ||
| | {{Drops table row|Bogatyr's Armillae of Casting}} | ||
| | {{Drops table row|Bogatyr's Armillae of Healing}} | ||
|- | {{Drops table row|Varlet's Ring}} | ||
| | {{Drops table row|Picaroon's Ring of Slaying}} | ||
| | {{Drops table row|Bogatyr's Ring of Aiming}} | ||
{{Drops table row|Bogatyr's Ring of Casting}} | |||
{{Drops table row|Bogatyr's Ring of Healing}} | |||
{{Table footer}} | |||
====[[File:Bronze Coffer (small).png|link=]] Treasure Coffer 2 (X:11.7 Y:8.1)==== | |||
{{Drops table header}} | |||
{{Drops table row|Varlet's Sallet}} | |||
{{Drops table row|Picaroon's Headgear of Maiming}} | |||
{{Drops table row|Picaroon's Eyepatch of Striking}} | |||
{{Drops table row|Picaroon's Mask of Scouting}} | |||
{{Drops table row|Bogatyr's Cap of Aiming}} | |||
{{Drops table row|Bogatyr's Blinder of Casting}} | |||
{{Drops table row|Bogatyr's Circlet of Healing}} | |||
{{Drops table row|Varlet's Gauntlets}} | |||
{{Drops table row|Picaroon's Armguards of Maiming}} | |||
{{Drops table row|Picaroon's Armguards of Striking}} | |||
{{Drops table row|Picaroon's Armguards of Scouting}} | |||
{{Drops table row|Bogatyr's Gloves of Aiming}} | |||
{{Drops table row|Bogatyr's Gloves of Casting}} | |||
{{Drops table row|Bogatyr's Gloves of Healing}} | |||
{{Drops table row|Varlet's Earrings}} | |||
{{Drops table row|Picaroon's Earrings of Slaying}} | |||
{{Drops table row|Bogatyr's Earrings of Aiming}} | |||
{{Drops table row|Bogatyr's Earrings of Casting}} | |||
{{Drops table row|Bogatyr's Earrings of Healing}} | |||
{{Drops table row|Varlet's Necklace}} | |||
{{Drops table row|Picaroon's Necklace of Slaying}} | |||
{{Drops table row|Bogatyr's Necklace of Aiming}} | |||
{{Drops table row|Bogatyr's Necklace of Casting}} | |||
{{Drops table row|Bogatyr's Necklace of Healing}} | |||
{{Table footer}} | |||
====[[File:Bronze Coffer (small).png|link=]] Treasure Coffer 3 (X:13.1 Y:4.5)==== | |||
{{Drops table header|show-levels=n}} | |||
{{Drops table row|Picaroon's Jacket of Maiming}} | |||
{{Drops table row|Picaroon's Jacket of Striking}} | |||
{{Drops table row|Picaroon's Jacket of Scouting}} | |||
{{Drops table row|Bogatyr's Longcoat of Aiming}} | |||
{{Drops table row|Bogatyr's Longcoat of Casting}} | |||
{{Drops table row|Bogatyr's Longcoat of Healing}} | |||
{{Drops table row|Varlet's Breeches}} | |||
{{Drops table row|Picaroon's Trousers of Maiming}} | |||
{{Drops table row|Picaroon's Trousers of Striking}} | |||
{{Drops table row|Picaroon's Trousers of Scouting}} | |||
{{Drops table row|Bogatyr's Slops of Aiming}} | |||
{{Drops table row|Bogatyr's Slops of Casting}} | |||
{{Drops table row|Bogatyr's Slops of Healing}} | |||
{{Drops table row|Varlet's Armillae}} | |||
{{Drops table row|Picaroon's Armillae of Slaying}} | |||
{{Drops table row|Bogatyr's Armillae of Aiming}} | |||
{{Drops table row|Bogatyr's Armillae of Casting}} | |||
{{Drops table row|Bogatyr's Armillae of Healing}} | |||
{{Drops table row|Varlet's Ring}} | |||
{{Drops table row|Picaroon's Ring of Slaying}} | |||
{{Drops table row|Bogatyr's Ring of Aiming}} | |||
{{Drops table row|Bogatyr's Ring of Casting}} | |||
{{Drops table row|Bogatyr's Ring of Healing}} | |||
{{Table footer}} | |||
====[[File:Bronze Coffer (small).png|link=]] Treasure Coffer 4 (X:15.0 Y:4.7)==== | |||
{{Drops table header|show-levels=n}} | |||
{{Drops table row|Varlet's Earrings}} | |||
{{Drops table row|Picaroon's Earrings of Slaying}} | |||
{{Drops table row|Bogatyr's Earrings of Aiming}} | |||
{{Drops table row|Bogatyr's Earrings of Casting}} | |||
{{Drops table row|Bogatyr's Earrings of Healing}} | |||
{{Drops table row|Varlet's Necklace}} | |||
{{Drops table row|Picaroon's Necklace of Slaying}} | |||
{{Drops table row|Bogatyr's Necklace of Aiming}} | |||
{{Drops table row|Bogatyr's Necklace of Casting}} | |||
{{Drops table row|Bogatyr's Necklace of Healing}} | |||
{{Table footer}} | |||
=== | ==Achievements== | ||
This duty is associated with the following [[achievements]]: | |||
{| {{STDT| mech1 sortable align-left}} | |||
{{achievement table header}} | |||
{| | {{achievement table row|Remapping the Realm: The Wanderer's Palace}} | ||
| | |||
|} | |} | ||
=== | ==Images== | ||
===Gear Images=== | |||
[[File:Patch 2.5 Dungeon gear.png|center|400px]] | |||
==Images== | ===Dungeon Images=== | ||
<gallery | <gallery mode=packed> | ||
File:The wanderers palace hard5.jpg | |||
File:the wanderers palace hard1.jpg | File:the wanderers palace hard1.jpg | ||
File:The wanderers palace hard4.jpg | |||
File:the wanderers palace hard2.jpg | File:the wanderers palace hard2.jpg | ||
File:the wanderers palace hard3.jpg | File:the wanderers palace hard3.jpg | ||
</gallery> | </gallery> | ||
{{ | ==Dialogue== | ||
'''Fruminous Koheel Ja:''' Adventurers? Here? | |||
Why lookout no catch you? | |||
'''Fruminous Koheel Ja:''' You brace to defy Silverscales—brave or stupid! | |||
'''Fruminous Koheel Ja:''' Run, run, run! None can quench firelit spear! | |||
'''Fruminous Koheel Ja:''' Burn! | |||
'''Slithy Zolool Ja:''' Honor to you who slay Koheel Ja! | |||
'''Slithy Zolool Ja:''' Much honor in death by old magicks of Mamool Ja! | |||
'''Slithy Zolool Ja:''' H–Honor to you who slay...me... | |||
'''Manxome Molaa Ja Ja:''' We smash them, Brother? | |||
''Into pulp, yessss, into pulp!'' | |||
'''Manxome Molaa Ja Ja:''' Brother, they doomed with no heali— | |||
''Shhh! Keep tricksy secret to yourself!'' | |||
'''Manxome Molaa Ja Ja:''' I no hold back, Brother! | |||
''Yesss, kill them—kill them now!'' | |||
'''Manxome Molaa Ja Ja:''' Sick ones make sickness, Brother! | |||
''Ehehehe, so badly will they ache!'' | |||
'''Manxome Molaa Ja Ja:''' I d-d-die? | |||
''Me too, Brothe...'' | |||
{{Duties nav|dungeon}} | |||
Latest revision as of 20:04, 15 December 2024
 This article is about the patch 2.5 dungeon. For the patch 2.0 dungeon, see The Wanderer's Palace.
The Wanderer's Palace (Hard)
- Level
- 50 (Sync: 50)
- Item Level
- 90
- Difficulty
- Hard
- Party size
- Light Party
4 man • 1 1
1  2
2 
- Unsyncing
- Allowed
- Time limit
- 90 minutes
- Duty Finder
- Dungeons (A Realm Reborn)
- Roulette
- High-level Dungeons
- Tomestones
 100
100 - Req. quest
 Not Easy Being Green
- Entrance
- Upper La Noscea (X:26, Y:22)
- Modes
- Command Mission, Explorer
- Patch
- 2.5
“Bound no more by the rancor of their fallen king, the tonberries have regained their senses─with a little help from devoted friends. Yet all thoughts of peace have been put to the blade, as a band of Mamool Ja mercenaries known as the Silverscales have stormed the walls and seized the place for their own. Someone must stop the sellswords from turning the Wanderer's Palace into an unassailable fortress, and take a stand against tonberry slaughter and slavery!
— In-game description
The Wanderer's Palace (Hard) is a level 50 dungeon introduced in patch 2.5.
Objectives
- Save the fleeing tonberries: 0/3
- Defeat Frumious Koheel Ja: 0/1
- Breach the defensive line: 0/1
- Defeat Slithy Zolool Ja: 0/1
- Free the imprisoned tonberries: 0/2
- Clear the Bellows: 0/1
- Defeat Manxome Molaa Ja Ja: 0/1
Enemies
- Silverscales Warder
- Pack Ziz
- Bronze Pugil
- Pteroc Pointer
- Silverscales Lurker
- Sacred Spear
- Silverscales Stabler
- Sacred Standard
- Silverscales Sophist
- Combat Wivre
- Purulent Abscess
- Purulent Pustule
- Bavaroid Waste
- Wivre Fodder
- Silverscales Zenist
- Sacred Idol
Bosses
Note: Despite the (Hard) in the name, the dungeon is not actually more difficult than any other story-mode dungeon. It is easily completed blind with the Duty Finder.
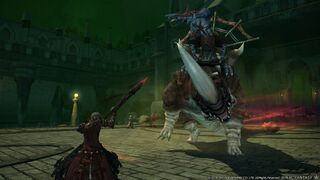
 Frumious Koheel Ja
Burn boss and kill spears ASAP. Frumious Koheel Ja casts Fire Angon by throwing burning spears at the ground which cast a stacking debuff to the whole party if they are left alive.
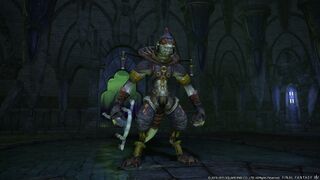
 Slithy Zolool Ja
A shaman boss, who summons totems. If after a while no-one has claimed the totems, he will recall all of them and gain the buffs himself. Some of the totems grant buffs while some should be ignored. He will randomly hex a target and turns them into a toad for 12 seconds. He will also randomly cast Fire to the party members and while the damage is not too big, the totems can increase the damage.
Standing in a totem gives you a buff or debuff. Clean as many of the flags as possible and don't stack fire resist down.
There will be Purple, Red, Blue and Green Totems. The effects of the various colors are random. One will give you attack up (DPS should pick it up), another will give you the toad debuff or cleanse the toad debuff (only pick it up if you are a toad), another will give you fire resist down and final one will give the player ![]() Heavy debuff.
Heavy debuff.
- Because the Totem effects are random, use the first couple Totems to figure out which color has which effect. Do not allow any one player to have too many stacks of the fire debuff or the player will die when the boss casts a random fire spell on them.
 Manxome Molaa Ja Ja
Stay very close to him to avoid a huge cone AoE. Move away for rotting gas. Person with rotting lung has to stay away from the party when Rotting Gas pops. The person with the lungs will also AoE around them.
The boss drops multiple banners on the ground during the fight. The banners' buff the boss' damage and armor, so the tank should just pull the boss away from the banner-range. Tank needs to keep moving the boss so the party doesn't have to fight in the banner AoE.
- Do not allow the boss to stand in purple circle of Sacred Standard, by kiting him around the outer edge of the boss room.
He will cast debuffs that makes healing worse and Soul Douse, which applies ![]() Doom on random party members looking at him. Healers can remove doom by healing the target to full hp.
Doom on random party members looking at him. Healers can remove doom by healing the target to full hp.
When Sacred Idol spawns (the Idol with a tether to the boss), kill it ASAP!
Loot
- See also: Ilvl100 Dungeon Armor and Ilvl100 Dungeon Accessories
 Frumious Koheel Ja
| Name | Type | Item Level | Rarity | Quantity |
|---|---|---|---|---|
| Bogatyr's Armillae of Aiming | Bracelets | 100 | Green | 1 |
| Bogatyr's Armillae of Casting | Bracelets | 100 | Green | 1 |
| Bogatyr's Armillae of Healing | Bracelets | 100 | Green | 1 |
| Bogatyr's Ring of Aiming | Ring | 100 | Green | 1 |
| Bogatyr's Ring of Casting | Ring | 100 | Green | 1 |
| Bogatyr's Ring of Healing | Ring | 100 | Green | 1 |
| Bogatyr's Thighboots of Casting | Feet | 100 | Green | 1 |
| Bogatyr's Thighboots of Healing | Feet | 100 | Green | 1 |
| Picaroon's Armillae of Slaying | Bracelets | 100 | Green | 1 |
| Picaroon's Leggings of Maiming | Feet | 100 | Green | 1 |
| Picaroon's Leggings of Scouting | Feet | 100 | Green | 1 |
| Picaroon's Leggings of Striking | Feet | 100 | Green | 1 |
| Picaroon's Ring of Slaying | Ring | 100 | Green | 1 |
| Varlet's Armillae | Bracelets | 100 | Green | 1 |
| Varlet's Ring | Ring | 100 | Green | 1 |
| Varlet's Sabatons | Feet | 100 | Green | 1 |
 Slithy Zolool Ja
 Manxome Molaa Ja Ja
- 50 Allagan Tomestone of Poetics
- Tonberry Card (Drops at a fixed rate)
- Manxome Molaa Ja Ja Card (Drops at a fixed rate)
| Name | Type | Item Level | Rarity | Quantity |
|---|---|---|---|---|
| Bogatyr's Longcoat of Aiming | Body | 100 | Green | 1 |
| Bogatyr's Longcoat of Casting | Body | 100 | Green | 1 |
| Bogatyr's Longcoat of Healing | Body | 100 | Green | 1 |
| Bogatyr's Slops of Aiming | Legs | 100 | Green | 1 |
| Bogatyr's Slops of Casting | Legs | 100 | Green | 1 |
| Bogatyr's Slops of Healing | Legs | 100 | Green | 1 |
| Picaroon's Jacket of Maiming | Body | 100 | Green | 1 |
| Picaroon's Jacket of Scouting | Body | 100 | Green | 1 |
| Picaroon's Jacket of Striking | Body | 100 | Green | 1 |
| Picaroon's Trousers of Maiming | Legs | 100 | Green | 1 |
| Picaroon's Trousers of Scouting | Legs | 100 | Green | 1 |
| Picaroon's Trousers of Striking | Legs | 100 | Green | 1 |
| Tricksome Orchestrion Roll | Orchestrion Roll | N/A | Basic | 1 |
| Varlet's Breeches | Legs | 100 | Green | 1 |
| Varlet's Hauberk | Body | 100 | Green | 1 |
Treasure Coffers
 Treasure Coffer 1 (X:14.7 Y:18.9)
| Name | Type | Item Level | Rarity | Quantity |
|---|---|---|---|---|
| Varlet's Sabatons | Feet | 100 | Green | 1 |
| Picaroon's Leggings of Maiming | Feet | 100 | Green | 1 |
| Picaroon's Leggings of Striking | Feet | 100 | Green | 1 |
| Picaroon's Leggings of Scouting | Feet | 100 | Green | 1 |
| Bogatyr's Thighboots of Casting | Feet | 100 | Green | 1 |
| Bogatyr's Thighboots of Healing | Feet | 100 | Green | 1 |
| Varlet's Armillae | Bracelets | 100 | Green | 1 |
| Picaroon's Armillae of Slaying | Bracelets | 100 | Green | 1 |
| Bogatyr's Armillae of Aiming | Bracelets | 100 | Green | 1 |
| Bogatyr's Armillae of Casting | Bracelets | 100 | Green | 1 |
| Bogatyr's Armillae of Healing | Bracelets | 100 | Green | 1 |
| Varlet's Ring | Ring | 100 | Green | 1 |
| Picaroon's Ring of Slaying | Ring | 100 | Green | 1 |
| Bogatyr's Ring of Aiming | Ring | 100 | Green | 1 |
| Bogatyr's Ring of Casting | Ring | 100 | Green | 1 |
| Bogatyr's Ring of Healing | Ring | 100 | Green | 1 |
 Treasure Coffer 2 (X:11.7 Y:8.1)
 Treasure Coffer 3 (X:13.1 Y:4.5)
 Treasure Coffer 4 (X:15.0 Y:4.7)
| Name | Type | Item Level | Rarity | Quantity |
|---|---|---|---|---|
| Varlet's Earrings | Earrings | 100 | Green | 1 |
| Picaroon's Earrings of Slaying | Earrings | 100 | Green | 1 |
| Bogatyr's Earrings of Aiming | Earrings | 100 | Green | 1 |
| Bogatyr's Earrings of Casting | Earrings | 100 | Green | 1 |
| Bogatyr's Earrings of Healing | Earrings | 100 | Green | 1 |
| Varlet's Necklace | Necklace | 100 | Green | 1 |
| Picaroon's Necklace of Slaying | Necklace | 100 | Green | 1 |
| Bogatyr's Necklace of Aiming | Necklace | 100 | Green | 1 |
| Bogatyr's Necklace of Casting | Necklace | 100 | Green | 1 |
| Bogatyr's Necklace of Healing | Necklace | 100 | Green | 1 |
Achievements
This duty is associated with the following achievements:
| Name | Points | Task | Reward | Patch |
|---|---|---|---|---|
| Remapping the Realm: The Wanderer's Palace | 10 | Discover every location within the Wanderer's Palace (Hard). | - | 2.5 |
Images
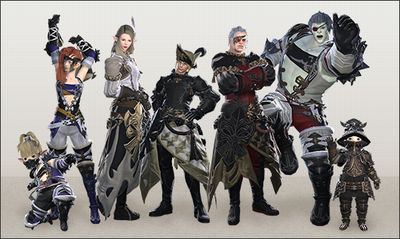
Gear Images
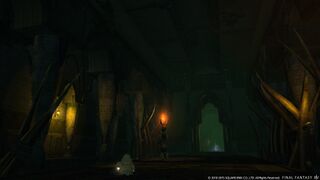
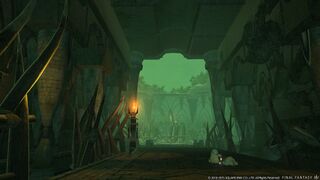
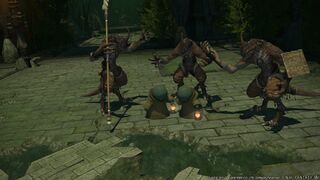
Dungeon Images
Dialogue
Fruminous Koheel Ja: Adventurers? Here?
Why lookout no catch you?
Fruminous Koheel Ja: You brace to defy Silverscales—brave or stupid!
Fruminous Koheel Ja: Run, run, run! None can quench firelit spear!
Fruminous Koheel Ja: Burn!
Slithy Zolool Ja: Honor to you who slay Koheel Ja!
Slithy Zolool Ja: Much honor in death by old magicks of Mamool Ja!
Slithy Zolool Ja: H–Honor to you who slay...me...
Manxome Molaa Ja Ja: We smash them, Brother?
Into pulp, yessss, into pulp!
Manxome Molaa Ja Ja: Brother, they doomed with no heali—
Shhh! Keep tricksy secret to yourself!
Manxome Molaa Ja Ja: I no hold back, Brother!
Yesss, kill them—kill them now!
Manxome Molaa Ja Ja: Sick ones make sickness, Brother!
Ehehehe, so badly will they ache!
Manxome Molaa Ja Ja: I d-d-die?
Me too, Brothe...

