Difference between revisions of "Lapis Manalis"
| (43 intermediate revisions by 3 users not shown) | |||
| Line 1: | Line 1: | ||
{{Duty infobox | {{Duty infobox | ||
| name = Lapis Manalis | | name = Lapis Manalis | ||
| Line 6: | Line 5: | ||
| type = dungeon | | type = dungeon | ||
| level = 90 | | level = 90 | ||
| level-sync = 90 | |||
| ilvl = 590 | | ilvl = 590 | ||
| ilvl-sync = 630 | |||
| size = light | | size = light | ||
| time-limit = 90 | | time-limit = 90 | ||
| duty-finder = Dungeons (Endwalker) | | duty-finder = Dungeons (Endwalker) | ||
| roulette = | | roulette = High-level Dungeons | ||
| tomestones = | | tomestones = 50 Poetics | ||
| entrance = Garlemald | | entrance = Garlemald | ||
| entrance-coordinates = 30.8, 35.8 | | entrance-coordinates = 30.8, 35.8 | ||
| Line 20: | Line 21: | ||
| release = endwalker | | release = endwalker | ||
}} {{TOC limit|3}} | }} {{TOC limit|3}} | ||
==Duty Support== | |||
*Party member selection is available. | |||
{| {{STDT|pve align-left}} | |||
! | |||
! Varshahn | |||
! Alphinaud | |||
! Alisaie | |||
! Y'shtola | |||
! Estinien | |||
! Zero | |||
|- | |||
| | |||
| [[File:DS Varshahn1.png]] | |||
| [[File:DS Alphinaud3.png]] | |||
| [[File:DS Alisaie3.png]] | |||
| [[File:DS Y'shtola2.png]] | |||
| [[File:DS Estinien2.png]] | |||
| [[File:DS Zero1.png]] | |||
|- | |||
| '''Class''' | |||
| {{GLA}} {{DRG}} Satrap | |||
| {{SGE}} [[Sage]] | |||
| {{RDM}} [[Red Mage]] | |||
| {{BLM}} Sorceress | |||
| {{DRG}} [[Dragoon]] | |||
| {{RPR}} Memoriate | |||
|- | |||
| '''Role''' | |||
| Tank or DPS | |||
| Healer | |||
| DPS | |||
| DPS | |||
| DPS | |||
| DPS | |||
|} | |||
==Objectives== | ==Objectives== | ||
*Arrive at the Silvan Throne. | *Arrive at the Silvan Throne. | ||
| Line 26: | Line 63: | ||
*Clear the forum messorum. | *Clear the forum messorum. | ||
*Arrive at Deepspine. | *Arrive at Deepspine. | ||
==Bosses== | ==Bosses== | ||
{{#ev:youtube|dxCN61LdNYk|350|right|Dungeon Guide by MTQcapture}} | |||
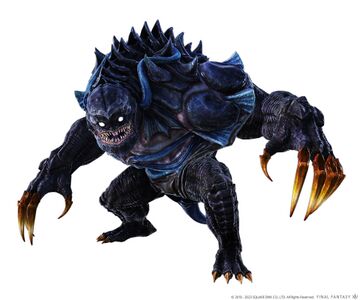
===[[File:Aggressive difficulty r5.png|link=]] [[Albion]]=== | ===[[File:Aggressive difficulty r5.png|link=]] [[Albion]]=== | ||
*'''Call of the Mountain''': The screen will begin shaking and the system message "A rumbling in the distance draws closer..." will appear. A portion of the east or west wall will begin to have moving snow, telegraphing where a herd of animals will charge through the room as a line AoE that hits around a third of the arena. The system message "Another rumbling can be heard in the distance..." will then appear, and an animal herd will charge down another third of the room based on the telegraph. Anyone hit by the charging animals will be inflicted with [[File:Concussion icon1.png|link=]] '''Concussion''' and receive damage-over-time. | |||
*'''Albion's Embrace''': Telegraphed tankbuster | |||
*'''Left Slam / Right Slam''': The boss will use a half-room cleave to the left or right of its hitbox, based on the name of the attack. Has only a brief AoE indicator. | |||
*'''Knock on Ice''': The boss summons three chunks of ice, telegraphed by red AoEs. | |||
*'''Icebreaker''': The boss faces one ice chunk, tethers it, and targets with a orange reticle. It will use a large circular AoE (with only a brief indicator) that destroys the rock. | |||
*'''Icy Throes''' (no cast bar): The boss marks everyone with an AoE telegraph so the party should spread. Two more ice chunks will also spawn. | |||
*'''Roar of Albion''': A roomwide AoE that can be dodged by hiding behind an ice chunk from the boss. | |||
===[[File:Aggressive difficulty r5.png|link=]] [[Galatea Magna]]=== | ===[[File:Aggressive difficulty r5.png|link=]] [[Galatea Magna]]=== | ||
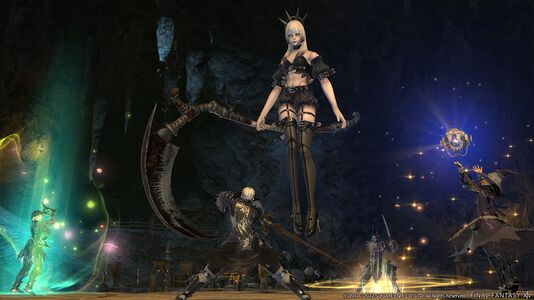
*'''Waxing Cycle''': The boss will use a large, telegraphed point-blank AoE, immediately followed by a very briefly telegraphed donut AoE that hits the previously safe area. Anyone hit by this attack or the next one will be inflicted with {{status effect|sustained damage}} '''[[Sustained Damage]]'''. | |||
*'''Waning Cycle''': The boss will use a large, telegraphed donut AoE, immediately followed by a very briefly telegraphed donut AoE that hits the previously safe area. | |||
*'''Soul Scythe''': The boss will face a random cardinal, then jump to it and perform a large, briefly telegraphed, circular AoE in the direction it was facing. | |||
*'''Soul Nebula''': Unavoidable roomwide damage that also spawns will summon two portals to the boss's east and west. This is followed by '''Scarecrow Chase'''. Each portal will have a number of dots over it (1 or 2), indicating in which order the boss will teleport to them and use a briefly telegraphed cross AoE that hits the intercardinals of the portals. Anyone hit will be inflicted with {{status effect|Doom}} '''[[Doom]]''' that must be cleansed with {{action icon|Esuna}} to prevent death. This first set can be dodged by remaining in the center of the room. | |||
*'''Tenebrism''': Gives everyone the [[File:Glassy-eyed icon1.png|link=]] '''Glassy-eyed''' debuff. Four meteor circles will sequentially spawn around the boss and must be soaked by at least one player to prevent them from exploding and dealing party-wide damage. When the last tower is about to be soaked, gaze indicators will appear above everyone, indicating that their '''Glassy-eyed''' debuff will resolve soon. Everyone must look away from each other or they will be inflicted with {{status effect|Petrification}} '''[[Petrification]]'''. | |||
*'''Soul Nebula / Scarecrow Chase''' (version 2): Functions similarly as before, except the boss will start on the edge of the arena and summon four portals, one in the middle, and three in the other edges. | |||
''Notes:'' | |||
*Depending on how quickly the party kills the boss, it will give a different line of dialogue upon its defeat and rank the party's performance from 1 to 12, with a lower number being a faster kill time. This appears to be purely cosmetic and does not impact rewards. | |||
*An average party in the Duty Finder will typically receive a rank of 7. | |||
*The top rank of 1 requires a kill time of less than 90 seconds (at level 90, a premade party of 3+ DPS in item level 630-635 best-in-slot gear, food, tinctures, full resource openers, party buff alignment, and strong burst damage is typically needed to achieve this). | |||
*If [[Zero]] is in the party as a [[Duty Support]] NPC, it will also give a different line of dialogue upon its defeat. | |||
===[[File:Aggressive difficulty r6.png|link=]] Drowned King: [[Cagnazzo]]=== | ===[[File:Aggressive difficulty r6.png|link=]] Drowned King: [[Cagnazzo]]=== | ||
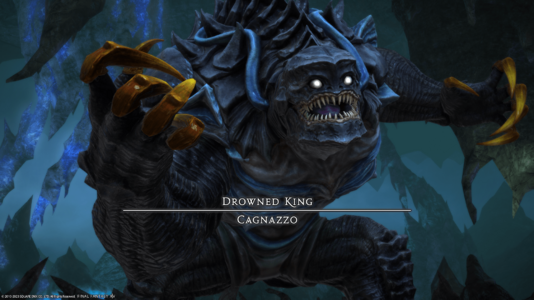
Shortly after engaging the boss, the arena will be surrounded by an AoE that will inflict {{status effect|dropsy}} '''[[Dropsy]]''' and deal damage-over-time to anyone who steps in it. | |||
*'''Stygian Deluge''': Unavoidable party-wide damage. | |||
*'''Antediluvian''': Spawns three sets of two bubbles across the arena, which will grow in size. When a bubble reaches maximum size, it will drop down as a large circular AoE with a brief indicator. The boss will also spawn a purple knockback AoE in the middle ('''Body Slam'''), which will kill anyone inside the AoE telegraph. This knockback cannot be prevented with knockback immune actions. | |||
*'''Hydraulic Ram''': The boss will sequentially telegraph several line charge and circle AoEs which will disappear after a short time. It will then use AoE attacks in the order of the telegraphs. | |||
*'''Hydrofall''': Telegraphed stack AoE. | |||
*'''Cursed Tide''': The boss assigns various debuffs to players and becomes untargetable. | |||
**[[File:Neap tide icon1.png|link=]] '''Neap Tide''': A point-blank AoE on the afflicted player when the debuff expires. Three players will receive this. | |||
**[[File:Spring tide icon1.png|link=]] '''Spring Tide''': A stack AoE on the afflicted player when the debuff expires. One player will receive this. | |||
**The boss will spawn four immobile '''Fearsome Flotsam''' which must be defeated before '''Cagnazzo's Power''' reaches 100, or the party will wipe. | |||
**The party's debuffs will resolve, but they will be telegraphed with standard AoE indicators for several seconds before they resolve. | |||
**Several telegraphed circular AoEs will also spawn. | |||
*'''Tsunami''': Party-wide damage after the adds phase. Heal through and mitigate. | |||
*'''Voidcleaver''': Four portals will spawn, each tethering to one player. These will periodically spawn telegraphed conal AoEs in the direction of the tethered player. | |||
*'''Lifescleaver''': Multiple telegraphed conal AoEs originating from the boss. | |||
*'''Void Torrent''': Line AoE tankbuster. | |||
==Loot== | ==Loot== | ||
===[[File:Silver Coffer (small).png|link=]] [[ | {{see also|Manalis Armor|Manalis Accessories}} | ||
{{Drops list| | ===[[File:Silver Coffer (small).png|link=]] [[Albion]]=== | ||
{{Drops list|Albion}} | |||
===[[File:Silver Coffer (small).png|link=]] [[ | ===[[File:Silver Coffer (small).png|link=]] [[Galatea Magna]]=== | ||
{{Drops list| | {{Drops list|Galatea Magna}} | ||
===[[File:Gold Coffer (small).png|link=]] [[ | ===[[File:Gold Coffer (small).png|link=]] [[Cagnazzo]]=== | ||
{{Drops list| | *{{Item icon|Cagnazzo Card}} (Drops at a fixed rate.) | ||
{{Drops list|Cagnazzo}} | |||
===Treasure Coffers=== | ===Treasure Coffers=== | ||
====[[File:Bronze Coffer (small).png|link=]] Treasure Coffer 1 (X: | ====[[File:Bronze Coffer (small).png|link=]] Treasure Coffer 1 (X: 11.1, Y: 10.6)==== | ||
{{Drops table header|show-levels=n}} | {{Drops table header|show-levels=n}} | ||
{{Drops table row|Manalis Gauntlets of Fending}} | |||
{{Drops table row|Manalis Halfgloves of Maiming}} | |||
{{Drops table row|Manalis Gauntlets of Striking}} | |||
{{Drops table row|Manalis Gauntlets of Scouting}} | |||
{{Drops table row|Manalis Gloves of Aiming}} | |||
{{Drops table row|Manalis Dress Gloves of Casting}} | |||
{{Drops table row|Manalis Halfgloves of Healing}} | |||
{{Drops table row|Manalis Wristband of Fending}} | |||
{{Drops table row|Manalis Wristband of Slaying}} | |||
{{Drops table row|Manalis Wristband of Aiming}} | |||
{{Drops table row|Manalis Wristband of Casting}} | |||
{{Drops table row|Manalis Wristband of Healing}} | |||
{{Drops table row|Manalis Ring of Fending}} | |||
{{Drops table row|Manalis Ring of Slaying}} | |||
{{Drops table row|Manalis Ring of Aiming}} | |||
{{Drops table row|Manalis Ring of Casting}} | |||
{{Drops table row|Manalis Ring of Healing}} | |||
{{Drops table row|Savage Aim Materia IX}} | |||
{{Drops table row|Savage Might Materia IX}} | |||
{{Drops table row|Heavens' Eye Materia IX}} | |||
{{Drops table row|Quickarm Materia IX}} | |||
{{Drops table row|Quicktongue Materia IX}} | |||
{{Drops table row|Battledance Materia IX}} | |||
{{Drops table row|Piety Materia IX}} | |||
{{Table footer}} | {{Table footer}} | ||
====[[File:Bronze Coffer (small).png|link=]] Treasure Coffer 2 (X: | ====[[File:Bronze Coffer (small).png|link=]] Treasure Coffer 2 (X: 11.0, Y: 9.7)==== | ||
{{Drops table header|show-levels=n}} | {{Drops table header|show-levels=n}} | ||
{{Drops table row|Manalis Sabatons of Fending}} | |||
{{Drops table row|Manalis Boots of Maiming}} | |||
{{Drops table row|Manalis Sabatons of Striking}} | |||
{{Drops table row|Manalis Sabatons of Scouting}} | |||
{{Drops table row|Manalis Greaves of Aiming}} | |||
{{Drops table row|Manalis Boots of Casting}} | |||
{{Drops table row|Manalis Boots of Healing}} | |||
{{Drops table row|Manalis Earrings of Fending}} | |||
{{Drops table row|Manalis Earrings of Slaying}} | |||
{{Drops table row|Manalis Earrings of Aiming}} | |||
{{Drops table row|Manalis Earrings of Casting}} | |||
{{Drops table row|Manalis Earrings of Healing}} | |||
{{Drops table row|Manalis Choker of Fending}} | |||
{{Drops table row|Manalis Choker of Slaying}} | |||
{{Drops table row|Manalis Choker of Aiming}} | |||
{{Drops table row|Manalis Choker of Casting}} | |||
{{Drops table row|Manalis Choker of Healing}} | |||
{{Drops table row|Savage Aim Materia IX}} | |||
{{Drops table row|Savage Might Materia IX}} | |||
{{Drops table row|Heavens' Eye Materia IX}} | |||
{{Drops table row|Quickarm Materia IX}} | |||
{{Drops table row|Quicktongue Materia IX}} | |||
{{Drops table row|Battledance Materia IX}} | |||
{{Drops table row|Piety Materia IX}} | |||
{{Table footer}} | {{Table footer}} | ||
====[[File:Bronze Coffer (small).png|link=]] Treasure Coffer 3 (X: | ====[[File:Bronze Coffer (small).png|link=]] Treasure Coffer 3 (X: 10.8, Y: 11.3)==== | ||
{{Drops table header|show-levels=n}} | {{Drops table header|show-levels=n}} | ||
{{Drops table row|Manalis Circlet of Fending}} | |||
{{Drops table row|Manalis Chapeau of Maiming}} | |||
{{Drops table row|Manalis Helm of Striking}} | |||
{{Drops table row|Manalis Helm of Scouting}} | |||
{{Drops table row|Manalis Turban of Aiming}} | |||
{{Drops table row|Manalis Hat of Casting}} | |||
{{Drops table row|Manalis Hat of Healing}} | |||
{{Drops table row|Manalis Wristband of Fending}} | |||
{{Drops table row|Manalis Wristband of Slaying}} | |||
{{Drops table row|Manalis Wristband of Aiming}} | |||
{{Drops table row|Manalis Wristband of Casting}} | |||
{{Drops table row|Manalis Wristband of Healing}} | |||
{{Drops table row|Manalis Ring of Fending}} | |||
{{Drops table row|Manalis Ring of Slaying}} | |||
{{Drops table row|Manalis Ring of Aiming}} | |||
{{Drops table row|Manalis Ring of Casting}} | |||
{{Drops table row|Manalis Ring of Healing}} | |||
{{Drops table row|Savage Aim Materia IX}} | |||
{{Drops table row|Savage Might Materia IX}} | |||
{{Drops table row|Heavens' Eye Materia IX}} | |||
{{Drops table row|Quickarm Materia IX}} | |||
{{Drops table row|Quicktongue Materia IX}} | |||
{{Drops table row|Battledance Materia IX}} | |||
{{Drops table row|Piety Materia IX}} | |||
{{Table footer}} | {{Table footer}} | ||
====[[File:Bronze Coffer (small).png|link=]] Treasure Coffer 4 (X: | ====[[File:Bronze Coffer (small).png|link=]] Treasure Coffer 4 (X: 12.4, Y: 10.4)==== | ||
{{Drops table header|show-levels=n}} | {{Drops table header|show-levels=n}} | ||
{{Drops table row|Manalis Bottoms of Fending}} | |||
{{Drops table row|Manalis Bottoms of Maiming}} | |||
{{Drops table row|Manalis Bottoms of Striking}} | |||
{{Drops table row|Manalis Bottoms of Scouting}} | |||
{{Drops table row|Manalis Bottoms of Aiming}} | |||
{{Drops table row|Manalis Trousers of Casting}} | |||
{{Drops table row|Manalis Bottoms of Healing}} | |||
{{Drops table row|Manalis Earrings of Fending}} | |||
{{Drops table row|Manalis Earrings of Slaying}} | |||
{{Drops table row|Manalis Earrings of Aiming}} | |||
{{Drops table row|Manalis Earrings of Casting}} | |||
{{Drops table row|Manalis Earrings of Healing}} | |||
{{Drops table row|Manalis Choker of Fending}} | |||
{{Drops table row|Manalis Choker of Slaying}} | |||
{{Drops table row|Manalis Choker of Aiming}} | |||
{{Drops table row|Manalis Choker of Casting}} | |||
{{Drops table row|Manalis Choker of Healing}} | |||
{{Drops table row|Savage Aim Materia IX}} | |||
{{Drops table row|Savage Might Materia IX}} | |||
{{Drops table row|Heavens' Eye Materia IX}} | |||
{{Drops table row|Quickarm Materia IX}} | |||
{{Drops table row|Quicktongue Materia IX}} | |||
{{Drops table row|Battledance Materia IX}} | |||
{{Drops table row|Piety Materia IX}} | |||
{{Table footer}} | {{Table footer}} | ||
==Lore== | |||
===Dated Records=== | |||
{{Quotation|Dated Records|The assaults from outside tribes have markedly increased of late. The Geraldines proved an especially barbarous thorn in our sides, their nigh ceaseless pillaging no doubt an effort to hoard supplies in preparation for the coming winter.<br> | |||
No longer able to tolerate the damages suffered by these incursions, the senate issued an order for their king's assassination, and we reapers were asked to ready our blades.<br> | |||
With three of her fellows in tow, Galatea set out under cover of night and infiltrated the enemy fortress. Their mission was a great success which soon put the enemy to rout.}} | |||
===Faded Records=== | |||
{{Quotation|Faded Records|Emperor Solus is convinced this magitek will spark a revolution in warfare as we know it. And as he devotes further resources to its advancement, our arts continue to fall out of favor. I fear the age of the reaper has come to an end.<br> | |||
After all our forebears have sacrificed for the good of the Empire. The blood spilled, the lives lost. They would dare deem us relics of a bygone era. | |||
Indeed, they believe the future lies with their “reaper” battle armor. | |||
}} | |||
===Trainee Warning Notice=== | |||
{{Quotation|Trainee Warning Notice|Aspirants are reminded not to approach the figures of the Pale Harvest without express permission. They should be treated with no less reverence than Galatea herself, and are hardly less dangerous.<br> | |||
Only those who have successfully forged a pact with an avatar may spar with the Galatea Parva. They will serve to refine one's use of invocations and tactical coordination.<br> | |||
The Galatea Magna, however, is reserved for those who are able to serve as host to their avatar. This periculous manikin is designed to push a reaper to their limits, if not beyond them.<br> | |||
Learn to walk in death's shadow, and you shall know no fear.}} | |||
===Dollmaster's Memorandum=== | |||
{{Quotation|Dollmaster's Memorandum|Maintenance of the Galateae must be handled with the utmost of care. The delicate art of their making has long since been lost, making repairs difficult, and reproduction all but impossible. | |||
The knowledge was kept secret, passed down to those who would inherit the position of master dollmaker. That is, until one man chose to break with tradition. | |||
He claimed to be leaving on a journey in pursuit of an “unparalleled beauty,” but we never learned the truth of it. The only thing that is certain, is the art of our forebears left with him.}} | |||
===Galatea Magna Evaluation Rankings=== | |||
{{Quotation|With Zero in party|<creak> Evaluation complete. | |||
An equal to [[Drusilla]]. Extraordinary... | |||
}} | |||
{{Quotation|Rank 1|<creak> Evaluation complete. Evaluation Ranking: 1 | |||
Even the great rulers of voidsent would struggle to contend with such strength. | |||
}} | |||
{{Quotation|Rank 2|<creak> Evaluation complete. Evaluation Ranking: 2 | |||
Impossible... Only [[Rullus]] has achieved such a feat. | |||
}} | |||
{{Quotation|Rank 3|<creak> Evaluation complete. Evaluation Ranking: 3 | |||
A spectacular performance. Such strength might even prove a match for Galatea herself were she still alive. | |||
}} | |||
{{Quotation|Rank 5|<creak> Evaluation complete. Evaluation Ranking: 5 | |||
A commendable performance. Such strength would prove a match for even knight-class voidsent. | |||
}} | |||
{{Quotation|Rank 7|<creak> Evaluation complete. Evaluation Ranking: 7 | |||
A respectable performance. Such strength would prove a match for even warrior-class voidsent. | |||
}} | |||
{{Quotation|Rank 9|<creak> Evaluation complete. Evaluation Ranking: 9 | |||
Your mastery of fundamentals will carry you far. Continue your training and seek ever greater heights. | |||
}} | |||
{{Quotation|Rank 12|<creak> Evaluation complete. Evaluation Ranking: 12 | |||
Not even the lowest order of voidsent would be daunted by such meager strength. | |||
}} | |||
==Achievements== | ==Achievements== | ||
| Line 72: | Line 309: | ||
==Images== | ==Images== | ||
===Gear Images=== | ===Gear Images=== | ||
The Manalis set is a recolor of the [[Diabolic Armor]] set, originally seen in {{questlink|araid|Dun Scaith}}. | |||
<gallery heights=225px widths=400px mode="packed"> | <gallery heights=225px widths=400px mode="packed"> | ||
File:dun scaith gear1.jpg|Diabolic Armor | |||
</gallery> | </gallery> | ||
===Dungeon Images=== | ===Dungeon Images=== | ||
<gallery mode="packed" heights="200px"> | <gallery mode="packed" heights="200px"> | ||
Lapis Manalis intro.png | |||
Lapis Manalis concept 1.jpeg | Lapis Manalis concept 1.jpeg | ||
Lapis Manalis concept 2.jpeg | Lapis Manalis concept 2.jpeg | ||
Lapis Manalis boss.png | |||
Galatea Magna.png | |||
Cagnazzo render.jpg | |||
</gallery> | |||
===Other Images=== | |||
<gallery mode="packed" heights=500px> | |||
Lapis Manalis dialogue1.jpg|Dungeon Dialogue Infographic Part 1 (credits: [https://www.reddit.com/r/ffxiv/comments/16wzhvo/dungeon_dialogue_infographic_lapis_manalis/ TrustInsighters]) | |||
Lapis Manalis dialogue2.jpg|Dungeon Dialogue Infographic Part 2 | |||
Lapis Manalis dialogue3.jpg|Dungeon Dialogue Infographic Part 3 | |||
</gallery> | </gallery> | ||
==Trivia== | |||
*In ancient Roman religion, ''[https://en.wikipedia.org/wiki/Lapis_manalis lapis manalis]'' referred to either one of two sacred stones. | |||
{{Duties nav|dungeon}} | {{Duties nav|dungeon}} | ||
Latest revision as of 14:46, 26 June 2024
Lapis Manalis
- Level
- 90 (Sync: 90)
- Item Level
- 590 (Sync: 630)
- Difficulty
- Normal
- Party size
- Light Party
4 man • 1 1
1  2
2 
- Unsyncing
- Allowed
- Time limit
- 90 minutes
- Duty Finder
- Dungeons (Endwalker)
- Roulette
- High-level Dungeons
- Tomestones
 50
50 - Req. quest
 King of the Mountain
- Entrance
- Garlemald (X:30.8, Y:35.8)
- Modes
- Duty Support, Trust, Explorer
- Trust EXP
- 0
- Patch
- 6.3
“Your quest to find Vrtra's brood-sister Azdaja leads you to Garlemald, where you believe she may have passed through a voidgate. Increased sightings of voidsent in the area lend further credence to your suspicions. In the hopes of narrowing your search for the alleged gate, Alphinaud tells you of an abandoned village in the mountains to the east where Garleans once practiced the reaper arts. But is a portal the only thing you may chance to find there in the heart of the mountain?
— In-game description
Lapis Manalis is a level 90 dungeon introduced in patch 6.3 with Endwalker.
Duty Support
- Party member selection is available.
| Varshahn | Alphinaud | Alisaie | Y'shtola | Estinien | Zero | |
|---|---|---|---|---|---|---|

|

|

|

|

|

| |
| Class | ||||||
| Role | Tank or DPS | Healer | DPS | DPS | DPS | DPS |
Objectives
- Arrive at the Silvan Throne.
- Clear the Silvan Throne.
- Arrive at the forum messorum.
- Clear the forum messorum.
- Arrive at Deepspine.
Bosses
 Albion
- Call of the Mountain: The screen will begin shaking and the system message "A rumbling in the distance draws closer..." will appear. A portion of the east or west wall will begin to have moving snow, telegraphing where a herd of animals will charge through the room as a line AoE that hits around a third of the arena. The system message "Another rumbling can be heard in the distance..." will then appear, and an animal herd will charge down another third of the room based on the telegraph. Anyone hit by the charging animals will be inflicted with
 Concussion and receive damage-over-time.
 - Albion's Embrace: Telegraphed tankbuster
- Left Slam / Right Slam: The boss will use a half-room cleave to the left or right of its hitbox, based on the name of the attack. Has only a brief AoE indicator.
- Knock on Ice: The boss summons three chunks of ice, telegraphed by red AoEs.
- Icebreaker: The boss faces one ice chunk, tethers it, and targets with a orange reticle. It will use a large circular AoE (with only a brief indicator) that destroys the rock.
- Icy Throes (no cast bar): The boss marks everyone with an AoE telegraph so the party should spread. Two more ice chunks will also spawn.
- Roar of Albion: A roomwide AoE that can be dodged by hiding behind an ice chunk from the boss.
 Galatea Magna
- Waxing Cycle: The boss will use a large, telegraphed point-blank AoE, immediately followed by a very briefly telegraphed donut AoE that hits the previously safe area. Anyone hit by this attack or the next one will be inflicted with
 Sustained Damage.
 - Waning Cycle: The boss will use a large, telegraphed donut AoE, immediately followed by a very briefly telegraphed donut AoE that hits the previously safe area.
- Soul Scythe: The boss will face a random cardinal, then jump to it and perform a large, briefly telegraphed, circular AoE in the direction it was facing.
- Soul Nebula: Unavoidable roomwide damage that also spawns will summon two portals to the boss's east and west. This is followed by Scarecrow Chase. Each portal will have a number of dots over it (1 or 2), indicating in which order the boss will teleport to them and use a briefly telegraphed cross AoE that hits the intercardinals of the portals. Anyone hit will be inflicted with
 Doom that must be cleansed with Esuna to prevent death. This first set can be dodged by remaining in the center of the room.
 - Tenebrism: Gives everyone the
 Glassy-eyed debuff. Four meteor circles will sequentially spawn around the boss and must be soaked by at least one player to prevent them from exploding and dealing party-wide damage. When the last tower is about to be soaked, gaze indicators will appear above everyone, indicating that their Glassy-eyed debuff will resolve soon. Everyone must look away from each other or they will be inflicted with
  Petrification.
 - Soul Nebula / Scarecrow Chase (version 2): Functions similarly as before, except the boss will start on the edge of the arena and summon four portals, one in the middle, and three in the other edges.
Notes:
- Depending on how quickly the party kills the boss, it will give a different line of dialogue upon its defeat and rank the party's performance from 1 to 12, with a lower number being a faster kill time. This appears to be purely cosmetic and does not impact rewards.
- An average party in the Duty Finder will typically receive a rank of 7.
- The top rank of 1 requires a kill time of less than 90 seconds (at level 90, a premade party of 3+ DPS in item level 630-635 best-in-slot gear, food, tinctures, full resource openers, party buff alignment, and strong burst damage is typically needed to achieve this).
- If Zero is in the party as a Duty Support NPC, it will also give a different line of dialogue upon its defeat.
 Drowned King: Cagnazzo
Shortly after engaging the boss, the arena will be surrounded by an AoE that will inflict ![]() Dropsy and deal damage-over-time to anyone who steps in it.
Dropsy and deal damage-over-time to anyone who steps in it.
- Stygian Deluge: Unavoidable party-wide damage.
- Antediluvian: Spawns three sets of two bubbles across the arena, which will grow in size. When a bubble reaches maximum size, it will drop down as a large circular AoE with a brief indicator. The boss will also spawn a purple knockback AoE in the middle (Body Slam), which will kill anyone inside the AoE telegraph. This knockback cannot be prevented with knockback immune actions.
- Hydraulic Ram: The boss will sequentially telegraph several line charge and circle AoEs which will disappear after a short time. It will then use AoE attacks in the order of the telegraphs.
- Hydrofall: Telegraphed stack AoE.
- Cursed Tide: The boss assigns various debuffs to players and becomes untargetable.
 Neap Tide: A point-blank AoE on the afflicted player when the debuff expires. Three players will receive this.
 Spring Tide: A stack AoE on the afflicted player when the debuff expires. One player will receive this.
- The boss will spawn four immobile Fearsome Flotsam which must be defeated before Cagnazzo's Power reaches 100, or the party will wipe.
- The party's debuffs will resolve, but they will be telegraphed with standard AoE indicators for several seconds before they resolve.
- Several telegraphed circular AoEs will also spawn.
- Tsunami: Party-wide damage after the adds phase. Heal through and mitigate.
- Voidcleaver: Four portals will spawn, each tethering to one player. These will periodically spawn telegraphed conal AoEs in the direction of the tethered player.
- Lifescleaver: Multiple telegraphed conal AoEs originating from the boss.
- Void Torrent: Line AoE tankbuster.
Loot
- See also: Manalis Armor and Manalis Accessories
 Albion
 Galatea Magna
 Cagnazzo
- Cagnazzo Card (Drops at a fixed rate.)
| Name | Type | Item Level | Rarity | Quantity |
|---|---|---|---|---|
| Deep Blue Orchestrion Roll | Orchestrion Roll | N/A | Basic | 1 |
| Lapis Manalis Banner | Other | N/A | Basic | 1 |
| Manalis Bottoms of Aiming | Legs | 605 | Green | 1 |
| Manalis Bottoms of Fending | Legs | 605 | Green | 1 |
| Manalis Bottoms of Healing | Legs | 605 | Green | 1 |
| Manalis Bottoms of Maiming | Legs | 605 | Green | 1 |
| Manalis Bottoms of Scouting | Legs | 605 | Green | 1 |
| Manalis Bottoms of Striking | Legs | 605 | Green | 1 |
| Manalis Coat of Casting | Body | 605 | Green | 1 |
| Manalis Coat of Healing | Body | 605 | Green | 1 |
| Manalis Coat of Maiming | Body | 605 | Green | 1 |
| Manalis Dolman of Aiming | Body | 605 | Green | 1 |
| Manalis Mail of Fending | Body | 605 | Green | 1 |
| Manalis Mail of Scouting | Body | 605 | Green | 1 |
| Manalis Mail of Striking | Body | 605 | Green | 1 |
| Manalis Trousers of Casting | Legs | 605 | Green | 1 |
| Pearl of Tides | Material | N/A | Basic | 1 |
| Wind-up Cagnazzo | Minion | N/A | Basic | 1 |
Treasure Coffers
 Treasure Coffer 1 (X: 11.1, Y: 10.6)
 Treasure Coffer 2 (X: 11.0, Y: 9.7)
 Treasure Coffer 3 (X: 10.8, Y: 11.3)
 Treasure Coffer 4 (X: 12.4, Y: 10.4)
Lore
Dated Records
“The assaults from outside tribes have markedly increased of late. The Geraldines proved an especially barbarous thorn in our sides, their nigh ceaseless pillaging no doubt an effort to hoard supplies in preparation for the coming winter.
No longer able to tolerate the damages suffered by these incursions, the senate issued an order for their king's assassination, and we reapers were asked to ready our blades.
With three of her fellows in tow, Galatea set out under cover of night and infiltrated the enemy fortress. Their mission was a great success which soon put the enemy to rout.
— Dated Records
Faded Records
“Emperor Solus is convinced this magitek will spark a revolution in warfare as we know it. And as he devotes further resources to its advancement, our arts continue to fall out of favor. I fear the age of the reaper has come to an end.
After all our forebears have sacrificed for the good of the Empire. The blood spilled, the lives lost. They would dare deem us relics of a bygone era. Indeed, they believe the future lies with their “reaper” battle armor.— Faded Records
Trainee Warning Notice
“Aspirants are reminded not to approach the figures of the Pale Harvest without express permission. They should be treated with no less reverence than Galatea herself, and are hardly less dangerous.
Only those who have successfully forged a pact with an avatar may spar with the Galatea Parva. They will serve to refine one's use of invocations and tactical coordination.
The Galatea Magna, however, is reserved for those who are able to serve as host to their avatar. This periculous manikin is designed to push a reaper to their limits, if not beyond them.
Learn to walk in death's shadow, and you shall know no fear.— Trainee Warning Notice
Dollmaster's Memorandum
“Maintenance of the Galateae must be handled with the utmost of care. The delicate art of their making has long since been lost, making repairs difficult, and reproduction all but impossible.
The knowledge was kept secret, passed down to those who would inherit the position of master dollmaker. That is, until one man chose to break with tradition.
He claimed to be leaving on a journey in pursuit of an “unparalleled beauty,” but we never learned the truth of it. The only thing that is certain, is the art of our forebears left with him.
— Dollmaster's Memorandum
Galatea Magna Evaluation Rankings
“<creak> Evaluation complete.
An equal to Drusilla. Extraordinary...
— With Zero in party
“<creak> Evaluation complete. Evaluation Ranking: 1
Even the great rulers of voidsent would struggle to contend with such strength.
— Rank 1
“<creak> Evaluation complete. Evaluation Ranking: 2
Impossible... Only Rullus has achieved such a feat.
— Rank 2
“<creak> Evaluation complete. Evaluation Ranking: 3
A spectacular performance. Such strength might even prove a match for Galatea herself were she still alive.
— Rank 3
“<creak> Evaluation complete. Evaluation Ranking: 5
A commendable performance. Such strength would prove a match for even knight-class voidsent.
— Rank 5
“<creak> Evaluation complete. Evaluation Ranking: 7
A respectable performance. Such strength would prove a match for even warrior-class voidsent.
— Rank 7
“<creak> Evaluation complete. Evaluation Ranking: 9
Your mastery of fundamentals will carry you far. Continue your training and seek ever greater heights.
— Rank 9
“<creak> Evaluation complete. Evaluation Ranking: 12
Not even the lowest order of voidsent would be daunted by such meager strength.
— Rank 12
Achievements
This duty is associated with the following achievements:
| Name | Points | Task | Reward | Patch |
|---|---|---|---|---|
| Mapping the Realm: Lapis Manalis | 10 | Discover every location within Lapis Manalis. | - | 6.3 |
Images
Gear Images
The Manalis set is a recolor of the Diabolic Armor set, originally seen in ![]() Dun Scaith.
Dun Scaith.
Dungeon Images
Other Images
Dungeon Dialogue Infographic Part 1 (credits: TrustInsighters)
Trivia
- In ancient Roman religion, lapis manalis referred to either one of two sacred stones.


