Difference between revisions of "The Tower of Zot"
Furstblumier (talk | contribs) |
|||
| (17 intermediate revisions by 3 users not shown) | |||
| Line 10: | Line 10: | ||
| size = light | | size = light | ||
| time-limit = 90 | | time-limit = 90 | ||
| duty-finder = Dungeons (Endwalker) | |||
| roulette = Leveling | | roulette = Leveling | ||
| tomestones = | | tomestones = | ||
| Line 17: | Line 18: | ||
| patch = 6.0 | | patch = 6.0 | ||
| release = Endwalker | | release = Endwalker | ||
| modes = duty support, trust, explorer | |||
| trust-exp = 6,566,000 | |||
}} {{TOC limit|3}} | }} {{TOC limit|3}} | ||
==Duty Support== | |||
*Party member selection is available. | |||
{| {{STDT|pve align-left}} | |||
! | |||
! Thancred | |||
! Alphinaud | |||
! Alisaie | |||
! Estinien | |||
|- | |||
| | |||
| [[File:DS Thancred2.png]] | |||
| [[File:DS Alphinaud3.png]] | |||
| [[File:DS Alisaie3.png]] | |||
| [[File:DS Estinien2.png]] | |||
|- | |||
| '''Class''' | |||
| {{GNB}} [[Gunbreaker]] | |||
| {{SGE}} [[Sage]] | |||
| {{RDM}} [[Red Mage]] | |||
| {{DRG}} [[Dragoon]] | |||
|- | |||
| '''Role''' | |||
| Tank | |||
| Healer | |||
| DPS | |||
| DPS | |||
|} | |||
==Objectives== | ==Objectives== | ||
#Arrive at Ingenuity's Ingress: 0/1 | #Arrive at Ingenuity's Ingress: 0/1 | ||
| Line 28: | Line 59: | ||
==Bosses== | ==Bosses== | ||
{{#ev:youtube|YZRTi2bays0|350|right|Dungeon Guide by MTQcapture}} | {{#ev:youtube|YZRTi2bays0|350|right|Dungeon Guide by MTQcapture}} | ||
===[[File:Aggressive difficulty | ===[[File:Aggressive difficulty r5.png|link=]] [[Minduruva]]=== | ||
* '''Manusya Bio''': Tankbuster. This attack also inflicts a high damage-over-time poison and should be removed immediately. | * '''Manusya Bio''': Tankbuster. This attack also inflicts a high damage-over-time poison and should be removed immediately. | ||
* '''Manusya Blizzard III''': The boss will fire twelve narrow cones from the center of the boss's hitbox across the arena. Stand between the marked AoEs to avoid. | * '''Manusya Blizzard III''': The boss will fire twelve narrow cones from the center of the boss's hitbox across the arena. Stand between the marked AoEs to avoid. | ||
| Line 39: | Line 70: | ||
The boss will then cast various spells while also Transmuting spells to markers. Make sure to watch what spell is being Transmuted and when it is going to fire and move accordingly. Repeat this until the boss is defeated. | The boss will then cast various spells while also Transmuting spells to markers. Make sure to watch what spell is being Transmuted and when it is going to fire and move accordingly. Repeat this until the boss is defeated. | ||
===[[File:Aggressive difficulty | ===[[File:Aggressive difficulty r5.png|link=]] [[Sanduruva]]=== | ||
* '''Isitva Siddhi''': Tankbuster. | * '''Isitva Siddhi''': Tankbuster. | ||
* '''Prapti Siddhi''': The boss fires a large line AoE at each player one at a time. Move out of the AoE marker to avoid. | * '''Prapti Siddhi''': The boss fires a large line AoE at each player one at a time. Move out of the AoE marker to avoid. | ||
| Line 59: | Line 90: | ||
==Loot== | ==Loot== | ||
{{see also|Monstrorum Weapons|Manusya Armor|Manusya Accessories}} | |||
===[[File:Silver Coffer (small).png|link=]] [[Minduruva]]=== | ===[[File:Silver Coffer (small).png|link=]] [[Minduruva]]=== | ||
* 341544 {{exp}} [[Experience Points]] | |||
{{Drops list|Minduruva}} | {{Drops list|Minduruva}} | ||
===[[File:Silver Coffer (small).png|link=]] [[Sanduruva]]=== | ===[[File:Silver Coffer (small).png|link=]] [[Sanduruva]]=== | ||
* 597706 {{exp}} [[Experience Points]] | |||
{{Drops list|Sanduruva}} | {{Drops list|Sanduruva}} | ||
===[[File:Gold Coffer (small).png|link=]] [[Cinduruva]]=== | ===[[File:Gold Coffer (small).png|link=]] [[Cinduruva]]=== | ||
*{{Item icon|Magus Sisters Card}} (Drops at a fixed rate) | *{{Item icon|Magus Sisters Card}} (Drops at a fixed rate) | ||
* 768478 {{exp}} [[Experience Points]] | |||
{{Drops list|Cinduruva}} | {{Drops list|Cinduruva}} | ||
| Line 158: | Line 193: | ||
{{Drops table row|Monstrorum Katana}} | {{Drops table row|Monstrorum Katana}} | ||
{{Drops table row|Monstrorum Knives}} | {{Drops table row|Monstrorum Knives}} | ||
{{Drops table row|Monstrorum Saberfangs}} | |||
{{Drops table row|Monstrorum Longbow}} | {{Drops table row|Monstrorum Longbow}} | ||
{{Drops table row|Monstrorum Pistol}} | {{Drops table row|Monstrorum Pistol}} | ||
| Line 164: | Line 200: | ||
{{Drops table row|Monstrorum Grimoire}} | {{Drops table row|Monstrorum Grimoire}} | ||
{{Drops table row|Monstrorum Foil}} | {{Drops table row|Monstrorum Foil}} | ||
{{Drops table row|Monstrorum Round Brush}} | |||
{{Drops table row|Monstrorum Signum}} | {{Drops table row|Monstrorum Signum}} | ||
{{Drops table row|Monstrorum Codex}} | {{Drops table row|Monstrorum Codex}} | ||
| Line 186: | Line 223: | ||
{{Drops table row|Manusya Choker of Healing}} | {{Drops table row|Manusya Choker of Healing}} | ||
{{Table footer}} | {{Table footer}} | ||
==Achievements== | |||
This duty is associated with the following [[achievements]]: | |||
{| {{STDT| mech1 sortable align-left}} | |||
{{achievement table header}} | |||
{{achievement table row|Mapping the Realm: The Tower of Zot}} | |||
|} | |||
==Images== | ==Images== | ||
| Line 197: | Line 242: | ||
Tower of Zot intro.png | Tower of Zot intro.png | ||
Tower of Zot boss.png | Tower of Zot boss.png | ||
</gallery> | |||
===Other Images=== | |||
<gallery mode="packed" heights=500px> | |||
Tower of Zot dialogue.jpg|Dungeon Dialogue Infographic Part 1 (credits: [https://www.reddit.com/user/TrustInsighters TrustInsighters]) | |||
Tower of Zot dialogue2.jpg|Dungeon Dialogue Infographic Part 2 | |||
Tower of Zot dialogue3.jpg|Dungeon Dialogue Infographic Part 3 | |||
</gallery> | </gallery> | ||
{{Duties nav|dungeon}} | {{Duties nav|dungeon}} | ||
Latest revision as of 19:24, 17 August 2024
The Tower of Zot
- Level
- 81 (Sync: 82)
- Item Level
- 500
- Difficulty
- Normal
- Party size
- Light Party
4 man • 1 1
1  2
2 
- Unsyncing
- Allowed
- Time limit
- 90 minutes
- Duty Finder
- Dungeons (Endwalker)
- Roulette
- Leveling
- Req. quest
 In the Dark of the Tower
- Entrance
- Thavnair (X:8.7, Y:8.2)
- Modes
- Duty Support, Trust, Explorer
- Trust EXP
- 6,566,000
- Patch
- 6.0
“Vrtra, great wyrm of the first brood and the hidden satrap of Radz–at–Han, has bid the Scions cross to Narunnair and mount a foray into the tiny island's unnatural spire─a Telophoroi structure known by the locals as the Tower of Zot.
Your companions join you on the journey, protective talismans in hand, prepared to face whatever unnamed horrors await you within. Come what may, you cannot allow Nidhana and her kin to perish in the grip of dark magicks and darker designs...
— In-game description
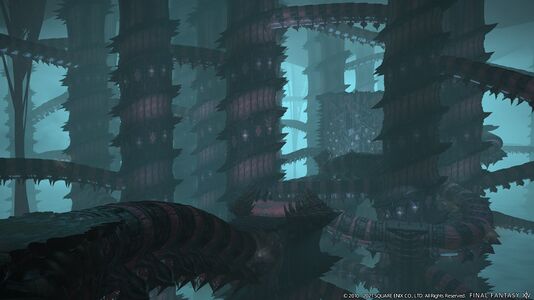
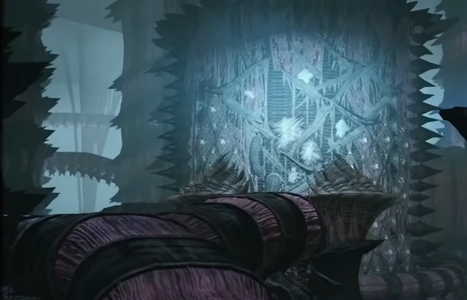
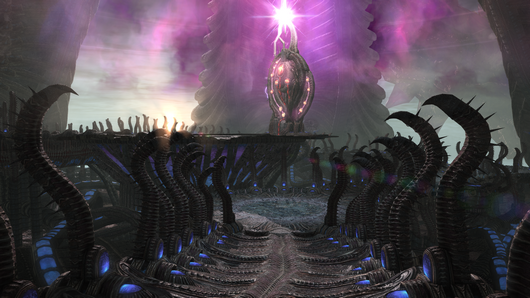
The Tower of Zot is a level 81 dungeon introduced in patch 6.0 with Endwalker.
Duty Support
- Party member selection is available.
| Thancred | Alphinaud | Alisaie | Estinien | |
|---|---|---|---|---|

|

|

|

| |
| Class | ||||
| Role | Tank | Healer | DPS | DPS |
Objectives
- Arrive at Ingenuity's Ingress: 0/1
- Clear Ingenuity's Ingress: 0/1
- Arrive at Prosperity's Promise: 0/1
- Clear Prosperity's Promise: 0/1
- Arrive at Wisdom's Ward: 0/1
- Defeat the Magus Sisters: 0/1
Bosses
 Minduruva
- Manusya Bio: Tankbuster. This attack also inflicts a high damage-over-time poison and should be removed immediately.
- Manusya Blizzard III: The boss will fire twelve narrow cones from the center of the boss's hitbox across the arena. Stand between the marked AoEs to avoid.
- Manuysa Fire III: A large donut AoE that can only be avoided by standing near the boss.
- Manusya Thunder III: The boss will fire several AoEs from the front, back, left, and right of its hitbox that move across the room to the edge of the arena. Move away from the boss or stand at a diagonal relative to the hitbox until the AoEs pass.
- Manusya Bio III: The boss will fire an AoE covering the entire room except the area between the boss and the nearest wall. Move to the unmarked side to avoid.
The boss will also use singular versions of these spells as heavy-hitting attacks on the tank. The boss will also use Transmute versions of the spell, marking a location and firing an orb towards it. Once the orb reaches the marker, it will fire the Transmuted spell from that location. The first spell is always Transmute Blizzard III. Minduruva will also fire a Manusya Bio III at the same time, so stand on the safe side of the boss and between the cones fired from the spell marker.
- Dhrupad: Targets all non-tank players and inflicts them with a damage-over-time debuff. This will be used after every Transmute spell cast.
The boss will then cast various spells while also Transmuting spells to markers. Make sure to watch what spell is being Transmuted and when it is going to fire and move accordingly. Repeat this until the boss is defeated.
 Sanduruva
- Isitva Siddhi: Tankbuster.
- Prapti Siddhi: The boss fires a large line AoE at each player one at a time. Move out of the AoE marker to avoid.
- Manusya Berserk: Five orbs will appear around the room, and once the boss finishes casting, they will explode in very large AoE circles. If a player is hit by the explosion (and survives), they will take heavy damage and receive the Berserk debuff, losing control of their character and attacking the boss wildly, getting hit by the Prakamya Siddhi cast immediately afterwards by the boss. There will be a gap in the ring of orbs, move to the gap, and then all the way against the wall directly behind that gap to avoid the attack.
- Prakamya Siddhi: A point-blank AoE that deals heavy damage to any players hit. Move out to avoid.
- Manusya Stop: The boss will teleport to the center of the arena and cast this spell. Players will be afflicted by a debuff that freezing them in place upon expiration. Players will be frozen one at a time, in succession. Once a player is stopped, the boss will cast a an unavoidable Prapti Siddhi line attack on that player, after which the player is unfrozen. Players should spread out around the boss to avoid taking excess damage. Heal through each hit.
- Manusya Confuse: The boss will leap from the arena, then drop down with five orbs disguised as the boss. After a set amount of time, the orbs drop their disguise and explode very quickly thereafter, inflicting Berserk. Only one of the bosses is the real boss, and marks the safe zone in the room. Players can determine the real boss by looking to see which one is not performing an emote (DoTs and debuffs also persist on the real boss, but not the clones). Once the true boss has been determined, run to the wall behind it until after the explosion, exactly like with Manusya Berserk. These mechanics will repeat until the boss is defeated.
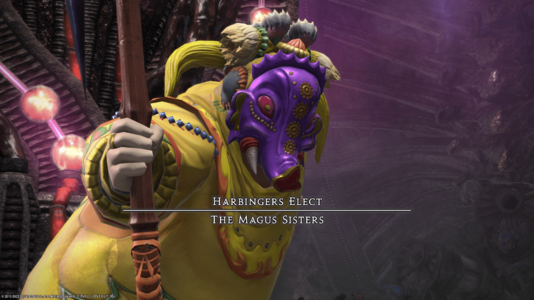
 Harbingers Elect: Cinduruva/The Magus Sisters
The fight will begin with only Cinduruva present, but the other bosses from earlier in the dungeon will soon join.
- Samsara: An unavoidable room-wide AoE attack. Mitigate and heal through.
After the first attack, the other sisters will join and cast Delta Attack. Minduruva casts the actual spell, Sanduruva casts Manusya Faith, buffing the attack and altering it slightly, as well as causing large line AoEs to fire across the room, and Cinduruva castsManusya Reflect causing the spell to fire from the hitboxes of all three sisters.
- Delta Attack: This spell can be either a variant of Manusya Blizzard III, Manusya Fire III or Manusya Thunder III. Which spell is coming out can be determined by the text box that appears on screen:
- "Glacial ice, entomb our foes!" - Blizzard III. Move between all the various firing narrow cone AoEs, making sure to also watch out for proximity markers that will drop large glaciers on the arena.
- "Thunderous tempest, smite our foes!" - Thunder III. Each boss will have the cross-pattern of Thunder AoEs firing from each of them. Be cautious, as the AoEs vary in size. Line AoEs will also fire across the arena, and a player will receive a stack marker that requires all players to stack to mitigate damage.
- "Insatiable flame, consume our foes!" - Fire III. Players will need to stand in two donut AoEs that appear in succession around the arena while also dodging massive line AoEs. The first donut safe zone is always the very center of the room, which will have a line AoE telegraph entirely cover it after the donut AoE goes off, so be ready to move. Players will also be marked with AoEs that will require them to spread out to avoid overlapping. Note that the player AoEs explode a few seconds after the second donut AoE, so stack in the safe zone, then spread immediately afterwards for the AoE markers.
Between each Delta Attack, the bosses will use their various skills on the players. It is important to avoid any line AoEs from Sanduruva while also cleansing any debuffs from Minduruva, as Cinduruva will cast another Samsara and deal high damage. This sequence can lead to high damage, so be sure to mitigate and heal through as needed. Defeat Cinduruva first, as she will revive her fallen sisters. After Cinduruva falls, there will be no more Delta Attacks, and the bosses will simply use the mechanics they used between each Delta Attack. Defeat each boss to complete the dungeon.
Loot
- See also: Monstrorum Weapons, Manusya Armor and Manusya Accessories
 Minduruva
- 341544
 Experience Points
 Sanduruva
- 597706
 Experience Points
 Cinduruva
- Magus Sisters Card (Drops at a fixed rate)
- 768478
 Experience Points
Treasure Coffers
 Treasure Coffer 1 (X:10.1 Y:11.1)
 Treasure Coffer 2 (X:12.5 Y:10.9)
 Treasure Coffer 3 (X:12.0 Y:11.4)
| Name | Type | Item Level | Rarity | Quantity |
|---|---|---|---|---|
| Manusya Coat of Fending | Body | 520 | Green | 1 |
| Manusya Mail of Maiming | Body | 520 | Green | 1 |
| Manusya Jacket of Striking | Body | 520 | Green | 1 |
| Manusya Chestpiece of Scouting | Body | 520 | Green | 1 |
| Manusya Coat of Aiming | Body | 520 | Green | 1 |
| Manusya Jacket of Casting | Body | 520 | Green | 1 |
| Manusya Chestpiece of Healing | Body | 520 | Green | 1 |
| Manusya Amulet of Fending | Bracelets | 520 | Green | 1 |
| Manusya Amulet of Slaying | Bracelets | 520 | Green | 1 |
| Manusya Amulet of Aiming | Bracelets | 520 | Green | 1 |
| Manusya Amulet of Casting | Bracelets | 520 | Green | 1 |
| Manusya Amulet of Healing | Bracelets | 520 | Green | 1 |
| Manusya Ring of Fending | Ring | 520 | Green | 1 |
| Manusya Ring of Slaying | Ring | 520 | Green | 1 |
| Manusya Ring of Aiming | Ring | 520 | Green | 1 |
| Manusya Ring of Casting | Ring | 520 | Green | 1 |
| Manusya Ring of Healing | Ring | 520 | Green | 1 |
 Treasure Coffer 4 (X:12.4 Y:10.2)
Achievements
This duty is associated with the following achievements:
| Name | Points | Task | Reward | Patch |
|---|---|---|---|---|
| Mapping the Realm: The Tower of Zot | 10 | Discover every location within the Tower of Zot. | - | 6.0 |
Images
Gear Images
Dungeon Images
Other Images
Dungeon Dialogue Infographic Part 1 (credits: TrustInsighters)

