Difference between revisions of "Coerthas Central Highlands"
Whitenorth (talk | contribs) |
Techhead7890 (talk | contribs) (fix directions on connected regions) |
||
| (29 intermediate revisions by 6 users not shown) | |||
| Line 7: | Line 7: | ||
| aetheryte2 = | | aetheryte2 = | ||
| aetheryte3 = | | aetheryte3 = | ||
| weather = fair skies, blizzard, fog, clouds | | weather = fair skies, clear skies, blizzard, fog, snow, clouds | ||
| map = coerthas central highlands.jpg | | map = coerthas central highlands.jpg | ||
| levels = | | levels = | ||
| connections = [[Mor Dhona]] ( | | connections = [[Mor Dhona]] (SW) <br> [[North Shroud]] (S) <br> {{HW}} [[Foundation]] (N) | ||
| loading-screen = | | loading-screen = | ||
| screenshot = | | screenshot = | ||
| sstext = | | sstext = | ||
| release = heavensward | | release = heavensward | ||
}} | }}<br> | ||
Level 1 & 50 [[Striking Dummy|Striking Dummies]] are located at (13.2, 16.9). | |||
{{TOC limit|2}} | {{TOC limit|2}} | ||
==Locations== | ==Locations== | ||
{{location table header|Western Thanalan|showLevel= | {{location table header|Western Thanalan|showLevel=false}} | ||
|- | |- | ||
| [[Dragonhead]] | | [[Dragonhead]] | ||
| | | | ||
: {{map icon| | : {{map icon|settlement}} [[First Dicasterial Observatorium of Aetherial and Astrological Phenomena]] | ||
: {{map icon|chocobokeep}} Porter | : {{map icon|chocobokeep}} [[Chocobo Porter]] | ||
: {{map icon| | : {{map icon|landmark}} [[Griffin Crossing]] | ||
: {{map icon|landmark}} [[Skyfire Locks]] | |||
: {{map icon|landmark}} | : {{map icon|trial}} [[Battle on the Big Bridge]] | ||
: {{map icon| | |||
|- | |- | ||
| [[Camp Dragonhead]] | | {{map icon|settlement}} [[Camp Dragonhead]] | ||
| | | | ||
: {{map icon|aetheryte}} Camp Dragonhead | : {{map icon|aetheryte}} Camp Dragonhead | ||
: {{map icon|chocobokeep}} Porter | : {{map icon|chocobokeep}} [[Chocobo Porter]] | ||
|- | |- | ||
| [[Providence Point]] | | [[Providence Point]] | ||
| | | | ||
: {{map icon|landmark}} Witchdrop | : {{map icon|landmark}} [[Witchdrop]] | ||
: {{map icon|landmark}} Steel Vigil | : {{map icon|landmark}} [[Steel Vigil]] | ||
: {{map icon|landmark}} The Ogre's Belly | : {{map icon|landmark}} [[The Ogre's Belly]] | ||
: {{map icon|landmark}} The Weeping Saint | : {{map icon|landmark}} [[The Weeping Saint]] | ||
: {{map icon|landmark}} Natalan | : {{map icon|landmark}} [[Natalan]] | ||
: {{map icon|dungeon}} Xelphatol | : {{map icon|trial}} [[A Relic Reborn: The Chimera]] | ||
: {{map icon|dungeon}} [[Xelphatol]] {{HW}} | |||
|- | |- | ||
| [[Boulder Downs]] | | [[Boulder Downs]] | ||
| | | | ||
: {{map icon|landmark}} Aurum Vale | : {{map icon|landmark}} [[The Aurum Vale (Landmark)|The Aurum Vale]] | ||
: {{map icon|landmark}} Hall of the Seven Echoes | : {{map icon|landmark}} [[Hall of the Seven Echoes]] | ||
: {{map icon|landmark}} Monument Tower | : {{map icon|landmark}} [[Monument Tower]] | ||
: {{map icon|landmark}} Daniffen Pass | : {{map icon|landmark}} [[The Fury's Gaze]] | ||
: {{map icon|dungeon}} Dzemael Darkhold | : {{map icon|landmark}} [[Daniffen Pass]] | ||
: {{map icon|landmark}} Dzemael Darkhold | : {{map icon|dungeon}} [[Dzemael Darkhold]] | ||
: {{map icon|dungeon}} The Aurum Vale | : {{map icon|landmark}} [[Dzemael Darkhold (Landmark)|Dzemael Darkhold]] | ||
: {{map icon|dungeon}} [[The Aurum Vale]] | |||
|- | |- | ||
| [[Whitebrim]] | | [[Whitebrim]] | ||
| | | | ||
: {{map icon| | : {{map icon|settlement}} [[Whitebrim Front]] | ||
: {{map icon|chocobokeep}} Porter (Whitebrim Front) | : {{map icon|chocobokeep}} [[Chocobo Porter]] (Whitebrim Front) | ||
: {{map icon| | : {{map icon|dungeon}} [[The Stone Vigil]] | ||
: {{map icon| | : {{map icon|landmark}} [[Behemoth's Dominion]] | ||
: {{map icon|dungeon}} | : {{map icon|dungeon}} [[Snowcloak]] | ||
|- | |||
: {{map icon| | | [[Natalan]] | ||
| | |||
: {{map icon|trial}} [[The Howling Eye (Hard)]] | |||
|} | |} | ||
| Line 80: | Line 74: | ||
==Shops & Services== | ==Shops & Services== | ||
{| {{STDT| | {{merchant list|Coerthas Central Highlands}} | ||
==Enemies== | |||
===Normal=== | |||
* [[Baritine Croc]] | |||
* [[Bateleur]] | |||
* [[Biast]] | |||
* [[Chinchilla]] | |||
* [[Downy Aevis]] | |||
* [[Dragonfly (Mob)|Dragonfly]] | |||
* [[Feral Croc]] | |||
* [[Giant Logger]] | |||
* [[Giant Lugger]] | |||
* [[Giant Reader]] | |||
* [[Highland Goobbue]] | |||
* [[Hippocerf]] | |||
* [[Ice Sprite]] | |||
* [[Ixali Boundwing]] | |||
* [[Ixali Fearcaller]] | |||
* [[Ixali Stillbeak]] | |||
* [[Ixali Wildtalon]] | |||
* [[Mudpuppy]] | |||
* [[Natalan Boldwing]] | |||
* [[Natalan Fogcaller]] | |||
* [[Natalan Swiftbeak]] | |||
* [[Natalan Watchwolf]] | |||
* [[Natalan Windtalon]] | |||
* [[Ornery Karakul]] | |||
* [[Plasmoid (Mob)|Plasmoid]] | |||
* [[Snow Wolf]] | |||
* [[Snow Wolf Pup]] | |||
* [[Snowstorm Goobbue]] | |||
* [[Taurus]] | |||
* [[Redhorn Ogre]] | |||
* [[Will-o'-the-wyke]] | |||
* [[Vodoriga]] | |||
===B Rank=== | |||
* [[Naul]] | |||
===A Rank=== | |||
* [[Marraco]] | |||
===S Rank=== | |||
* [[Safat]] | |||
==Vistas== | |||
{{see also|Sightseeing Log}} | |||
Players can unlock the Sightseeing Log by completing the level 20 quest {{questlink|feature|A Sight to Behold}}. After completing the first 20 vistas, players can unlock the remaining vistas by talking to the NPC [[Millith Ironheart]] in [[Old Gridania]] (X:10.7, Y:6.0). | |||
{| {{STDT|location sortable align-left}} | |||
|- | |- | ||
! | ! # | ||
! | ! Name | ||
! Zone | |||
! Coordinate | |||
! Weather | |||
! data-sort-type=number | Time | |||
! Emote | |||
! Comment | |||
|- | |- | ||
| [[ | | 68 || [[Sightseeing Log 68: The Nail| The Nail]] || [[Coerthas Central Highlands]] || (X:25.4, Y:29.9) || {{weather icon|fair skies}} [[Fair Skies]] <br> {{weather icon|clear skies}} [[Clear Skies]] || 17:00-18:00 || {{action icon|Lookout}} ||Top of the Observatorium on the ladder under the telescope. Jump onto the lamp closest to the ladder and then onto the ladder itself. | ||
|- | |- | ||
| [[ | | 69 || [[Sightseeing Log 69: The Observatorium| The Observatorium]] || [[Coerthas Central Highlands]] || (X:25.4, Y:29.8) || {{weather icon|fog}} [[Fog]] || 18:00-5:00 || {{action icon|Lookout}} ||Take a couple of steps down from the first floor and walk/fall off into the center of the tower, landing on the highest chandelier. | ||
|- | |- | ||
| [[ | | 70 || [[Sightseeing Log 70: The Frozen Fang| The Frozen Fang]] || [[Coerthas Central Highlands]] || (X:11.7, Y:15.8) || {{weather icon|blizzards}} [[Blizzard (Weather)|Blizzards]] || 8:00-12:00 || {{action icon|Lookout}} ||From the base of the stairs at (11.0,15.5) walk along the small ledge that sticks out until you're at the middle of the semi-circle part of the bridge. | ||
|- | |- | ||
| 71 || [[Sightseeing Log 71: The Holy See of Ishgard| The Holy See of Ishgard]] || [[Coerthas Central Highlands]] || (X:12.8, Y:17.3, Z:1.4) || {{weather icon|fair skies}} [[Fair Skies]] <br> {{weather icon|clear skies}} [[Clear Skies]] || 5:00-8:00 || {{action icon|Lookout}} ||Top of the tower on the over-arch. After climbing the stone spiral staircase, enter the small room and use the wooden stairs to get all the way up. | |||
|- | |||
| 72 || [[Sightseeing Log 72: Boulder Downs| Boulder Downs]] || [[Coerthas Central Highlands]] || (X:7.8, Y:28.9, Z:1.8) || {{weather icon|fair skies}} [[Fair Skies]] <br> {{weather icon|clear skies}} [[Clear Skies]] || 17:00-18:00 || {{action icon|Lookout}} ||Top of monument tower next to the NPC standing next to the top of the stairs. | |||
|- | |||
| 73 || [[Sightseeing Log 73: The Fury's Gaze| The Fury's Gaze]] ||[[Coerthas Central Highlands]] || (X:7.9, Y:31.3) || {{weather icon|blizzards}} [[Blizzard (Weather)|Blizzards]] || 18:00-5:00 || {{action icon|Lookout}} ||Inside the cave before you reach the plasmoids. | |||
|- | |||
| 74 || [[Sightseeing Log 74: Snowcloak| Snowcloak]] || [[Coerthas Central Highlands]] || (X:2.2, Y:21.4) || {{weather icon|fair skies}} [[Fair Skies]] <br> {{weather icon|clear skies}} [[Clear Skies]] || 8:00-12:00 || {{action icon|Lookout}} ||Climb up to the highest ledge. | |||
|- | |||
| 75 || [[Sightseeing Log 75: Camp Dragonhead| Camp Dragonhead]] || [[Coerthas Central Highlands]] || (X:26.5, Y:17.7) || {{weather icon|fair skies}} [[Fair Skies]] <br> {{weather icon|clear skies}} [[Clear Skies]] || 12:00-17:00 || {{action icon|Lookout}} ||Climb up to the eastern battlements and head south to draw parallel to the green-roofed building. Jump up onto a higher crenelation that's in line with a buttress opposite and sprint one step and jump over to the building. | |||
|- | |||
| 76 || [[Sightseeing Log 76: The Steel Vigil| The Steel Vigil]] || [[Coerthas Central Highlands]] || (X:28.2, Y:10.3) || {{weather icon|fair skies}} [[Fair Skies]] <br> {{weather icon|clear skies}} [[Clear Skies]] || 5:00-8:00 || {{action icon|Lookout}} ||On the broken arch of the ruins. Start climbing from the most South Eastern edge of the broken wall. The vista is just on the other side of the steeple. | |||
|} | |} | ||
== | ==Achievements== | ||
This zone is associated with the following achievements: | |||
{| {{STDT| mech1 sortable align-left}} | |||
{{achievement table header}} | |||
{{achievement table row|Mapping the Realm: Coerthas Central Highlands}} | |||
|} | |||
==Images== | ==Images== | ||
<gallery mode=packed> | |||
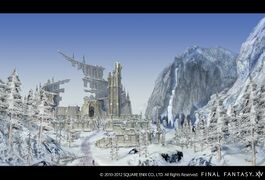
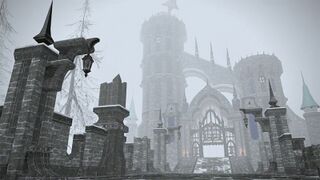
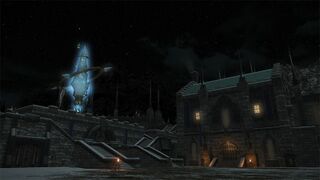
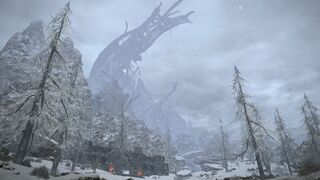
File:ARR artwork4.jpg|[[Steel Vigil]] | |||
File:ARR new location2.jpg|[[Natalan]] | |||
ishgard2.jpg|the [[Gates of Judgement]] | |||
ishgard3.jpg|[[Camp Dragonhead]] | |||
File:Ishgard1.jpg | |||
Coerthas 10.jpg|the Central Highlands before [[the Calamity]] (during 1.x) | |||
</gallery> | |||
==Lore== | |||
===Dragonhead=== | |||
The first knights to settle and build the fortress in Coerthas were said to have named the area after the unusual shape of its rocky outcroppings, which to them resembled the severed head of a dragon. | |||
====First Dicasterial Observatorium of Aetherial and Astrological Phenomena==== | |||
Three hundred years ago, Ishgardian astrologian Adaunel the Younger convinced the Holy See that he could predict the comings and goings of the Dravanian Horde by studying the movements of the heavens, and thus secured funding for the construction of the Observatorium and its grand astroscope. | |||
====Griffin Crossing==== | |||
This massive viaduct which once provided passage to the Coerthas eastern highlands is immortalized in Ishgardian legend as the location where King Thordan and his knights twelve fought the great wyrm Nidhogg. A portion of the bridge was destroyed during the Seventh Umbral Calamity and is currently undergoing repair. | |||
====Skyfire Locks==== | |||
Built into the rolling knolls so that they appear smaller than they actually are, the Skyfire Locks are a series of defensive fortifications which may be used as shelters for merchants and smallfolk to escape an assault from above. | |||
====Camp Dragonhead==== | |||
An Ishgardian stronghold situated atop Haldrath’s March and under the command of House Fortemps, this camp is responsible for ensuring the safety of the smallfolk and merchants traveling to and from Ishgard. | |||
===Providence Point=== | |||
According to the Enchiridion, the vision of the Promised Land which King Thordan received prompting him to lead his people to Coerthas was of this very vista overseeing the Sea of Clouds. | |||
====Witchdrop==== | |||
Those accused of heresy under Ishgardian law are sometimes made to answer to a higher power, and are thus cast into this gorge. If they are deemed innocent in the eyes of Halone, their death will be quick, and their soul gently guided to Her halls. However, if the accused is indeed guilty of consorting with dragons, then they will surely spread their fiendish wings to save themselves from the sharp crags below. Their absconsion will surely be fleeting, though, as the presiding inquisitor is often accompanied by a skilled bowman to shoot any who try to escape. | |||
====Steel Vigil==== | |||
Under the authority of House Haillenarte, the Steel Vigil was Ishgard’s eastern watchtower, and warned the Holy See of aerial attacks for centuries before being razed and gutted by the Dravanian Horde and their vile commander, Svara. As if relinquishing the citadel was not misfortune enough, the Count de Haillenarte also lost his third son and commander of the Vigil, Ser Chlodebaimt, to Svara’s snapping thralls. | |||
====The Ogre’s Belly==== | |||
Thought to be the den of ogres and other unsavory beasts, the locals tell of men who sought shelter from the harsh snowstorms, only to be “swallowed” up by the cavern’s twisting paths. | |||
====The Weeping Saint==== | |||
Ishgardian legend tells that this grotto was where Saint Daniffen came to mourn the maiden he loved that was murdered by a basilisk, and later vowed retribution on the fiend and its kin. The icy waters which trickle down from the mountains and form pools are said to be the saint’s tears, and they are often collected for use in the church’s purification rituals and in the production of sacramental wine. | |||
====Natalan==== | |||
Intended to function as an outpost, the Ixal established Natalan to take advantage of the strong updrafts from the valley below to launch their dirigibles. As the population increased, it was gradually expanded and fortified. | |||
===Boulder Downs=== | |||
Before the Calamity, Boulder Downs was a vast sloped lea littered with moraine deposited by realm-swallowing glaciers long receded. The rain of debris that accompanied the fall of Dalamud, however, transformed the landscape into a frozen wasteland pocked with gaping impact craters and peculiar dark matter formations. | |||
====Aurum Vale==== | |||
The Aurum Vale is, contrary to its name, not a valley of riches, but rather a series of underground caves containing precious deposits of mythril and sulphur. However, these coveted veins are largely submerged in heated groundwater, triggering a chemical reaction which results in puddles of a highly toxic sludge known as goldbile. | |||
====Hall of the Seven Echoes==== | |||
So high are its walls, were one to cry out while traversing this narrow canyon road linking Mor Dhona to the Coerthas central highlands, it is said her voice would echo seven times. | |||
====Monument Tower==== | |||
Pilgrims of the Ishgardian faith often stop here to pray to the sacred stone suspended within the Fury’s Gaze—a holy place guarded by the Temple Knights stationed within the tower. | |||
====Daniffen Pass==== | |||
Ishgardian scripture asserts that this winding cavern is the selfsame one traversed by Saint Daniffen long ago. As a result, pilgrims from the Holy See attempting to walk in the saint’s footsteps are a common sight. | |||
====Dzemael Darkhold==== | |||
As its name suggests, the construction of the Darkhold was financed by House Dzemael, which sought to utilize existing underground caves to build a flawless fortification to defend against the Dravanian Horde. However, construction was postponed indefinitely when the house’s digging uncovered an entrance to the void, from which an army of voidsent emerged. | |||
===Whitebrim=== | |||
When one peers to the north from atop Whitebrim’s jagged cliffs, she can spy the Holy See of Ishgard; yet if she were to look down, they would see naught but an endless sea of white clouds, and it is for this sight which Whitebrim was named. | |||
===Whitebrim=== | |||
When one peers to the north from atop Whitebrim’s jagged cliffs, she can spy the Holy See of Ishgard; yet if she were to look down, they would see naught but an endless sea of white clouds, and it is for this sight which Whitebrim was named. | |||
====Whitebrim front==== | |||
Under the command of Lord Drillemont of House Durendaire, Whitebrim Front is a relatively new outpost established for the purpose of quartering the Temple Knights tasked with retaking the Stone Vigil. | |||
====Stone vigil==== | |||
This great watchtower was constructed as part of the last line of defense before the Dravanian Horde would reach the city proper. Once the responsibility of House Haillenarte, which supplied it with the most advanced cannons, airships, and other weaponry, it suffered severe damage during the Calamity, and was overrun and occupied by the Dravanians soon after. | |||
====Behemoth’s dominion==== | |||
Although this valley appears to be a prime tract of land for settlement, it is a kingdom already claimed by a terrible beast which occasionally descends from the mountains to wreak havoc: the behemoth. The first sightings of the behemoth were reported after shards of Dalamud fell to the earth, leading to speculation that the monster came from within the false moon. Thus the behemoth is thought to be “Bahamut’s spawn” despite its anatomical dissimilarity to dragons. | |||
====Snowcloak==== | |||
Formed in the aftermath of the Calamity, the great ice wall has long been thought an impenetrable barrier between central and western Coerthas. In truth, however, the wall is riddled with hidden tunnels, which heretics have employed as a base of operations. | |||
<ref>Encyclopaedia Eorzea: Volume I, page 162</ref> | |||
==References== | |||
<references /> | |||
{{Zone nav}} | {{Zone nav}} | ||
Latest revision as of 10:44, 2 November 2023
Coerthas Central Highlands
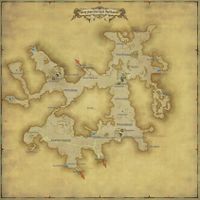
Map of Coerthas Central Highlands
- Type
- Zone
- Zone
- Coerthas
(Aldenard) - Connects to
- Mor Dhona (SW)
North Shroud (S)
 Foundation (N)
 - Aetherytes
- Camp Dragonhead (X:26.0, Y:16, Z:4)
“The Coerthas central highlands are the gateway to the capital, which is why Ishgard long ago established several strongholds at the base of the Nail, many of which have been damaged or destroyed in recent years by the Dravanians.
— In-game description
Coerthas Central Highlands is a zone in Coerthas.
Level 1 & 50 Striking Dummies are located at (13.2, 16.9).
Locations
| Area | Points of Interest |
|---|---|
| Dragonhead | |
| Camp Dragonhead |
|
| Providence Point | |
| Boulder Downs | |
| Whitebrim |
|
| Natalan |
Activities
Coerthas Central Highlands Sidequests
Coerthas Central Highlands FATEs
Shops & Services
| Merchant Name | Merchant Location |
|---|---|
| Merchant & Mender | (X:26.3, Y:16.4) |
| Merchant & Mender | (X:26.2, Y:27.8) |
| Merchant & Mender | (X:13.2, Y:15.9) |
Enemies
Normal
- Baritine Croc
- Bateleur
- Biast
- Chinchilla
- Downy Aevis
- Dragonfly
- Feral Croc
- Giant Logger
- Giant Lugger
- Giant Reader
- Highland Goobbue
- Hippocerf
- Ice Sprite
- Ixali Boundwing
- Ixali Fearcaller
- Ixali Stillbeak
- Ixali Wildtalon
- Mudpuppy
- Natalan Boldwing
- Natalan Fogcaller
- Natalan Swiftbeak
- Natalan Watchwolf
- Natalan Windtalon
- Ornery Karakul
- Plasmoid
- Snow Wolf
- Snow Wolf Pup
- Snowstorm Goobbue
- Taurus
- Redhorn Ogre
- Will-o'-the-wyke
- Vodoriga
B Rank
A Rank
S Rank
Vistas
- See also: Sightseeing Log
Players can unlock the Sightseeing Log by completing the level 20 quest ![]() A Sight to Behold. After completing the first 20 vistas, players can unlock the remaining vistas by talking to the NPC Millith Ironheart in Old Gridania (X:10.7, Y:6.0).
A Sight to Behold. After completing the first 20 vistas, players can unlock the remaining vistas by talking to the NPC Millith Ironheart in Old Gridania (X:10.7, Y:6.0).
| # | Name | Zone | Coordinate | Weather | Time | Emote | Comment |
|---|---|---|---|---|---|---|---|
| 68 | The Nail | Coerthas Central Highlands | (X:25.4, Y:29.9) | Fair Skies Clear Skies |
17:00-18:00 | Lookout | Top of the Observatorium on the ladder under the telescope. Jump onto the lamp closest to the ladder and then onto the ladder itself. |
| 69 | The Observatorium | Coerthas Central Highlands | (X:25.4, Y:29.8) | Fog | 18:00-5:00 | Lookout | Take a couple of steps down from the first floor and walk/fall off into the center of the tower, landing on the highest chandelier. |
| 70 | The Frozen Fang | Coerthas Central Highlands | (X:11.7, Y:15.8) | Blizzards | 8:00-12:00 | Lookout | From the base of the stairs at (11.0,15.5) walk along the small ledge that sticks out until you're at the middle of the semi-circle part of the bridge. |
| 71 | The Holy See of Ishgard | Coerthas Central Highlands | (X:12.8, Y:17.3, Z:1.4) | Fair Skies Clear Skies |
5:00-8:00 | Lookout | Top of the tower on the over-arch. After climbing the stone spiral staircase, enter the small room and use the wooden stairs to get all the way up. |
| 72 | Boulder Downs | Coerthas Central Highlands | (X:7.8, Y:28.9, Z:1.8) | Fair Skies Clear Skies |
17:00-18:00 | Lookout | Top of monument tower next to the NPC standing next to the top of the stairs. |
| 73 | The Fury's Gaze | Coerthas Central Highlands | (X:7.9, Y:31.3) | Blizzards | 18:00-5:00 | Lookout | Inside the cave before you reach the plasmoids. |
| 74 | Snowcloak | Coerthas Central Highlands | (X:2.2, Y:21.4) | Fair Skies Clear Skies |
8:00-12:00 | Lookout | Climb up to the highest ledge. |
| 75 | Camp Dragonhead | Coerthas Central Highlands | (X:26.5, Y:17.7) | Fair Skies Clear Skies |
12:00-17:00 | Lookout | Climb up to the eastern battlements and head south to draw parallel to the green-roofed building. Jump up onto a higher crenelation that's in line with a buttress opposite and sprint one step and jump over to the building. |
| 76 | The Steel Vigil | Coerthas Central Highlands | (X:28.2, Y:10.3) | Fair Skies Clear Skies |
5:00-8:00 | Lookout | On the broken arch of the ruins. Start climbing from the most South Eastern edge of the broken wall. The vista is just on the other side of the steeple. |
Achievements
This zone is associated with the following achievements:
| Name | Points | Task | Reward | Patch |
|---|---|---|---|---|
| Mapping the Realm: Coerthas Central Highlands | 10 | Visit the Coerthas central highlands and unlock the area map. | - | 2.1 |
Images
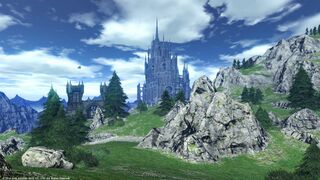
the Central Highlands before the Calamity (during 1.x)
Lore
Dragonhead
The first knights to settle and build the fortress in Coerthas were said to have named the area after the unusual shape of its rocky outcroppings, which to them resembled the severed head of a dragon.
First Dicasterial Observatorium of Aetherial and Astrological Phenomena
Three hundred years ago, Ishgardian astrologian Adaunel the Younger convinced the Holy See that he could predict the comings and goings of the Dravanian Horde by studying the movements of the heavens, and thus secured funding for the construction of the Observatorium and its grand astroscope.
Griffin Crossing
This massive viaduct which once provided passage to the Coerthas eastern highlands is immortalized in Ishgardian legend as the location where King Thordan and his knights twelve fought the great wyrm Nidhogg. A portion of the bridge was destroyed during the Seventh Umbral Calamity and is currently undergoing repair.
Skyfire Locks
Built into the rolling knolls so that they appear smaller than they actually are, the Skyfire Locks are a series of defensive fortifications which may be used as shelters for merchants and smallfolk to escape an assault from above.
Camp Dragonhead
An Ishgardian stronghold situated atop Haldrath’s March and under the command of House Fortemps, this camp is responsible for ensuring the safety of the smallfolk and merchants traveling to and from Ishgard.
Providence Point
According to the Enchiridion, the vision of the Promised Land which King Thordan received prompting him to lead his people to Coerthas was of this very vista overseeing the Sea of Clouds.
Witchdrop
Those accused of heresy under Ishgardian law are sometimes made to answer to a higher power, and are thus cast into this gorge. If they are deemed innocent in the eyes of Halone, their death will be quick, and their soul gently guided to Her halls. However, if the accused is indeed guilty of consorting with dragons, then they will surely spread their fiendish wings to save themselves from the sharp crags below. Their absconsion will surely be fleeting, though, as the presiding inquisitor is often accompanied by a skilled bowman to shoot any who try to escape.
Steel Vigil
Under the authority of House Haillenarte, the Steel Vigil was Ishgard’s eastern watchtower, and warned the Holy See of aerial attacks for centuries before being razed and gutted by the Dravanian Horde and their vile commander, Svara. As if relinquishing the citadel was not misfortune enough, the Count de Haillenarte also lost his third son and commander of the Vigil, Ser Chlodebaimt, to Svara’s snapping thralls.
The Ogre’s Belly
Thought to be the den of ogres and other unsavory beasts, the locals tell of men who sought shelter from the harsh snowstorms, only to be “swallowed” up by the cavern’s twisting paths.
The Weeping Saint
Ishgardian legend tells that this grotto was where Saint Daniffen came to mourn the maiden he loved that was murdered by a basilisk, and later vowed retribution on the fiend and its kin. The icy waters which trickle down from the mountains and form pools are said to be the saint’s tears, and they are often collected for use in the church’s purification rituals and in the production of sacramental wine.
Natalan
Intended to function as an outpost, the Ixal established Natalan to take advantage of the strong updrafts from the valley below to launch their dirigibles. As the population increased, it was gradually expanded and fortified.
Boulder Downs
Before the Calamity, Boulder Downs was a vast sloped lea littered with moraine deposited by realm-swallowing glaciers long receded. The rain of debris that accompanied the fall of Dalamud, however, transformed the landscape into a frozen wasteland pocked with gaping impact craters and peculiar dark matter formations.
Aurum Vale
The Aurum Vale is, contrary to its name, not a valley of riches, but rather a series of underground caves containing precious deposits of mythril and sulphur. However, these coveted veins are largely submerged in heated groundwater, triggering a chemical reaction which results in puddles of a highly toxic sludge known as goldbile.
Hall of the Seven Echoes
So high are its walls, were one to cry out while traversing this narrow canyon road linking Mor Dhona to the Coerthas central highlands, it is said her voice would echo seven times.
Monument Tower
Pilgrims of the Ishgardian faith often stop here to pray to the sacred stone suspended within the Fury’s Gaze—a holy place guarded by the Temple Knights stationed within the tower.
Daniffen Pass
Ishgardian scripture asserts that this winding cavern is the selfsame one traversed by Saint Daniffen long ago. As a result, pilgrims from the Holy See attempting to walk in the saint’s footsteps are a common sight.
Dzemael Darkhold
As its name suggests, the construction of the Darkhold was financed by House Dzemael, which sought to utilize existing underground caves to build a flawless fortification to defend against the Dravanian Horde. However, construction was postponed indefinitely when the house’s digging uncovered an entrance to the void, from which an army of voidsent emerged.
Whitebrim
When one peers to the north from atop Whitebrim’s jagged cliffs, she can spy the Holy See of Ishgard; yet if she were to look down, they would see naught but an endless sea of white clouds, and it is for this sight which Whitebrim was named.
Whitebrim
When one peers to the north from atop Whitebrim’s jagged cliffs, she can spy the Holy See of Ishgard; yet if she were to look down, they would see naught but an endless sea of white clouds, and it is for this sight which Whitebrim was named.
Whitebrim front
Under the command of Lord Drillemont of House Durendaire, Whitebrim Front is a relatively new outpost established for the purpose of quartering the Temple Knights tasked with retaking the Stone Vigil.
Stone vigil
This great watchtower was constructed as part of the last line of defense before the Dravanian Horde would reach the city proper. Once the responsibility of House Haillenarte, which supplied it with the most advanced cannons, airships, and other weaponry, it suffered severe damage during the Calamity, and was overrun and occupied by the Dravanians soon after.
Behemoth’s dominion
Although this valley appears to be a prime tract of land for settlement, it is a kingdom already claimed by a terrible beast which occasionally descends from the mountains to wreak havoc: the behemoth. The first sightings of the behemoth were reported after shards of Dalamud fell to the earth, leading to speculation that the monster came from within the false moon. Thus the behemoth is thought to be “Bahamut’s spawn” despite its anatomical dissimilarity to dragons.
Snowcloak
Formed in the aftermath of the Calamity, the great ice wall has long been thought an impenetrable barrier between central and western Coerthas. In truth, however, the wall is riddled with hidden tunnels, which heretics have employed as a base of operations. [1]
References
- ↑ Encyclopaedia Eorzea: Volume I, page 162
