Difference between revisions of "The Heroes' Gauntlet"
GoldenAvatar (talk | contribs) |
|||
| (29 intermediate revisions by 10 users not shown) | |||
| Line 4: | Line 4: | ||
| type = dungeon | | type = dungeon | ||
| level = 80 | | level = 80 | ||
| level-sync = 80 | |||
| ilvl = 460 | | ilvl = 460 | ||
| ilvl-sync = 500 | |||
| size = light | | size = light | ||
| time-limit = 90 | | time-limit = 90 | ||
| roulette = | | duty-finder = Dungeons (Shadowbringers) | ||
| tomestones = | | roulette = High-level Dungeons | ||
| tomestones = 50 poetics | |||
| entrance = Eulmore | | entrance = Eulmore | ||
| entrance-coordinates = 12.4, 11.2 | | entrance-coordinates = 12.4, 11.2 | ||
| req-quest = The Converging Light | | req-quest = The Converging Light | ||
| modes = duty support, trust, explorer | |||
| trust-exp = 2,331,200 | |||
| patch = 5.3 | | patch = 5.3 | ||
| release = shadowbringers | | release = shadowbringers | ||
}} | }} {{TOC limit|3}} | ||
==Duty Support== | |||
{{TOC limit|3}} | *Party member selection is available. | ||
{| {{STDT|pve align-left}} | |||
== | ! | ||
! Thancred | |||
! Urianger | |||
! Alphinaud | |||
! Alisaie | |||
! Y'shtola | |||
! Ryne | |||
|- | |||
| | |||
| [[File:DS Thancred2.png]] | |||
| [[File:DS Urianger1.png]] | |||
| [[File:DS Alphinaud2.png]] | |||
| [[File:DS Alisaie2.png]] | |||
| [[File:DS Y'shtola2.png]] | |||
| [[File:DS Ryne1.png]] | |||
|- | |||
| '''Class''' | |||
| {{GNB}} [[Gunbreaker]] | |||
| {{AST}} [[Astrologian]] | |||
| {{SCH}} Academician | |||
| {{RDM}} [[Red Mage]] | |||
| {{BLM}} Sorceress | |||
| {{ROG}} Oracle of Light | |||
|- | |||
| '''Role''' | |||
| Tank | |||
| Healer | |||
| Healer | |||
| DPS | |||
| DPS | |||
| DPS | |||
|} | |||
==Objectives== | ==Objectives== | ||
#Arrive in the Mount Argai Mines: 0/1 | |||
#Clear the Mount Argai Mines: 0/1 | |||
#Arrive in the Summer Ballroom: 0/1 | |||
#Clear the Summer Ballroom: 0/1 | |||
#Arrive in the Illuminated Plaza: 0/1 | |||
#Defeat the [[Spectral Berserker|spectral berserker]]: 0/1 | |||
==Bosses== | ==Bosses== | ||
===[[File:Aggressive difficulty | {{#ev:youtube|410iZI5KlSY|350|right|The Heroes' Gauntlet Dungeon Guide}} | ||
===[[File:Aggressive difficulty r5.png|link=]] [[Spectral Thief]]=== | |||
* '''Spectral Dream''': Tankbuster. | * '''Spectral Dream''': Tankbuster. | ||
* '''Chicken Knife''': Line AOEs from each corner targeting each party member. Trust NPCs will stack in the center. | * '''Chicken Knife''': Line AOEs from each corner targeting each party member. Trust NPCs will stack in the center. | ||
| Line 32: | Line 74: | ||
* '''Spectral Gust''': Marked AOE on all party members. Don't stack. | * '''Spectral Gust''': Marked AOE on all party members. Don't stack. | ||
===[[File:Aggressive difficulty | ===[[File:Aggressive difficulty r5.png|link=]] [[Spectral Necromancer]]=== | ||
* '''Twisted Touch''': Tankbuster. | * '''Twisted Touch''': Tankbuster. | ||
* '''Chaos Storm''': Raidwide. | * '''Chaos Storm''': Raidwide. | ||
* '''Absolute Dark II''': Giant cone AOE. Inflicts cleanseable Doom. Dodge. | * '''Absolute Dark II''': Giant cone AOE. Inflicts cleanseable {{status effect|doom}} '''[[Doom (status effect)|Doom]]'''. Dodge. | ||
* '''Necromancy''': Summons four zombies, one tethered to each party member. Summons walking zombies first, crawling zombies second, then both in succession. | * '''Necromancy''': Summons four zombies, one tethered to each party member. Summons walking zombies first, crawling zombies second, then both in succession. | ||
** Walking, light tether: These zombies auto you for a few seconds, then drop dead in preparation for Necroburst. | ** Walking, light tether: These zombies auto you for a few seconds, then drop dead in preparation for Necroburst. | ||
| Line 48: | Line 90: | ||
* '''Raging Slice''': Line AOE in front inflicting vuln stacks. Always casts several in a row -- two the first time, then three for the rest of the fight. | * '''Raging Slice''': Line AOE in front inflicting vuln stacks. Always casts several in a row -- two the first time, then three for the rest of the fight. | ||
* '''Wild Rage''': Instakill circle + knockback, leaving behind a crater. | * '''Wild Rage''': Instakill circle + knockback, leaving behind a crater. | ||
* '''Falling Rock''': Drops a rock on each party member, then uses '''Wild Anguish''' on all of you in quick succession. Stack with ''the rocks'' to survive, not each other. | * '''Falling Rock''': Drops a rock on each party member, then uses '''Wild Anguish''' on all of you in quick succession. Stack with ''the rocks'' to survive, not each other. | ||
* '''Wild Rampage''': Massive damage (almost guaranteed OHKO) and vuln stacks. Stand in the crater to avoid. | * '''Wild Rampage''': Massive damage (almost guaranteed OHKO) and vuln stacks. Stand in the crater to avoid. | ||
** '''A Bit Berserk''': Standing in the crater will inflict stacks every second or so. Becomes '''Truly Berserk''' at 8 stacks, forcing you to auto the boss and take massive self-damage with each hit. <br /> Move out of the crater as soon as '''Wild Rampage''' is complete. | |||
==Loot== | ==Loot== | ||
{{see also|Shadowless Armor|Shadowless Accessories}} | |||
===[[File:Silver Coffer (small).png|link=]] [[Spectral Thief]]=== | ===[[File:Silver Coffer (small).png|link=]] [[Spectral Thief]]=== | ||
{{Drops list|Spectral Thief}} | {{Drops list|Spectral Thief}} | ||
| Line 59: | Line 102: | ||
{{Drops list|Spectral Necromancer}} | {{Drops list|Spectral Necromancer}} | ||
===[[File: | ===[[File:Gold Coffer (small).png|link=]] Distant Ideal: [[Spectral Berserker]]=== | ||
{{Drops list|Spectral Berserker}} | {{Drops list|Spectral Berserker}} | ||
===Treasure Coffers=== | ===Treasure Coffers=== | ||
==== [[File:Bronze Coffer (small).png | ====[[File:Bronze Coffer (small).png|link=]] Treasure Coffer 1 (X: 10.9 Y: 11.5)==== | ||
{{Drops table header|show-levels=n}} | {{Drops table header|show-levels=n}} | ||
{{Drops table row|Shadowless Greaves of Fending}} | {{Drops table row|Shadowless Greaves of Fending}} | ||
{{Drops table row|Shadowless Greaves of Maiming}} | {{Drops table row|Shadowless Greaves of Maiming}} | ||
| Line 98: | Line 134: | ||
{{Table footer}} | {{Table footer}} | ||
==== [[File:Bronze Coffer (small).png | ====[[File:Bronze Coffer (small).png|link=]] Treasure Coffer 2 (X: 13.3 Y: 12.1)==== | ||
{{Drops table header|show-levels=n}} | {{Drops table header|show-levels=n}} | ||
{{Drops table row|Shadowless Mask of Fending}} | {{Drops table row|Shadowless Mask of Fending}} | ||
| Line 124: | Line 160: | ||
{{Drops table row|Shadowless Necklace of Casting}} | {{Drops table row|Shadowless Necklace of Casting}} | ||
{{Drops table row|Shadowless Necklace of Healing}} | {{Drops table row|Shadowless Necklace of Healing}} | ||
{{Table footer}} | {{Table footer}} | ||
==== [[File:Bronze Coffer (small).png | ====[[File:Bronze Coffer (small).png|link=]] Treasure Coffer 3 (X: 10.9 Y: 11.5)==== | ||
{{Drops table header|show-levels=n}} | {{Drops table header|show-levels=n}} | ||
{{Drops table row|Shadowless Coat of Fending}} | {{Drops table row|Shadowless Coat of Fending}} | ||
| Line 168: | Line 197: | ||
{{Table footer}} | {{Table footer}} | ||
==== [[File:Bronze Coffer (small).png | ====[[File:Bronze Coffer (small).png|link=]] Treasure Coffer 4 (X: 13.3 Y: 12.1)==== | ||
{{Drops table header|show-levels=n}} | {{Drops table header|show-levels=n}} | ||
{{Drops table row|Shadowless Earrings of Fending}} | {{Drops table row|Shadowless Earrings of Fending}} | ||
| Line 188: | Line 217: | ||
{{Drops table row|Piety Materia VII}} | {{Drops table row|Piety Materia VII}} | ||
{{Table footer}} | {{Table footer}} | ||
==Achievements== | |||
This duty is associated with the following [[achievements]]: | |||
{| {{STDT| mech1 sortable align-left}} | |||
{{achievement table header}} | |||
{{achievement table row|Mapping the Realm: The Heroes' Gauntlet}} | |||
|} | |||
==Images== | ==Images== | ||
===Gear Images=== | ===Gear Images=== | ||
[[File:The Heroes' Gauntlet Gear1.jpg|400px]] | [[File:The Heroes' Gauntlet Gear1.jpg|center|400px]] | ||
===Dungeon Images=== | ===Dungeon Images=== | ||
<gallery mode="packed"> | <gallery mode="packed" heights=200px> | ||
Heroes' Gauntlet intro.png | |||
File:The Heroes' Gauntlet1.jpg | File:The Heroes' Gauntlet1.jpg | ||
File:The Heroes' Gauntlet2.jpg | File:The Heroes' Gauntlet2.jpg | ||
Heroes' Gauntlet boss.png | |||
File:Spectral Necromancer render.png | |||
</gallery> | |||
===Other Images=== | |||
<gallery mode="packed" heights=300px> | |||
Heroes Gauntlet dialogue.jpg|Dungeon Dialogue Infographic (credits: [https://www.reddit.com/user/TrustInsighters TrustInsighters]) | |||
</gallery> | </gallery> | ||
==Easter Eggs== | |||
Rarely, [[Hildibrand]] may be summoned in the [[Lakeland]] area (x11.9,y12.6) of the dungeon as a spectral [[Warrior of Light]]. | |||
{{Duties nav|dungeon}} | {{Duties nav|dungeon}} | ||
Latest revision as of 12:40, 26 June 2024
The Heroes' Gauntlet
- Level
- 80 (Sync: 80)
- Item Level
- 460 (Sync: 500)
- Difficulty
- Normal
- Party size
- Light Party
4 man • 1 1
1  2
2 
- Unsyncing
- Allowed
- Time limit
- 90 minutes
- Duty Finder
- Dungeons (Shadowbringers)
- Roulette
- High-level Dungeons
- Tomestones
 50
50 - Req. quest
 The Converging Light
- Entrance
- Eulmore (X:12.4, Y:11.2)
- Modes
- Duty Support, Trust, Explorer
- Trust EXP
- 2,331,200
- Patch
- 5.3
“When yet another starshower manifests over Norvrandt, the Warriors of Darkness find themselves under attack from mysterious spectral foes, who by all appearances are being summoned forth with the selfsame magick the Crystal Exarch employs─a magick that should lie beyond even the Ascians' ken. Seeking to take the battle away from innocent civilians, the heroes flee Eulmore in an airship, setting course for the Crystarium...
— In-game description
The Heroes' Gauntlet is a level 80 dungeon introduced in patch 5.3 with Shadowbringers.
Duty Support
- Party member selection is available.
| Thancred | Urianger | Alphinaud | Alisaie | Y'shtola | Ryne | |
|---|---|---|---|---|---|---|

|

|

|

|

|

| |
| Class | ||||||
| Role | Tank | Healer | Healer | DPS | DPS | DPS |
Objectives
- Arrive in the Mount Argai Mines: 0/1
- Clear the Mount Argai Mines: 0/1
- Arrive in the Summer Ballroom: 0/1
- Clear the Summer Ballroom: 0/1
- Arrive in the Illuminated Plaza: 0/1
- Defeat the spectral berserker: 0/1
Bosses
 Spectral Thief
- Spectral Dream: Tankbuster.
- Chicken Knife: Line AOEs from each corner targeting each party member. Trust NPCs will stack in the center.
- Dash: Will teleport to marked location just before unleashing a circle AOE. Inflicts vuln stacks.
- Shadowdash: Will teleport self and shadow to two marked locations and both unleash either a circle AOE or a line AOE. AOEs are marked, just remember that he's going to move first. Inflicts vuln stacks.
- Spectral Whirlwind: Raidwide damage.
- Spectral Gust: Marked AOE on all party members. Don't stack.
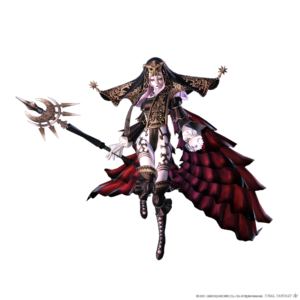
 Spectral Necromancer
- Twisted Touch: Tankbuster.
- Chaos Storm: Raidwide.
- Absolute Dark II: Giant cone AOE. Inflicts cleanseable
 Doom. Dodge.
 - Necromancy: Summons four zombies, one tethered to each party member. Summons walking zombies first, crawling zombies second, then both in succession.
- Walking, light tether: These zombies auto you for a few seconds, then drop dead in preparation for Necroburst.
- Crawling, smoky tether: These zombies will inflict Rigor Mortis when they catch you -- they slowly approach at first, but will instantly close the gap after an AOE marker if they haven't caught you by then.
- Necroburst: Zombies explode, inflicting heavy damage and (if they were summoned walking) vuln stacks.
- Pain Mire: Five giant circle AOEs that inflict vuln stacks and leave behind bleed puddles.
- Dark Deluge: Drops a circle AOE on each player that inflicts vuln stacks. Dodge.
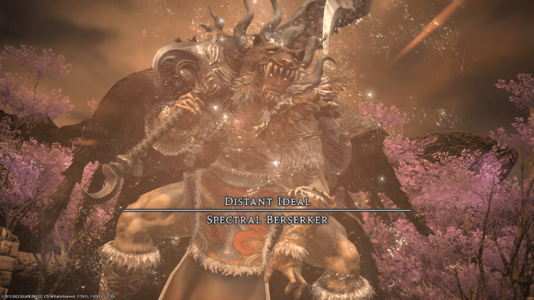
 Distant Ideal: Spectral Berserker
- Beastly Fury: Raidwide damage. First use will fill the arena's edges and corners with bleed puddles.
- Wild Anguish: Stack attack inflicting Magic Vulnerability Up for a few seconds.
- Raging Slice: Line AOE in front inflicting vuln stacks. Always casts several in a row -- two the first time, then three for the rest of the fight.
- Wild Rage: Instakill circle + knockback, leaving behind a crater.
- Falling Rock: Drops a rock on each party member, then uses Wild Anguish on all of you in quick succession. Stack with the rocks to survive, not each other.
- Wild Rampage: Massive damage (almost guaranteed OHKO) and vuln stacks. Stand in the crater to avoid.
- A Bit Berserk: Standing in the crater will inflict stacks every second or so. Becomes Truly Berserk at 8 stacks, forcing you to auto the boss and take massive self-damage with each hit.
Move out of the crater as soon as Wild Rampage is complete.
- A Bit Berserk: Standing in the crater will inflict stacks every second or so. Becomes Truly Berserk at 8 stacks, forcing you to auto the boss and take massive self-damage with each hit.
Loot
- See also: Shadowless Armor and Shadowless Accessories
 Spectral Thief
| Name | Type | Item Level | Rarity | Quantity |
|---|---|---|---|---|
| Shadowless Boots of Casting | Feet | 475 | Green | 1 |
| Shadowless Boots of Healing | Feet | 475 | Green | 1 |
| Shadowless Bracelet of Aiming | Bracelets | 475 | Green | 1 |
| Shadowless Bracelet of Casting | Bracelets | 475 | Green | 1 |
| Shadowless Bracelet of Fending | Bracelets | 475 | Green | 1 |
| Shadowless Bracelet of Healing | Bracelets | 475 | Green | 1 |
| Shadowless Bracelet of Slaying | Bracelets | 475 | Green | 1 |
| Shadowless Greaves of Fending | Feet | 475 | Green | 1 |
| Shadowless Greaves of Maiming | Feet | 475 | Green | 1 |
| Shadowless Ring of Aiming | Ring | 475 | Green | 1 |
| Shadowless Ring of Casting | Ring | 475 | Green | 1 |
| Shadowless Ring of Fending | Ring | 475 | Green | 1 |
| Shadowless Ring of Healing | Ring | 475 | Green | 1 |
| Shadowless Ring of Slaying | Ring | 475 | Green | 1 |
| Shadowless Sabatons of Aiming | Feet | 475 | Green | 1 |
| Shadowless Sabatons of Scouting | Feet | 475 | Green | 1 |
| Shadowless Sabatons of Striking | Feet | 475 | Green | 1 |
 Spectral Necromancer
 Distant Ideal: Spectral Berserker
| Name | Type | Item Level | Rarity | Quantity |
|---|---|---|---|---|
| Ephemeral Necromancer | Minion | N/A | Basic | 1 |
| Shadowless Bottoms of Casting | Legs | 475 | Green | 1 |
| Shadowless Bottoms of Healing | Legs | 475 | Green | 1 |
| Shadowless Coat of Aiming | Body | 475 | Green | 1 |
| Shadowless Coat of Fending | Body | 475 | Green | 1 |
| Shadowless Coat of Maiming | Body | 475 | Green | 1 |
| Shadowless Coat of Scouting | Body | 475 | Green | 1 |
| Shadowless Coat of Striking | Body | 475 | Green | 1 |
| Shadowless Hose of Aiming | Legs | 475 | Green | 1 |
| Shadowless Hose of Scouting | Legs | 475 | Green | 1 |
| Shadowless Hose of Striking | Legs | 475 | Green | 1 |
| Shadowless Robe of Casting | Body | 475 | Green | 1 |
| Shadowless Robe of Healing | Body | 475 | Green | 1 |
| Shadowless Skirt of Fending | Legs | 475 | Green | 1 |
| Shadowless Trousers of Maiming | Legs | 475 | Green | 1 |
| Where All Roads Lead Orchestrion Roll | Orchestrion Roll | N/A | Basic | 1 |
Treasure Coffers
 Treasure Coffer 1 (X: 10.9 Y: 11.5)
 Treasure Coffer 2 (X: 13.3 Y: 12.1)
 Treasure Coffer 3 (X: 10.9 Y: 11.5)
 Treasure Coffer 4 (X: 13.3 Y: 12.1)
| Name | Type | Item Level | Rarity | Quantity |
|---|---|---|---|---|
| Shadowless Earrings of Fending | Earrings | 475 | Green | 1 |
| Shadowless Earrings of Slaying | Earrings | 475 | Green | 1 |
| Shadowless Earrings of Aiming | Earrings | 475 | Green | 1 |
| Shadowless Earrings of Casting | Earrings | 475 | Green | 1 |
| Shadowless Earrings of Healing | Earrings | 475 | Green | 1 |
| Shadowless Necklace of Fending | Necklace | 475 | Green | 1 |
| Shadowless Necklace of Slaying | Necklace | 475 | Green | 1 |
| Shadowless Necklace of Aiming | Necklace | 475 | Green | 1 |
| Shadowless Necklace of Casting | Necklace | 475 | Green | 1 |
| Shadowless Necklace of Healing | Necklace | 475 | Green | 1 |
| Savage Aim Materia VII | Materia | 420 | Basic | 1 |
| Savage Might Materia VII | Materia | 420 | Basic | 1 |
| Heavens' Eye Materia VII | Materia | 420 | Basic | 1 |
| Quickarm Materia VII | Materia | 420 | Basic | 1 |
| Quicktongue Materia VII | Materia | 420 | Basic | 1 |
| Battledance Materia VII | Materia | 420 | Basic | 1 |
| Piety Materia VII | Materia | 420 | Basic | 1 |
Achievements
This duty is associated with the following achievements:
| Name | Points | Task | Reward | Patch |
|---|---|---|---|---|
| Mapping the Realm: The Heroes' Gauntlet | 10 | Discover every location within the Heroes' Gauntlet. | - | 5.45 |
Images
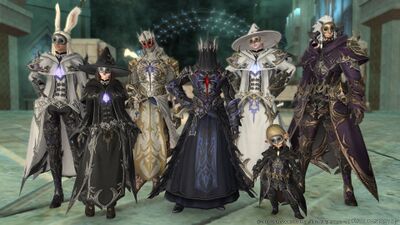
Gear Images
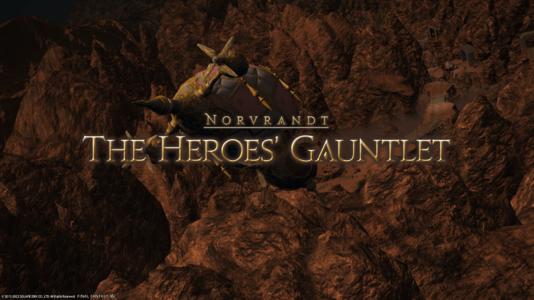
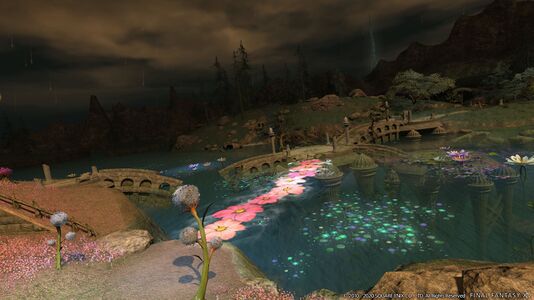
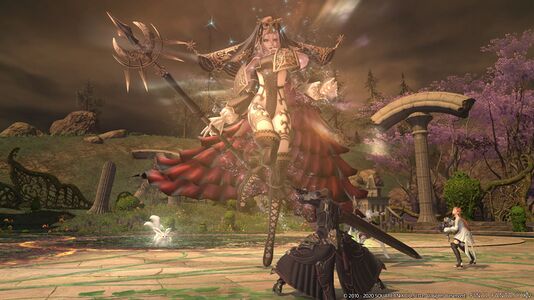
Dungeon Images
Other Images
Dungeon Dialogue Infographic (credits: TrustInsighters)
Easter Eggs
Rarely, Hildibrand may be summoned in the Lakeland area (x11.9,y12.6) of the dungeon as a spectral Warrior of Light.

