Difference between revisions of "Halatali"
(→Armour) |
|||
| (52 intermediate revisions by 19 users not shown) | |||
| Line 1: | Line 1: | ||
{{ | {{other uses|the [[Duty_Roulette#Duty_Roulette:_Leveling|Leveling]] [[dungeon]]|the optional level 50 [[dungeon]]|Halatali (Hard)}} | ||
| | {{Duty infobox | ||
| description = Originally a holy place for the first Lalafell arrived in Eorzea, the twisting labyrinth of natural caverns which wind through this massive mesa were transformed by the Pugilist's Guild into a series of training pits, animal pens and holding cells to accommodate the ever-growing popularity of Ul'dah's coliseum. After the Calamity, however the location was abandoned - those remaining in the pens, left for dead. Not all of them, however, met that fate and now the tunnels are rife with those who survived... as well as the tormented spirits of those who did not. | |||
| type = dungeon | |||
| level = 20 | |||
| ilvl = | |||
| level-sync = 23 | |||
| size = light | |||
| time-limit = 90 | |||
| duty-finder = Dungeons (A Realm Reborn) | |||
| roulette = Leveling | |||
| entrance = Eastern Thanalan | |||
| entrance-coordinates = 14.7, 30.2 | |||
| | | req-quest = Hallo Halatali | ||
| patch = 2.0 | |||
| release = A Realm Reborn | |||
| modes = duty support, explorer | |||
}} [[Duty Support]] for this dungeon was added in [[patch 7.1]], along with changes to the bosses. {{TOC limit|3}} | |||
==Duty Support== | |||
{{ | {| {{STDT|pve align-left}} | ||
! | |||
! Scion Marauder | |||
! Scion Conjurer | |||
! Scion Thaumaturge | |||
! Scion Lancer | |||
|- | |||
| | |||
| [[File:DS Marauder2.png]] | |||
| [[File:DS Conjurer2.png]] | |||
| [[File:DS Thaumaturge2.png]] | |||
| [[File:DS Lancer2.png]] | |||
|- | |||
| '''Class''' | |||
| {{MRD}} [[Marauder]] | |||
| {{CNJ}} [[Conjurer]] | |||
| {{THM}} [[Thaumaturge]] | |||
| {{LNC}} [[Lancer]] | |||
|- | |||
| '''Role''' | |||
| Tank | |||
| Healer | |||
| DPS | |||
| DPS | |||
|} | |||
== | ==Objectives== | ||
#Clear the Hall of the Cesti : 0/1 | |||
#Activate the chain winch : 0/5 | |||
#Clear the Hall of the Secutores: 0/1 | |||
#Defeat [[Tangata]]: 0/1 | |||
==== | ==Walkthrough== | ||
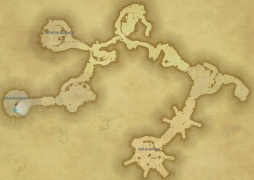
For the path, start by going south towards the Hall of the Cesti for the first boss. Use the Aetherial Flow to proceed to the next section. | |||
Pull the Chain Winches as all 5 will need to be pulled to gain access to the Hall of the Secutores. The fourth one will spawn a gas bomb that will self destruct and kill anyone standing in the AOE - simply stay out of the area and let it go off safely. As the 5th Winch is pulled the door should open. Go down into the pit, kill the boss, and use another Aetherial Flow. | |||
Most groups will simply turn right and go through the Ludus Door immediately, as it is not required to kill the Pit Peiste. This is where the final boss is located. | |||
==Bosses== | |||
{{#ev:youtube|JEMEmO3ahwY|325|right|Halatali Guide}} | |||
===[[File:Aggressive difficulty r4.png|link=]] [[Firemane]]=== | |||
* '''Fire II:''' Circular AoE. | |||
* '''Fireflow:''' The boss will cast two sets of 4 cones in cardinal directions. After the first set goes off, move into it to avoid the second set. | |||
* '''Burning Bolt:''' Tankbuster. | |||
== | ===[[File:Aggressive difficulty r4.png|link=]] [[Thunderclap Guivre]]=== | ||
* '''Electrify:''' Circular AoE. | |||
* '''Levinfang:''' Tankbuster. | |||
* '''Hydroelectric Shock:''' {{combat message|The water crackles with electricity!}} The boss will start charging electricity, giving a purple glow to the entire pool of water. Retreat to the dirt slopes on the edge of the arena until the attack goes off. Ranged party members can still hit the boss while standing on the slope. | |||
{{ | |||
=== | ===[[File:Aggressive difficulty r2.png|link=]] [[Pit Peiste]]=== | ||
Pit Peiste is a reptilian optional boss with Rudius Beaks as adds. He is spawned when any player approaches the treasure chest at the open center of a stone circular area. It is not required to complete the dungeon and so is often skipped. | |||
=== | ===[[File:Aggressive difficulty r6.png|link=]] [[Tangata]]=== | ||
* '''Straight Punch:''' Tankbuster. | |||
* '''Burning Ward:''' {{combat message|Tangata calls upon spirits of flame!}} At around 80% health, the boss gains a fire shield that makes it invulnerable. Two torches will light up and start spawning fire wisps, which will approach the boss, and will explode into room-wide AoEs if they reach it. Kill the wisps to disable the shield, which will give the message: {{combat message|Tangata's fiery ward has vanished!|color=blue}}. This move is repeated at about 60% HP. | |||
* '''Plain Pound:''' Multi-stage AoE that starts as a circle, then two concentric donuts. Stand outside the initial circle, then when it goes off, move into it to avoid the donuts. | |||
* '''Firewater:''' Circular AoE. | |||
==Bestiary== | ==Bestiary== | ||
{| width=75% | {| width=75% | ||
|width=50%| | |width=50%| | ||
{| | {| {{STDT|sortable item align-left}} | ||
|- | |- | ||
!width=25%|Name | !width=25%|Name | ||
| Line 71: | Line 94: | ||
| [[Firemane]] || | | [[Firemane]] || | ||
|- | |- | ||
| [[Fire Sprite]] || | | [[Fire Sprite]] || | ||
|- | |- | ||
| [[Gas Bomb]] || | | | [[Gas Bomb]] || {{Action icon|Self-destruct}} | ||
|- | |- | ||
| [[Heckler Imp]] || | | [[Heckler Imp]] || | ||
|} | |} | ||
|width=50% valign=top| | |width=50% valign=top| | ||
{| | {| {{STDT|sortable item align-left}} | ||
|- | |- | ||
!width=25%|Name | !width=25%|Name | ||
!width=75%|Drops | !width=75%|Drops | ||
|- | |- | ||
| [[Lightning Sprite]] || | | [[Lightning Sprite]] || | ||
|- | |- | ||
| [[Noxius]] || | | [[Noxius]] || | ||
| Line 101: | Line 124: | ||
==Loot== | ==Loot== | ||
=== | {{see also|Doctore's Weapons|Doctore's Armor|Doctore's Accessories}} | ||
{| | ===[[File:Silver Coffer (small).png|link=]] [[Firemane]]=== | ||
| | * 9,194 {{exp}} [[Experience Points]] | ||
{{Drops list|Firemane}} | |||
===[[File:Silver Coffer (small).png|link=]] [[Thunderclap Guivre]]=== | |||
* 16,200 {{exp}} [[Experience Points]] | |||
{{Drops list|Thunderclap Guivre}} | |||
===[[File:Gold Coffer (small).png|link=]] [[Tangata]]=== | |||
* 20,827 {{exp}} [[Experience Points]] | |||
| | {{Drops list|Tangata}} | ||
|[[Aetherial Coral Ring]] || [[File: | |||
|} | ===Treasure Coffers=== | ||
'' | Not every chest appears on every run. Only 4 chests will appear total. All possible chests are listed. | ||
====[[File:Bronze Coffer (small).png|link=]] Treasure Coffer 1 (X: 14.3 Y: 9.9)==== | |||
{{Drops table header}} | |||
{{Drops table row|Gladiator's Doctore Arms (Lv. 20)}} | |||
{{Drops table row|Doctore's Bill}} | |||
{{Drops table row|Doctore's Fork}} | |||
{{Drops table row|Doctore's Hora}} | |||
{{Drops table row|Doctore's Stilettos}} | |||
{{Drops table row|Doctore's Armored Bow}} | |||
{{Drops table row|Doctore's Cudgel}} | |||
{{Drops table row|Doctore's Grimoire}} | |||
{{Drops table row|Doctore's Crook}} | |||
{{Table footer}} | |||
====[[File:Bronze Coffer (small).png|link=]] Treasure Coffer 2 (X: 12.7 Y: 9.0)==== | |||
{{Drops table header}} | |||
{{Drops table row|Doctore's Sollerets}} | |||
{{Drops table row|Doctore's Caligae}} | |||
{{Drops table row|Doctore's Crakows}} | |||
{{Drops table row|Aetherial Brass Ear Cuffs}} | |||
{{Drops table row|Aetherial Coral Armillae}} | |||
{{Drops table row|Aetherial Coral Ring}} | |||
{{Table footer}} | |||
====[[File:Bronze Coffer (small).png|link=]] Treasure Coffer 3 (X: 12.0 Y: 9.5)==== | |||
{{Drops table header}} | |||
{{Drops table row|Doctore's Chain Coif}} | |||
{{Drops table row|Coeurl's Eye}} | |||
{{Drops table row|Doctore's Hat}} | |||
{{Drops table row|Doctore's Vambraces}} | |||
{{Drops table row|Doctore's Bracers}} | |||
{{Drops table row|Doctore's Ringbands}} | |||
{{Table footer}} | |||
====[[File:Bronze Coffer (small).png|link=]] Treasure Coffer 4 (X: 11.6 Y: 7.4)==== | |||
{{Drops table header}} | |||
{{Drops table row|Doctore's Chainmail}} | |||
{{Drops table row|Doctore's Harness}} | |||
{{Drops table row|Doctore's Robe}} | |||
{{Drops table row|Doctore's Trousers}} | |||
{{Drops table row|Doctore's Subligar}} | |||
{{Drops table row|Doctore's Tights}} | |||
{{Table footer}} | |||
====[[File:Bronze Coffer (small).png|link=]] Treasure Coffer 5 (X: 10.4 Y: 8.6)==== | |||
{{Drops table header}} | |||
{{Drops table row|Gladiator's Doctore Arms (Lv. 20)}} | |||
{{Drops table row|Doctore's Bill}} | |||
{{Drops table row|Doctore's Fork}} | |||
{{Drops table row|Doctore's Hora}} | |||
{{Drops table row|Doctore's Stilettos}} | |||
{{Drops table row|Doctore's Armored Bow}} | |||
{{Drops table row|Doctore's Cudgel}} | |||
{{Drops table row|Doctore's Grimoire}} | |||
{{Drops table row|Doctore's Crook}} | |||
{{Table footer}} | |||
====[[File:Bronze Coffer (small).png|link=]] Treasure Coffer 6 (X: 9.5 Y: 8.9)==== | |||
{{Drops table header}} | |||
{{Drops table row|Aetherial Brass Ear Cuffs}} | |||
{{Drops table row|Aetherial Coral Armillae}} | |||
{{Drops table row|Aetherial Coral Ring}} | |||
{{Table footer}} | |||
====[[File:Bronze Coffer (small).png|link=]] Treasure Coffer 7 (X: 11.8 Y: 8.5)==== | |||
{{Drops table header}} | |||
{{Drops table row|Doctore's Chainmail}} | |||
{{Drops table row|Doctore's Harness}} | |||
{{Drops table row|Doctore's Robe}} | |||
{{Drops table row|Doctore's Trousers}} | |||
{{Drops table row|Doctore's Subligar}} | |||
{{Drops table row|Doctore's Tights}} | |||
{{Table footer}} | |||
====[[File:Bronze Coffer (small).png|link=]] Treasure Coffer 8 (X: 8.7 Y: 11.2)==== | |||
{{Drops table header}} | |||
{{Drops table row|Doctore's Sollerets}} | |||
{{Drops table row|Doctore's Caligae}} | |||
{{Drops table row|Doctore's Crakows}} | |||
{{Drops table row|Aetherial Brass Ear Cuffs}} | |||
{{Drops table row|Aetherial Coral Armillae}} | |||
{{Drops table row|Aetherial Coral Ring}} | |||
{{Table footer}} | |||
=== | ==Achievements== | ||
This duty is associated with the following achievements: | |||
{| {{STDT| mech1 sortable align-left}} | |||
{| | {{achievement table header}} | ||
{{achievement table row|Mapping the Realm: Halatali}} | |||
| | |||
|} | |} | ||
==Images== | ==Images== | ||
<gallery | <gallery mode=packed> | ||
File:Halatali title.jpg | |||
halatali1.jpg | halatali1.jpg | ||
halatali2.jpg | halatali2.jpg | ||
halatali map.jpg | File:Halatali3.jpg | ||
halatali map.jpg|Map | |||
</gallery> | </gallery> | ||
{{ | ==Lore== | ||
===Given To The Beasts=== | |||
Established by the Coliseum Foundation as a training ground for its gladiators, Halatali was home to a menagerie of fighting beasts. In the chaos that followed the Calamity, however, the facility was abandoned and the creatures were left to starve. Five years later, in a bid to resume operations, a team of builders was sent in to survey the premises. But instead of carcasses littering the floors, they found feral beasts prowling the halls, grown unnaturally strong and savage through a ruthless struggle for survival. | |||
Fearless adventurers were called in to eliminate the creatures, and following extensive renovations, Halatali was declared fit for purpose once more. Reporting on its restoration, Ul’dah’s leading paper, the Mythril Eye, hailed Halatali as one of the great post-Calamity revival stories. | |||
===Tangata=== | |||
While the sultanate ordinarily prohibits the commercial use of voidsent, a generous donation made to the Order of Nald’thal secured an exception for this ogre, which was put to fighting in the Coliseum. It must be noted, however, that the specimen was captured in its natural habitat in Coerthas and not summoned via forbidden magicks. | |||
===Adventurous Opposition=== | |||
With the danger purged and renovations completed, Halatali’s doors were thrown open for the first time since the Calamity, its halls echoing, once more with the familiar clang of steel and the roar of beasts. Seeking to further hone its gladiators' sword arms, the Coliseum Foundation reached out to adventurers for sterner opposition, full many of whom eagerly answered the call, taking to the field in mock battles. Throwing its doors open wider, Halatali later came to host spectacles for the public, most notably the final bout of the prestigious Mythril Cup. | |||
===Narasimha=== | |||
A fearsome manticore commanded by Mumuepo, the disgraced former high priest of the Order of Nald’thal, who took to the bloodsands in order to make bail on corruption charges. No coin is spared in ensuring the battle-fitness and ferocity of this main attraction. To bind such a vicious creature to his will, the thaumaturge is said to have employed an ancient | |||
art of enthrallment whose secrets he parsed from an old Belah'dian tome. | |||
{{Duties nav|dungeon}} | |||
Latest revision as of 04:59, 23 November 2024
 This article is about the Leveling dungeon. For the optional level 50 dungeon, see Halatali (Hard).
Halatali
- Level
- 20 (Sync: 23)
- Difficulty
- Normal
- Party size
- Light Party
4 man • 1 1
1  2
2 
- Unsyncing
- Allowed
- Time limit
- 90 minutes
- Duty Finder
- Dungeons (A Realm Reborn)
- Roulette
- Leveling
- Req. quest
 Hallo Halatali
- Entrance
- Eastern Thanalan (X:14.7, Y:30.2)
- Modes
- Duty Support, Explorer
- Patch
- 2.0
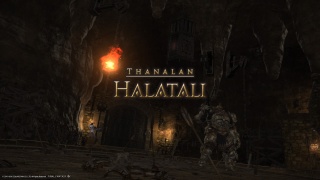
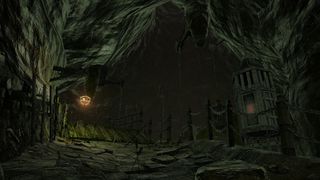
“Originally a holy place for the first Lalafell arrived in Eorzea, the twisting labyrinth of natural caverns which wind through this massive mesa were transformed by the Pugilist's Guild into a series of training pits, animal pens and holding cells to accommodate the ever-growing popularity of Ul'dah's coliseum. After the Calamity, however the location was abandoned - those remaining in the pens, left for dead. Not all of them, however, met that fate and now the tunnels are rife with those who survived... as well as the tormented spirits of those who did not.
— In-game description
Halatali is a level 20 dungeon introduced in patch 2.0. Duty Support for this dungeon was added in patch 7.1, along with changes to the bosses.
Duty Support
| Scion Marauder | Scion Conjurer | Scion Thaumaturge | Scion Lancer | |
|---|---|---|---|---|

|

|

|

| |
| Class | ||||
| Role | Tank | Healer | DPS | DPS |
Objectives
- Clear the Hall of the Cesti : 0/1
- Activate the chain winch : 0/5
- Clear the Hall of the Secutores: 0/1
- Defeat Tangata: 0/1
Walkthrough
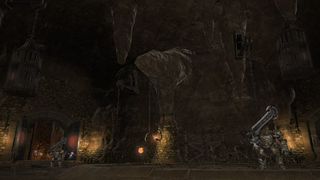
For the path, start by going south towards the Hall of the Cesti for the first boss. Use the Aetherial Flow to proceed to the next section.
Pull the Chain Winches as all 5 will need to be pulled to gain access to the Hall of the Secutores. The fourth one will spawn a gas bomb that will self destruct and kill anyone standing in the AOE - simply stay out of the area and let it go off safely. As the 5th Winch is pulled the door should open. Go down into the pit, kill the boss, and use another Aetherial Flow.
Most groups will simply turn right and go through the Ludus Door immediately, as it is not required to kill the Pit Peiste. This is where the final boss is located.
Bosses
 Firemane
- Fire II: Circular AoE.
- Fireflow: The boss will cast two sets of 4 cones in cardinal directions. After the first set goes off, move into it to avoid the second set.
- Burning Bolt: Tankbuster.
 Thunderclap Guivre
- Electrify: Circular AoE.
- Levinfang: Tankbuster.
- Hydroelectric Shock: The water crackles with electricity! The boss will start charging electricity, giving a purple glow to the entire pool of water. Retreat to the dirt slopes on the edge of the arena until the attack goes off. Ranged party members can still hit the boss while standing on the slope.
 Pit Peiste
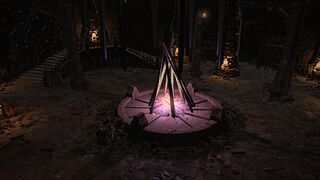
Pit Peiste is a reptilian optional boss with Rudius Beaks as adds. He is spawned when any player approaches the treasure chest at the open center of a stone circular area. It is not required to complete the dungeon and so is often skipped.
 Tangata
- Straight Punch: Tankbuster.
- Burning Ward: Tangata calls upon spirits of flame! At around 80% health, the boss gains a fire shield that makes it invulnerable. Two torches will light up and start spawning fire wisps, which will approach the boss, and will explode into room-wide AoEs if they reach it. Kill the wisps to disable the shield, which will give the message: Tangata's fiery ward has vanished!. This move is repeated at about 60% HP.
- Plain Pound: Multi-stage AoE that starts as a circle, then two concentric donuts. Stand outside the initial circle, then when it goes off, move into it to avoid the donuts.
- Firewater: Circular AoE.
Bestiary
|
|
Loot
- See also: Doctore's Weapons, Doctore's Armor and Doctore's Accessories
 Firemane
- 9,194
 Experience Points
| Name | Type | Item Level | Rarity | Quantity |
|---|---|---|---|---|
| Coeurl's Eye | Head | 22 | Green | 1 |
| Doctore's Bracers | Hands | 22 | Green | 1 |
| Doctore's Chain Coif | Head | 22 | Green | 1 |
| Doctore's Hat | Head | 22 | Green | 1 |
| Doctore's Ringbands | Hands | 22 | Green | 1 |
| Doctore's Vambraces | Hands | 22 | Green | 1 |
 Thunderclap Guivre
- 16,200
 Experience Points
| Name | Type | Item Level | Rarity | Quantity |
|---|---|---|---|---|
| Coeurl's Eye | Head | 22 | Green | 1 |
| Doctore's Bracers | Hands | 22 | Green | 1 |
| Doctore's Chain Coif | Head | 22 | Green | 1 |
| Doctore's Chainmail | Body | 22 | Green | 1 |
| Doctore's Harness | Body | 22 | Green | 1 |
| Doctore's Hat | Head | 22 | Green | 1 |
| Doctore's Ringbands | Hands | 22 | Green | 1 |
| Doctore's Robe | Body | 22 | Green | 1 |
| Doctore's Subligar | Legs | 22 | Green | 1 |
| Doctore's Tights | Legs | 22 | Green | 1 |
| Doctore's Trousers | Legs | 22 | Green | 1 |
| Doctore's Vambraces | Hands | 22 | Green | 1 |
 Tangata
- 20,827
 Experience Points
| Name | Type | Item Level | Rarity | Quantity |
|---|---|---|---|---|
| Aetherial Brass Ear Cuffs | Earrings | 20 | Aetherial | 1 |
| Aetherial Coral Armillae | Bracelets | 19 | Aetherial | 1 |
| Aetherial Coral Ring | Ring | 19 | Aetherial | 1 |
| Doctore's Armored Bow | Archer's Arm | 22 | Green | 1 |
| Doctore's Bill | Marauder's Arm | 22 | Green | 1 |
| Doctore's Buckler | Shield | 22 | Green | 1 |
| Doctore's Crook | Two-handed Conjurer's Arm | 22 | Green | 1 |
| Doctore's Cudgel | One-handed Thaumaturge's Arm | 22 | Green | 1 |
| Doctore's Fork | Lancer's Arm | 22 | Green | 1 |
| Doctore's Grimoire | Arcanist's Grimoire | 22 | Green | 1 |
| Doctore's Hora | Pugilist's Arm | 22 | Green | 1 |
| Doctore's Scimitar | Gladiator's Arm | 22 | Green | 1 |
| Doctore's Stilettos | Rogue's Arm | 22 | Green | 1 |
| The Ludus Orchestrion Roll | Orchestrion Roll | N/A | Basic | 1 |
Treasure Coffers
Not every chest appears on every run. Only 4 chests will appear total. All possible chests are listed.
 Treasure Coffer 1 (X: 14.3 Y: 9.9)
| Name | Type | Item Level | Rarity | Quantity |
|---|---|---|---|---|
| Gladiator's Doctore Arms (Lv. 20) | Other | N/A | Green | 1 |
| Doctore's Bill | Marauder's Arm | 22 | Green | 1 |
| Doctore's Fork | Lancer's Arm | 22 | Green | 1 |
| Doctore's Hora | Pugilist's Arm | 22 | Green | 1 |
| Doctore's Stilettos | Rogue's Arm | 22 | Green | 1 |
| Doctore's Armored Bow | Archer's Arm | 22 | Green | 1 |
| Doctore's Cudgel | One-handed Thaumaturge's Arm | 22 | Green | 1 |
| Doctore's Grimoire | Arcanist's Grimoire | 22 | Green | 1 |
| Doctore's Crook | Two-handed Conjurer's Arm | 22 | Green | 1 |
 Treasure Coffer 2 (X: 12.7 Y: 9.0)
| Name | Type | Item Level | Rarity | Quantity |
|---|---|---|---|---|
| Doctore's Sollerets | Feet | 22 | Green | 1 |
| Doctore's Caligae | Feet | 22 | Green | 1 |
| Doctore's Crakows | Feet | 22 | Green | 1 |
| Aetherial Brass Ear Cuffs | Earrings | 20 | Aetherial | 1 |
| Aetherial Coral Armillae | Bracelets | 19 | Aetherial | 1 |
| Aetherial Coral Ring | Ring | 19 | Aetherial | 1 |
 Treasure Coffer 3 (X: 12.0 Y: 9.5)
| Name | Type | Item Level | Rarity | Quantity |
|---|---|---|---|---|
| Doctore's Chain Coif | Head | 22 | Green | 1 |
| Coeurl's Eye | Head | 22 | Green | 1 |
| Doctore's Hat | Head | 22 | Green | 1 |
| Doctore's Vambraces | Hands | 22 | Green | 1 |
| Doctore's Bracers | Hands | 22 | Green | 1 |
| Doctore's Ringbands | Hands | 22 | Green | 1 |
 Treasure Coffer 4 (X: 11.6 Y: 7.4)
| Name | Type | Item Level | Rarity | Quantity |
|---|---|---|---|---|
| Doctore's Chainmail | Body | 22 | Green | 1 |
| Doctore's Harness | Body | 22 | Green | 1 |
| Doctore's Robe | Body | 22 | Green | 1 |
| Doctore's Trousers | Legs | 22 | Green | 1 |
| Doctore's Subligar | Legs | 22 | Green | 1 |
| Doctore's Tights | Legs | 22 | Green | 1 |
 Treasure Coffer 5 (X: 10.4 Y: 8.6)
| Name | Type | Item Level | Rarity | Quantity |
|---|---|---|---|---|
| Gladiator's Doctore Arms (Lv. 20) | Other | N/A | Green | 1 |
| Doctore's Bill | Marauder's Arm | 22 | Green | 1 |
| Doctore's Fork | Lancer's Arm | 22 | Green | 1 |
| Doctore's Hora | Pugilist's Arm | 22 | Green | 1 |
| Doctore's Stilettos | Rogue's Arm | 22 | Green | 1 |
| Doctore's Armored Bow | Archer's Arm | 22 | Green | 1 |
| Doctore's Cudgel | One-handed Thaumaturge's Arm | 22 | Green | 1 |
| Doctore's Grimoire | Arcanist's Grimoire | 22 | Green | 1 |
| Doctore's Crook | Two-handed Conjurer's Arm | 22 | Green | 1 |
 Treasure Coffer 6 (X: 9.5 Y: 8.9)
| Name | Type | Item Level | Rarity | Quantity |
|---|---|---|---|---|
| Aetherial Brass Ear Cuffs | Earrings | 20 | Aetherial | 1 |
| Aetherial Coral Armillae | Bracelets | 19 | Aetherial | 1 |
| Aetherial Coral Ring | Ring | 19 | Aetherial | 1 |
 Treasure Coffer 7 (X: 11.8 Y: 8.5)
| Name | Type | Item Level | Rarity | Quantity |
|---|---|---|---|---|
| Doctore's Chainmail | Body | 22 | Green | 1 |
| Doctore's Harness | Body | 22 | Green | 1 |
| Doctore's Robe | Body | 22 | Green | 1 |
| Doctore's Trousers | Legs | 22 | Green | 1 |
| Doctore's Subligar | Legs | 22 | Green | 1 |
| Doctore's Tights | Legs | 22 | Green | 1 |
 Treasure Coffer 8 (X: 8.7 Y: 11.2)
| Name | Type | Item Level | Rarity | Quantity |
|---|---|---|---|---|
| Doctore's Sollerets | Feet | 22 | Green | 1 |
| Doctore's Caligae | Feet | 22 | Green | 1 |
| Doctore's Crakows | Feet | 22 | Green | 1 |
| Aetherial Brass Ear Cuffs | Earrings | 20 | Aetherial | 1 |
| Aetherial Coral Armillae | Bracelets | 19 | Aetherial | 1 |
| Aetherial Coral Ring | Ring | 19 | Aetherial | 1 |
Achievements
This duty is associated with the following achievements:
| Name | Points | Task | Reward | Patch |
|---|---|---|---|---|
| Mapping the Realm: Halatali | 10 | Discover every location within Halatali. | - | 2.0 |
Images
Lore
Given To The Beasts
Established by the Coliseum Foundation as a training ground for its gladiators, Halatali was home to a menagerie of fighting beasts. In the chaos that followed the Calamity, however, the facility was abandoned and the creatures were left to starve. Five years later, in a bid to resume operations, a team of builders was sent in to survey the premises. But instead of carcasses littering the floors, they found feral beasts prowling the halls, grown unnaturally strong and savage through a ruthless struggle for survival.
Fearless adventurers were called in to eliminate the creatures, and following extensive renovations, Halatali was declared fit for purpose once more. Reporting on its restoration, Ul’dah’s leading paper, the Mythril Eye, hailed Halatali as one of the great post-Calamity revival stories.
Tangata
While the sultanate ordinarily prohibits the commercial use of voidsent, a generous donation made to the Order of Nald’thal secured an exception for this ogre, which was put to fighting in the Coliseum. It must be noted, however, that the specimen was captured in its natural habitat in Coerthas and not summoned via forbidden magicks.
Adventurous Opposition
With the danger purged and renovations completed, Halatali’s doors were thrown open for the first time since the Calamity, its halls echoing, once more with the familiar clang of steel and the roar of beasts. Seeking to further hone its gladiators' sword arms, the Coliseum Foundation reached out to adventurers for sterner opposition, full many of whom eagerly answered the call, taking to the field in mock battles. Throwing its doors open wider, Halatali later came to host spectacles for the public, most notably the final bout of the prestigious Mythril Cup.
Narasimha
A fearsome manticore commanded by Mumuepo, the disgraced former high priest of the Order of Nald’thal, who took to the bloodsands in order to make bail on corruption charges. No coin is spared in ensuring the battle-fitness and ferocity of this main attraction. To bind such a vicious creature to his will, the thaumaturge is said to have employed an ancient art of enthrallment whose secrets he parsed from an old Belah'dian tome.

