Difference between revisions of "Paglth'an"
Freedom4556 (talk | contribs) (→Loot) |
|||
| (12 intermediate revisions by 2 users not shown) | |||
| Line 8: | Line 8: | ||
| size = light | | size = light | ||
| time-limit = 90 | | time-limit = 90 | ||
| roulette = | | duty-finder = Dungeons (Shadowbringers) | ||
| roulette = High-level Dungeons | |||
| tomestones = 100 poetics | | tomestones = 100 poetics | ||
| entrance = Ul'dah - Steps of Nald | | entrance = Ul'dah - Steps of Nald | ||
| entrance-coordinates = 10.7, 11.4 | | entrance-coordinates = 10.7, 11.4 | ||
| req-quest = The Flames of War | | req-quest = The Flames of War | ||
| modes = duty support, trust, explorer | |||
| trust-exp = 2,404,400 | |||
| patch = 5.5 | | patch = 5.5 | ||
| release = shadowbringers | | release = shadowbringers | ||
}} | }} {{TOC limit|3}} | ||
{{TOC limit|3}} | ==Duty Support== | ||
== | *Party member selection is available. | ||
{| {{STDT|pve align-left}} | |||
! | |||
! G'raha Tia | |||
! Thancred | |||
! Urianger | |||
! Alphinaud | |||
! Alisaie | |||
! Y'shtola | |||
|- | |||
| | |||
| [[File:DS G'raha Tia1.png]] | |||
| [[File:DS Thancred2.png]] | |||
| [[File:DS Urianger1.png]] | |||
| [[File:DS Alphinaud1.png]] | |||
| [[File:DS Alisaie1.png]] | |||
| [[File:DS Y'shtola2.png]] | |||
|- | |||
| '''Class''' | |||
| {{PLD}} {{WHM}} {{BLM}} All-Rounder | |||
| {{GNB}} [[Gunbreaker]] | |||
| {{AST}} [[Astrologian]] | |||
| {{SCH}} Academician | |||
| {{RDM}} [[Red Mage]] | |||
| {{BLM}} Sorceress | |||
|- | |||
| '''Role''' | |||
| Any | |||
| Tank | |||
| Healer | |||
| Healer | |||
| DPS | |||
| DPS | |||
|} | |||
==Objectives== | ==Objectives== | ||
#Arrive at the gathering ring: 0/1 | |||
#Clear the gathering ring: 0/1 | |||
#Arrive at the scalekin pen: 0/1 | |||
#Clear the scalekin pen: 0/1 | |||
#Arrive at Sunseat: 0/1 | |||
#Defeat [[Lunar Bahamut]]: 0/1 | |||
==Bosses== | ==Bosses== | ||
{{#ev:youtube|apFP4v_zcCg|350|right|Video guide by MTQcapture}} | {{#ev:youtube|apFP4v_zcCg|350|right|Video guide by MTQcapture}} | ||
===[[File:Aggressive difficulty | ===[[File:Aggressive difficulty r5.png|link=]] [[Amhuluk]]=== | ||
* '''Critical Rip''': Tankbuster. | * '''Critical Rip''': Tankbuster. | ||
* '''Lightning Bolt''': Large targeted circle AoEs on all players with additional ones on random lampposts on the edge of the arena. Players must pass their AoE off to a lamppost that doesn't already have an AoE. Deals moderate damage and inflicts a stack of '''Lightning Vulnerability Up''' to players hit. | * '''Lightning Bolt''': Large targeted circle AoEs on all players with additional ones on random lampposts on the edge of the arena. Players must pass their AoE off to a lamppost that doesn't already have an AoE. Deals moderate damage and inflicts a stack of '''Lightning Vulnerability Up''' to players hit. | ||
| Line 38: | Line 73: | ||
* '''Spike Flail''': Narrow cone from Amhuluk's rear. Used immediately after '''Wide Blaster''', with no time to avoid. | * '''Spike Flail''': Narrow cone from Amhuluk's rear. Used immediately after '''Wide Blaster''', with no time to avoid. | ||
===[[File:Aggressive difficulty | ===[[File:Aggressive difficulty r5.png|link=]] [[Magitek Fortress]]=== | ||
* The main target is the '''Magitek Core''', guarded by a force field. To get to the Core, the party must defeat waves of adds. | * The main target is the '''Magitek Core''', guarded by a force field. To get to the Core, the party must defeat waves of adds. | ||
* While fighting the adds, two of the three cannons on the fortress will charge up a blue energy and eventually blast a line ahead of it, dealing damage and inflicting a stack of '''Vulnerability Up'''. | * While fighting the adds, two of the three cannons on the fortress will charge up a blue energy and eventually blast a line ahead of it, dealing damage and inflicting a stack of {{status effect|vulnerability up}} '''[[Vulnerability Up]]'''. | ||
** The first wave consists of three '''Tempered Imperials''' and two '''Telotek Predators'''. After a few moments, six more Tempered Imperials will emerge from the sides of the fortress. | ** The first wave consists of three '''Tempered Imperials''' and two '''Telotek Predators'''. After a few moments, six more Tempered Imperials will emerge from the sides of the fortress. | ||
*** '''Magitek Claw''': Used by Telotek Predators. The Predator jumps at its primary target, dealing moderate damage. | *** '''Magitek Claw''': Used by Telotek Predators. The Predator jumps at its primary target, dealing moderate damage. | ||
* ''' | * '''2-tonze Magitek Missile''': Large circle AoE below a random player. | ||
* Once the entirety of a wave has been defeated, the cannons will power down, the Amalj'aa on the outside of the arena will disable the force field, and a jump pad to the Core will appear. | * Once the entirety of a wave has been defeated, the cannons will power down, the Amalj'aa on the outside of the arena will disable the force field, and a jump pad to the Core will appear. | ||
** '''Defensive Reaction''': High party-wide damage. Only cast when the Magitek Core is directly under attack, and is the core's only method of direct attack. | ** '''Defensive Reaction''': High party-wide damage. Only cast when the Magitek Core is directly under attack, and is the core's only method of direct attack. | ||
| Line 65: | Line 100: | ||
==Loot== | ==Loot== | ||
{{see also|Paglth'an Armor|Paglth'an Accessories}} | |||
===[[File:Silver Coffer (small).png|link=]] [[Amhuluk]]=== | ===[[File:Silver Coffer (small).png|link=]] [[Amhuluk]]=== | ||
*{{tomestone|Poetics|20}} [[Allagan Tomestone of Poetics]] | |||
{{Drops list|Amhuluk}} | {{Drops list|Amhuluk}} | ||
===[[File:Silver Coffer (small).png|link=]] [[Magitek Fortress]]=== | ===[[File:Silver Coffer (small).png|link=]] [[Magitek Fortress]]=== | ||
*{{tomestone|Poetics|30}} [[Allagan Tomestone of Poetics]] | |||
{{Drops list|Magitek Fortress}} | {{Drops list|Magitek Fortress}} | ||
===[[File:Gold Coffer (small).png|link=]] [[Lunar Bahamut]]=== | ===[[File:Gold Coffer (small).png|link=]] [[Lunar Bahamut]]=== | ||
*{{tomestone|Poetics|50}} [[Allagan Tomestone of Poetics]] | |||
*{{Item icon|Lunar Bahamut Card}} (Drops at a fixed rate.) | |||
{{Drops list|Lunar Bahamut}} | {{Drops list|Lunar Bahamut}} | ||
| Line 186: | Line 226: | ||
{{Drops table row|Piety Materia VII}} | {{Drops table row|Piety Materia VII}} | ||
{{Table footer}} | {{Table footer}} | ||
==Achievements== | |||
This duty is associated with the following [[achievements]]: | |||
{| {{STDT| mech1 sortable align-left}} | |||
{{achievement table header}} | |||
{{achievement table row|Mapping the Realm: Paglth'an}} | |||
|} | |||
==Images== | ==Images== | ||
| Line 195: | Line 243: | ||
===Dungeon Images=== | ===Dungeon Images=== | ||
<gallery mode="packed"> | <gallery mode="packed" heights=200px> | ||
Paglth'an image.png | |||
File:Paglth'an2.jpeg | File:Paglth'an2.jpeg | ||
File:Paglth'an1.jpeg | File:Paglth'an1.jpeg | ||
Paglth'an boss.png | |||
</gallery> | </gallery> | ||
===Other Images=== | |||
<gallery mode="packed" heights=300px> | |||
Paglth'an dialogue.jpg|Dungeon Dialogue Infographic (credits: [https://www.reddit.com/user/TrustInsighters TrustInsighters]) | |||
</gallery> | |||
{{Duties nav|dungeon}} | {{Duties nav|dungeon}} | ||
Latest revision as of 12:40, 26 June 2024
Paglth'an
- Level
- 80 (Sync: 80)
- Item Level
- 490
- Difficulty
- Normal
- Party size
- Light Party
4 man • 1 1
1  2
2 
- Unsyncing
- Allowed
- Time limit
- 90 minutes
- Duty Finder
- Dungeons (Shadowbringers)
- Roulette
- High-level Dungeons
- Tomestones
 100
100 - Req. quest
 The Flames of War
- Entrance
- Ul'dah - Steps of Nald (X:10.7, Y:11.4)
- Modes
- Duty Support, Trust, Explorer
- Trust EXP
- 2,404,400
- Patch
- 5.5
“Long have the sweeping plains of Paglth'an been home to the nomadic Amalj'aa. Though the herding of livestock keeps them constantly on the move, the permanent settlement of Zolm'ak forms the seat of power and center of their society. It is there the Telophoroi would wreak destruction, dispatching a vast host comprised of both imperial soldiers and tempered dragons, with Lunar Bahamut at its head. Yet even against these heretofore unimagined foes the Amalj'aa stand strong, with Estinien, the recently freed Tiamat, and the Eorzean Alliance at their side and eager to turn the tide.
— In-game description
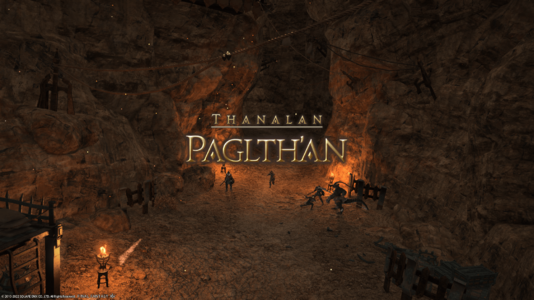
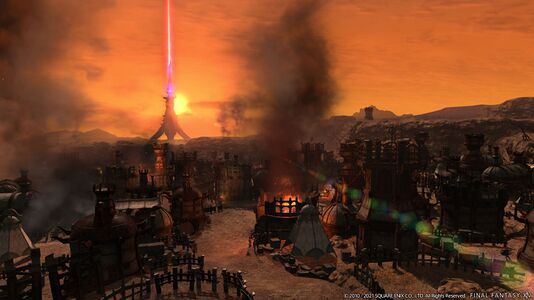
Paglth'an is a level 80 dungeon introduced in patch 5.5 with Shadowbringers.
Duty Support
- Party member selection is available.
| G'raha Tia | Thancred | Urianger | Alphinaud | Alisaie | Y'shtola | |
|---|---|---|---|---|---|---|

|

|

|

|

|

| |
| Class | ||||||
| Role | Any | Tank | Healer | Healer | DPS | DPS |
Objectives
- Arrive at the gathering ring: 0/1
- Clear the gathering ring: 0/1
- Arrive at the scalekin pen: 0/1
- Clear the scalekin pen: 0/1
- Arrive at Sunseat: 0/1
- Defeat Lunar Bahamut: 0/1
Bosses
 Amhuluk
- Critical Rip: Tankbuster.
- Lightning Bolt: Large targeted circle AoEs on all players with additional ones on random lampposts on the edge of the arena. Players must pass their AoE off to a lamppost that doesn't already have an AoE. Deals moderate damage and inflicts a stack of Lightning Vulnerability Up to players hit.
- Electric Burst: Unavoidable moderate party-wide damage.
- Thundercall: Summons several lightning orbs along the edge of the arena that occasionally pulse for damage. Precedes Lightning Bolt from the second cast onward.
- Wide Blaster: Wide cone from Amhuluk's front. Immediately followed by Spike Flail.
- Spike Flail: Narrow cone from Amhuluk's rear. Used immediately after Wide Blaster, with no time to avoid.
 Magitek Fortress
- The main target is the Magitek Core, guarded by a force field. To get to the Core, the party must defeat waves of adds.
- While fighting the adds, two of the three cannons on the fortress will charge up a blue energy and eventually blast a line ahead of it, dealing damage and inflicting a stack of
 Vulnerability Up.
- The first wave consists of three Tempered Imperials and two Telotek Predators. After a few moments, six more Tempered Imperials will emerge from the sides of the fortress.
- Magitek Claw: Used by Telotek Predators. The Predator jumps at its primary target, dealing moderate damage.
- The first wave consists of three Tempered Imperials and two Telotek Predators. After a few moments, six more Tempered Imperials will emerge from the sides of the fortress.
- 2-tonze Magitek Missile: Large circle AoE below a random player.
- Once the entirety of a wave has been defeated, the cannons will power down, the Amalj'aa on the outside of the arena will disable the force field, and a jump pad to the Core will appear.
- Defensive Reaction: High party-wide damage. Only cast when the Magitek Core is directly under attack, and is the core's only method of direct attack.
- After reaching 50% health, the Magitek Core will eject the party back into the arena and reactivate the force field, at which point the second wave of adds appears and new mechanics are added to the cannons.
- The second wave begins with six Tempered Imperials, two Telotek Sky Armors, and a single Mark II Telotek Colossus. Eventually, six Tempered Imperials and two Telotek Predators will appear.
- Aethershot: Used by Telotek Sky Armors. Circle AoE below a random player.
- Exhaust: Used by the Mark II Telotek Colossus. Line AoE in the direction of a random player.
- The second wave begins with six Tempered Imperials, two Telotek Sky Armors, and a single Mark II Telotek Colossus. Eventually, six Tempered Imperials and two Telotek Predators will appear.
- Missile: Five sets of three missiles appear on the east and west edges of the arena and slowly travel across in a straight line.
- Ground-to-ground Ballistic: Light damage and strong knockback from the center of the arena. Only used when the center cannon isn't firing.
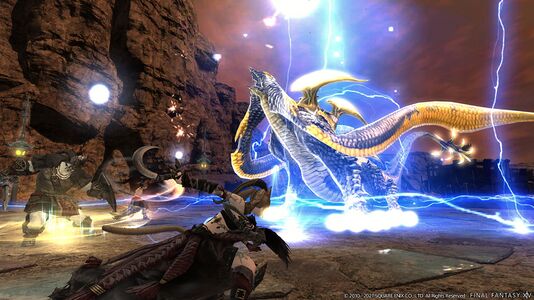
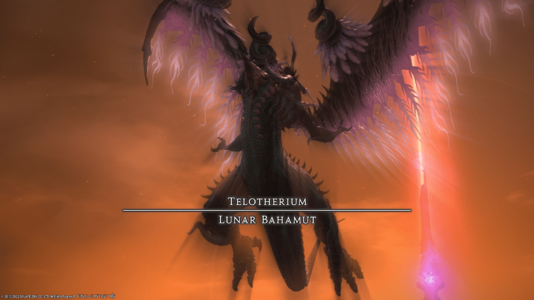
 Telotherium: Lunar Bahamut
- Twisted Scream: Light party-wide damage and spawns eight nails, staggered out in sets of two. The nails will explode in the order they appear in a large circle AoE around them. From the third time this is used, three sets of nails will appear instead of two.
- Perigean Breath: Cone AoE from Lunar Bahamut's front toward a random player.
- Akh Morn: Stack marker on a random player, deals moderate damage four times in a row.
- Megaflare: Orange markers on each player, spread to avoid overlapping damage. After the initial explosion, a second circle AoE will appear where each player was standing when the first strike went off, exploding a few moments later.
- Megaflare Dive: Lunar Bahamut becomes untargetable, moves to one edge of the arena, then dive bombs in a line across, dealing high damage and knockback to players hit. Lunar Bahamut precedes this attack with a Twisted Scream that leaves nails in the safe areas for the attack.
- Kan Rhai: Targets a random player with a short cross AoE. After a few seconds, energy erupts from the ground below where the player was standing, leaving a lingering AoE that pulses high damage every second for a few seconds. If the fight is allowed to drag on, subsequent casts of Kan Rhai will target multiple players.
- Lunar Flare: Covers the arena in purple circle AoEs that shrink over time, gradually exposing safe area(s). The attack can leave four safe areas along the edge of the arena, or a single safe area in the direct center, but not both at the same time.
- Gigaflare: High unavoidable party-wide damage.
- Flatten: Tankbuster. This is used late in the fight so it is often skipped with enough dps.
Loot
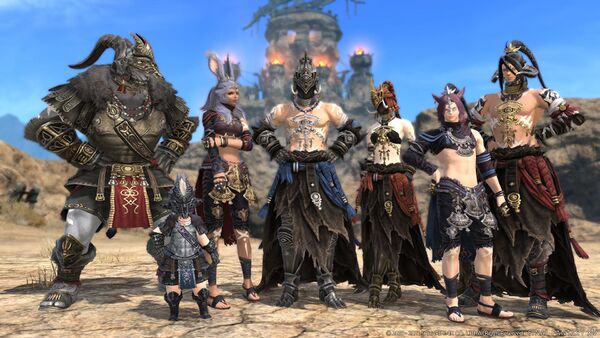
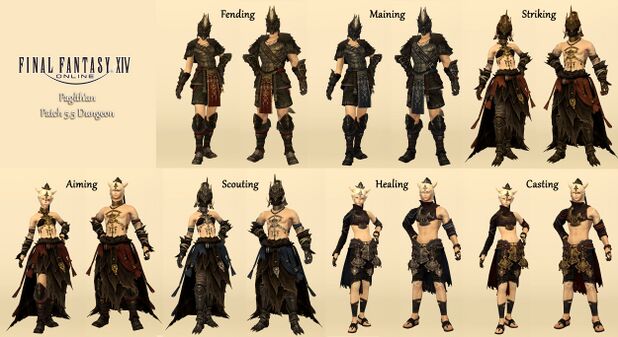
- See also: Paglth'an Armor and Paglth'an Accessories
 Amhuluk
 Magitek Fortress
 Lunar Bahamut
 50 Allagan Tomestone of Poetics
- Lunar Bahamut Card (Drops at a fixed rate.)
| Name | Type | Item Level | Rarity | Quantity |
|---|---|---|---|---|
| Magitek Predator F1 | Minion | N/A | Basic | 1 |
| Paglth'an Bottoms of Aiming | Legs | 505 | Green | 1 |
| Paglth'an Bottoms of Fending | Legs | 505 | Green | 1 |
| Paglth'an Bottoms of Maiming | Legs | 505 | Green | 1 |
| Paglth'an Breeches of Casting | Legs | 505 | Green | 1 |
| Paglth'an Breeches of Healing | Legs | 505 | Green | 1 |
| Paglth'an Chestpiece of Aiming | Body | 505 | Green | 1 |
| Paglth'an Chestpiece of Scouting | Body | 505 | Green | 1 |
| Paglth'an Chestpiece of Striking | Body | 505 | Green | 1 |
| Paglth'an Chestwrap of Casting | Body | 505 | Green | 1 |
| Paglth'an Chestwrap of Healing | Body | 505 | Green | 1 |
| Paglth'an Hose of Scouting | Legs | 505 | Green | 1 |
| Paglth'an Hose of Striking | Legs | 505 | Green | 1 |
| Paglth'an Jacket of Fending | Body | 505 | Green | 1 |
| Paglth'an Jacket of Maiming | Body | 505 | Green | 1 |
| Seven Flames Orchestrion Roll | Orchestrion Roll | N/A | Basic | 1 |
Treasure Coffers
 Treasure Coffer 1 (X: 12.8 Y: 12.3)
 Treasure Coffer 2 (X: 15.5 Y: 11.4)
 Treasure Coffer 3 (X: 18.0 Y: 9.1)
 Treasure Coffer 4 (X: 16.6 Y: 10.5)
| Name | Type | Item Level | Rarity | Quantity |
|---|---|---|---|---|
| Paglth'an Earring of Fending | Earrings | 505 | Green | 1 |
| Paglth'an Earring of Slaying | Earrings | 505 | Green | 1 |
| Paglth'an Earring of Aiming | Earrings | 505 | Green | 1 |
| Paglth'an Earring of Casting | Earrings | 505 | Green | 1 |
| Paglth'an Earring of Healing | Earrings | 505 | Green | 1 |
| Paglth'an Necklace of Fending | Necklace | 505 | Green | 1 |
| Paglth'an Necklace of Slaying | Necklace | 505 | Green | 1 |
| Paglth'an Necklace of Aiming | Necklace | 505 | Green | 1 |
| Paglth'an Necklace of Casting | Necklace | 505 | Green | 1 |
| Paglth'an Necklace of Healing | Necklace | 505 | Green | 1 |
| Savage Aim Materia VII | Materia | 420 | Basic | 1 |
| Savage Might Materia VII | Materia | 420 | Basic | 1 |
| Heavens' Eye Materia VII | Materia | 420 | Basic | 1 |
| Quickarm Materia VII | Materia | 420 | Basic | 1 |
| Quicktongue Materia VII | Materia | 420 | Basic | 1 |
| Battledance Materia VII | Materia | 420 | Basic | 1 |
| Piety Materia VII | Materia | 420 | Basic | 1 |
Achievements
This duty is associated with the following achievements:
| Name | Points | Task | Reward | Patch |
|---|---|---|---|---|
| Mapping the Realm: Paglth'an | 10 | Discover every location within Paglth'an. | - | 5.5 |
Images
Gear Images
Dungeon Images
Other Images
Dungeon Dialogue Infographic (credits: TrustInsighters)

