Difference between revisions of "Containment Bay S1T7 (Extreme)"
Freedom4556 (talk | contribs) m (→Strategy) |
Freedom4556 (talk | contribs) (→Loot) |
||
| Line 120: | Line 120: | ||
==Loot== | ==Loot== | ||
*Each player will receive {{Item reward|1|Fiend Totem}} per kill. Collect 10 totems to exchange for a weapon or 99 for a {{Item icon|Warring Lanner Whistle}} at [[Bertana]] in [[Idyllshire]] (X:5.9 Y:5.2). | *Each player will receive {{Item reward|1|Fiend Totem}} per kill. Collect 10 totems to exchange for a weapon or 99 for a {{Item icon|Warring Lanner Whistle}} at [[Bertana]] in [[Idyllshire]] (X:5.9 Y:5.2). | ||
*{{Item icon|Sephirot Sap}} | |||
*{{Item icon|Sephirot Card}} (Drops at a fixed rate) | *{{Item icon|Sephirot Card}} (Drops at a fixed rate) | ||
===[[File:Gold Coffer (small).png|link=]] Treasure Coffer=== | ===[[File:Gold Coffer (small).png|link=]] Treasure Coffer=== | ||
| Line 142: | Line 142: | ||
{{Drops table row|Shield of the Sephirot}} | {{Drops table row|Shield of the Sephirot}} | ||
{{Drops table row|Fiend Sap}} | {{Drops table row|Fiend Sap}} | ||
{{Drops table row|Sephirotic Weapon Coffer}} | |||
{{Drops table row|Warring Lanner Whistle}} | {{Drops table row|Warring Lanner Whistle}} | ||
{{Drops table row|Faded Copy of Fiend}} | {{Drops table row|Faded Copy of Fiend}} | ||
Revision as of 02:51, 27 December 2021
Containment Bay S1T7 (Extreme)
- Level
- 60 (Sync: 60)
- Item Level
- 205
- Difficulty
- Extreme
- Party size
- Full Party
8 man • 2 2
2  4
4 
- Unsyncing
- Allowed
- Time limit
- 60 minutes
- Roulette
- Mentor
- Tomestones
 20
20 - Req. quest
 A Fiendish Likeness
- Patch
- 3.2
“Preserved upon the Allagan tomestone you received from Unukalhai was an extraordinary history─a detailed record of the battles fought between the eikon Sephirot and the armies of Allag. After feeding the account of this epic conflict into Azys Lla's verification systems, you have succeeded in activating what the node describes as a “combat simulation."
Can the enigmatic technology of the ancient empire truly manifest an enhanced simulacrum of the formidable Fiend? Can this artificial incarnation truly surpass the threat posed by the original Sephirot? There is but one way to know for certain...— In-game description
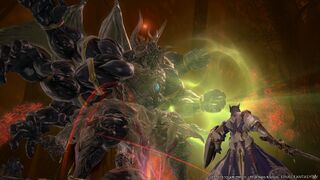
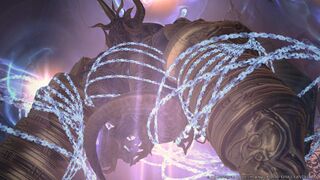
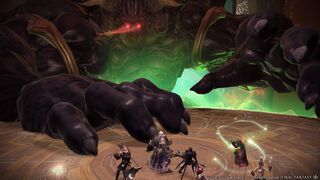
Containment Bay S1T7 (Extreme) is a level 60 trial introduced in patch 3.2 with Heavensward.
- See also: Containment Bay S1T7
Strategy
 The Warring Triad: Sephirot
DnT Guide:[DnT] Containment Bay S1T7 (Extreme) Guide
Phase 1: 100% - 65%
- First of all i'd like to say this fight is a dance and you have to know that all moves will blend into each other, I'll try to keep them in order and as detailed as possible.
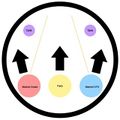
- Ein Sof - Four green circles will pop up growing in size over time, go to the side where no circle pops, and while doing this at the same time the next move will be happening so split up here healers on one side with off-tank and DPS on the other.
- Fiendish Rage - Two players will be marked and you'll have to split up the group to share damage for the two hits (usually people will stack the healers and the off tank on one side and the DPS on the other)
- main tank cannot be hit by either of the split AoE hits or a deadly death blowing debuff will be applied to him
- Chesed - This will happen after you guys are done splitting up the damage from the previous ability, tank will usually re-center the boss ASAP after both groups have been hit, and usually soon after he's back in the center you'll see his arm charge back for a super hit on the main tank which I think will happen twice back-to-back (one tank buff+adlo usually works wonders).
- Ain - This move will happen when you see one green circle spawn on the map (same looking as the ones from ratzon), best practice is to center your self between the boss and the green circle, usually closer to the boss then the green circle to avoid extra damage, and this is done to bait the Ain ability in the direction of the green circle (safe to usually start moving past him after his arms pull back, in preperation for the next ability which will be markers/circles).
- Ratzon - For this I know most people in learning groups have been doing big purple circle right behind the boss and the small green ones spread out, and i think this is the worst practice happening at the moment, and whats causing much problems for newer groups trying to get to Phase 3 continuously. In my opinion Big circle at the edge of the map would work best because then only one player is having to move really far rather then 3-5 other players having to struggle getting out of the bigger circle's AoE to be safe.
- -Repeat from Ein Sof till phase 2
Phase 2: Adds
- Not quite sure what to put for this part yet cause different groups do different things and it's sad/weird to me that we can't figure out the best way, if i understand it correctly and being a healer, and decent with numbers 2 big adds spawn and 12 small ones spawn, so I don't understand why 6-1-6-1 wouldn't always be the best way to go, for heals sake and tank sake. but please i know this part will need a edit hopefully someone more enlightened has a more solid answer.
- Cochma (big add) - Physical Damage and will apply magic down vulnerability stacks over time, also healers note that this big add has it's own little mini tank buster so just be ready to heal this adds tank around that time.
- -upon dying a Cochma add can do roughly 10K damage per person party wide without proper buffs and what not
- Binah (little adds) - Magical Damage (these guys can really hurt the big add tank if not careful with the positioning of them)
- -upon dying each Binah add can do roughly 2K damage per person party wide without proper buffs and what not
Note: So after more time in here the best way to go if things are shaky is 3-1-9-1 and it usually always works out as long as people are topped off before the 'Cochma' goes off.
Phase 3
- should have this part completed by the end of today, aboutz to go hard.
- Yesad - Interestingly enough this move is the first and probably most important move to be on the lookout for throughout the entirety of phase 3, and this first one is usually dealt with by just stacking together in the middle of the map for the start of phase 3. The best way to know that this move is coming or that it's time to move is the entire floor will flash a yellowish color and will then crack up all green, start moving after the yellow flash.
- Force Field - This will be the next ability and all this does is applies one of two possible debuffs on you which will come into play for a couple of the next abilities we're about to talk about.
- -Orange Debuff: physical resistance, will stack far south of the boss, after first two towers during Razton (green growing balls), also these guys will be stuck with the responsibility of being in the towers AoE while they are up, if at least one person with orange is not in the towers AoE when it goes off it's going to hurt and party will get paralyzed. Best practice here is four people will have orange and as soon as they get it they should call right or left, so that way all four people with orange don't end up at the same tower.
- -Blue Debuff: magic resistance, will stack at boss's chin breaking the tethers, after towers during Razton (green growing balls), Very important to break the tethers here blue people, or most likely someone's going to die.
- Big Balls in his Hands #1 - This will happen right after everyone gets their force field debuff, and to not die just make sure you go to the hand where you're matching your debuff color with the color of the ball in his hand.
- Towers #1 - This happens next and is not that hard to deal with at all, simply have two orange people stand in each each tower, at the very least you want one person with the orange debuff in each tower at all times, two is for safety measures.
- Razton (Green Growing Balls) - This will sort of happen during towers and is kinda of a way to say get ready to get in place, if you have orange you're at this point running away from the boss (south of boss), and if you have the blue debuff you should be stacking at his chin to grab one of the four tethers from the orange guys. (if a tether is left on a orange person he/she will be killed)
- Towers #2 - This will now happen again right after Razton/Tethers, so orange people get ready to get right back in a tower ASAP after green balls disappear.
- Big Balls in his Hands #2 - This will now also happen again after towers are dealt with, so get to your respective sides, after this ability the color debuff should wear off be ready for earth-shaker makers ASAP.
- Earth Shaker/Yesad - 1 DPS and 1 Healer will get a marker above their heads, one has to go far left and the other has to go far right, everyone else should be stacking up tight on bosses mid because keep in mind this earth shaker is happening while a Yesad is also about to be going down, so after the yellow flash goes of get ready to move everyone including the outer people that had the earth shaker markers.
- Da'At/AoE Damage - Basically after the above earth shaker and yesad go off, everyone kind of wants to spread out and have their own little space, because this ability will start causing damage (which has a AoE splash, hence the spreading out) to random players starting with a very hard hit on the Main tank.
- Towers #3 - These towers have to get handled by tanks only because no one will have the color debuffs to handle them with, so tanks with their super HP will at this part take one tower each.
- Big Balls in his Hands #3 - Since we don't have any color debuffs, everyone can just stack in mid, and healers get ready to lift/top off party.
- Pillar of Mercy/Yesad/Razton(x2 balls) - Best practice is to stack on the first pillar of mercy till you see the yellow flash that way you bait the Yesad to where no one should be standing. Once the yellow flash happens right away step out of the first pillar of mercy, looking at the boss you want to step out to the right, if looking away from the boss step out to the left (keep in mind a knock back is incoming, so don't do a deep left or right while moving out of the pillar of mercy.)
- Earth Shaker/Da'At/Yesad - Heaker/DPS with earth shaker makers get ready to go to your proper sides, rest of the group spread out getting ready for Yesad.
- Towers #4 - These towers have to get handled by tanks only because no one will have the color debuffs to handle them with, so tanks with their super HP will at this part take one tower each.
- Big Balls in his Hands #4 - Since we don't have any color debuffs, everyone can just stack in mid, and healers get ready to lift/top off party
- Malkuth (Knock-Back) - Most groups will stack by his face, by whatever marker is there and move slightly forward to avoid being knocked off the edge after he blows the party back.
Note: Healing hell starts here!!!!!!!!!!!!!!!!!!!!
- Adds/Big Balls Hands #5 - Mainly tanks have to worry here about running forward and grabbing adds rest of the party usually stacks on Storm of Words after being knocked back there (healers will be lifting group from knock-back DMG and then will be getting ready to lift the party after AoE Damage, while also topping off tanks for their towers, while also getting ready to AoE heal again after towers for some crazy party DMG).
- Towers #5/Yesad/Storm of Words - Tanks grab a tower each, the rest of the group should be stacked on Storm of Words, and getting ready to move for the Yesad that is about to happen (after the yesad finish of the last two adds and stack on Storm of Words getting ready for the last yesad of phase 3).
- Big Balls Hands #6 - Healers make sure everyone is topped and AoE heal after they go off.
- Yesad - This here is the last yesad of phase 3 before the group gets knocked up into the air, thanks to Storm of Words.
- Big Balls Hands #7 - If you're a healer at this point your like holy s*** i still have MP left?
Note: Healing hell ends here!!!!!!!!!!!!!!!!!!!!
- -Repeat from the first yesad until you defeat him or he enrages
Loot
- Each player will receive 1 Fiend Totem per kill. Collect 10 totems to exchange for a weapon or 99 for a Warring Lanner Whistle at Bertana in Idyllshire (X:5.9 Y:5.2).
- Sephirot Sap
- Sephirot Card (Drops at a fixed rate)
 Treasure Coffer
| Name | Type | Item Level | Rarity | Quantity |
|---|---|---|---|---|
| Blade of the Sephirot | Gladiator's Arm | 220 | Blue | 1 |
| Axe of the Sephirot | Marauder's Arm | 220 | Blue | 1 |
| Edge of the Sephirot | Dark Knight's Arm | 220 | Blue | 1 |
| Pike of the Sephirot | Lancer's Arm | 220 | Blue | 1 |
| Fists of the Sephirot | Pugilist's Arm | 220 | Blue | 1 |
| Katana of Sephirot | Samurai's Arm | 220 | Blue | 1 |
| Points of the Sephirot | Rogue's Arm | 220 | Blue | 1 |
| Bow of the Sephirot | Archer's Arm | 220 | Blue | 1 |
| Fire of the Sephirot | Machinist's Arm | 220 | Blue | 1 |
| Staff of the Sephirot | Two-handed Thaumaturge's Arm | 220 | Blue | 1 |
| Word of the Sephirot | Arcanist's Grimoire | 220 | Blue | 1 |
| Rapier of Sephirot | Red Mage's Arm | 220 | Blue | 1 |
| Cane of the Sephirot | Two-handed Conjurer's Arm | 220 | Blue | 1 |
| Song of the Sephirot | Scholar's Arm | 220 | Blue | 1 |
| Star of the Sephirot | Astrologian's Arm | 220 | Blue | 1 |
| Shield of the Sephirot | Shield | 220 | Blue | 1 |
| Fiend Sap | Material | N/A | Basic | 1 |
| Sephirotic Weapon Coffer (IL 220) | Other | N/A | Basic | 1 |
| Warring Lanner Whistle | Other | N/A | Basic | 1 |
| Faded Copy of Fiend | Orchestrion Roll | N/A | Basic | 1 |
Lore
Preserved upon the Allagan tomestone you received from Unukalhai was an extraordinary history─a detailed record of the battles fought between the eikon Sephirot and the armies of Allag. After feeding the account of this epic conflict into Azys Lla's verification systems, you have succeeded in activating what the node describes as a “combat simulation.”
Can the enigmatic technology of the ancient empire truly manifest an enhanced simulacrum of the formidable Fiend? Can this artificial incarnation truly surpass the threat posed by the original Sephirot? There is but one way to know for certain...
Images


